Denver Omelette

There’s a particular stillness to a Saturday morning that begs for something more deliberate than a snatched bowl of cereal, and for me, that something is the humble yet deeply satisfying Denver omelette. I love the ritual of it: the quiet clatter of the whisk against the bowl, the sharp, clean scent of diced onion hitting a hot pan, and the slow, patient work of coaxing the eggs into a tender, golden pillow. This isn’t a recipe to rush; it’s a project for the soul, a way to fill the kitchen with comforting aromas and start the weekend with a plate of pure, uncomplicated joy.
Recipe Overview
- Prep Time: 15 minutes
- Cooking Time: 10 minutes
- Total Time: 25 minutes
- Servings: 1 generous omelette
- Difficulty: Medium
Why You’ll Love This Denver Omelette
- A Weekend Ritual: This recipe encourages you to slow down, savour the process, and enjoy the sensory journey from chopping to the first bite, much like making Garlic Butter Baked Chicken Legs.
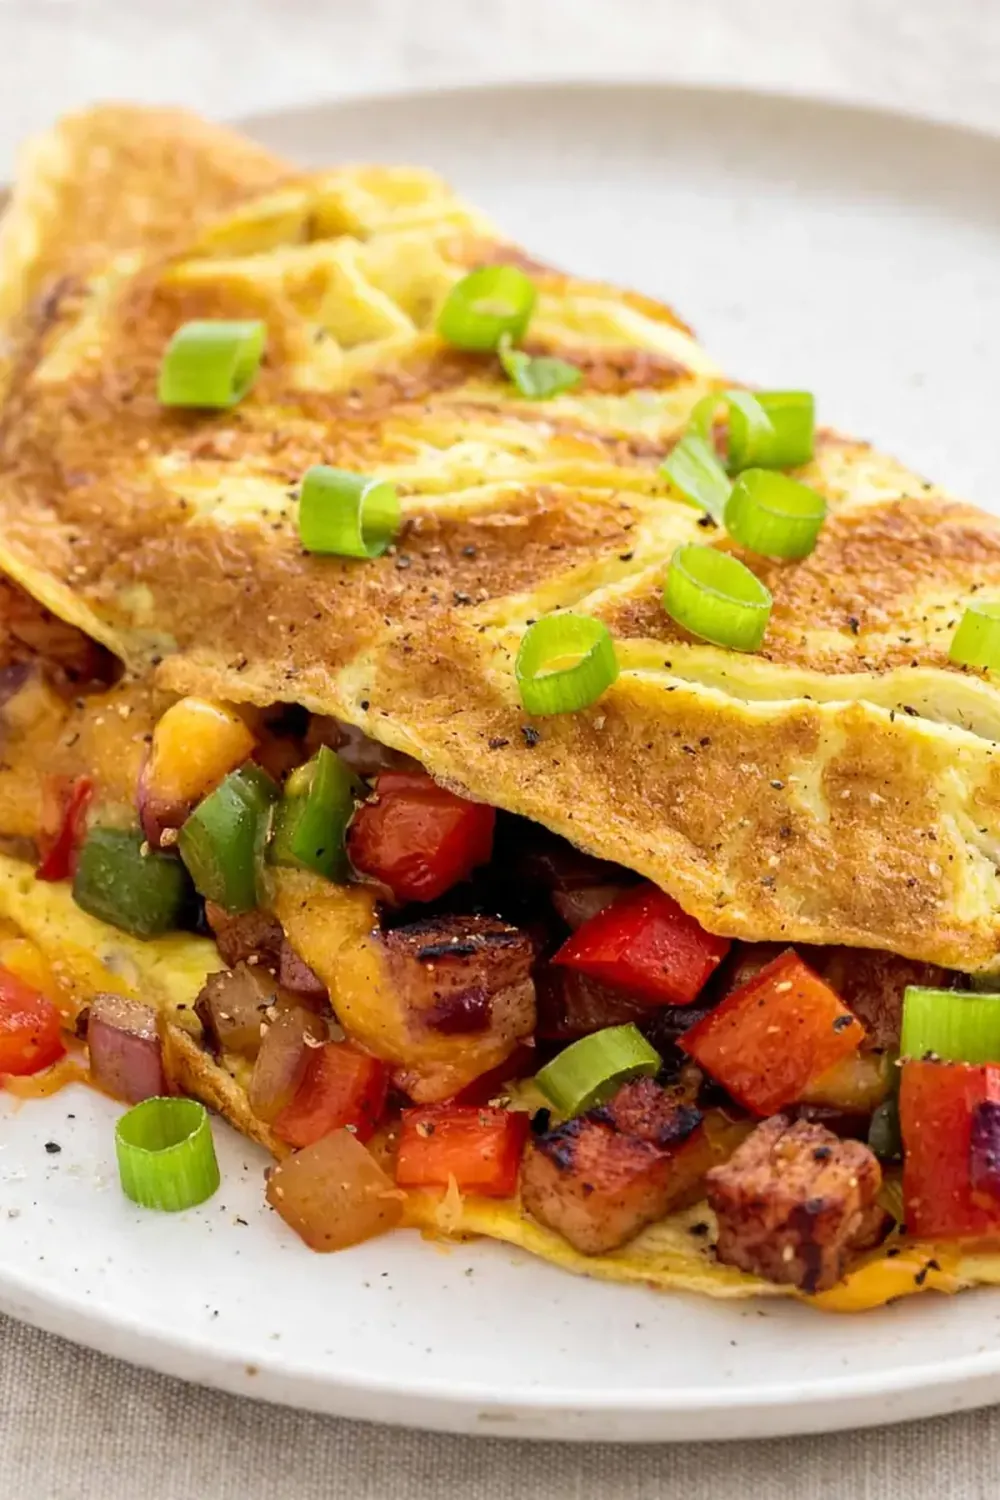
- Perfectly Balanced Fillings: The classic trio of diced peppers, onion, and tender meat creates a hearty, savoury filling that never overwhelms the delicate eggs.
- Foolproof Technique: After testing this recipe five times, I finally got it just right, with clear cues for heat and doneness so you get a tender, never-rubber, omelette every time.
- Customisable to Your Larder: It’s a brilliant way to use up leftover cooked chicken or turkey, and you can easily swap the vegetables for whatever you have on hand, just like you might adapt a Classic American Cheeseburger to your own taste.
- Deeply Satisfying: It’s a complete meal in one pan—protein-rich, colourful, and filling enough to power you through a lazy morning without feeling heavy.
Ingredients You’ll Need
- 3 large eggs
- 1 tablespoon whole milk or single cream
- ¼ teaspoon fine sea salt
- Freshly ground black pepper, to taste
- 1 tablespoon unsalted butter
- 50g cooked chicken or turkey breast, diced into small cubes
- 30g green bell pepper, finely diced
- 30g red bell pepper, finely diced
- 30g onion, finely diced
- 30g grated cheddar cheese (optional, but lovely)
- 1 teaspoon vegetable oil
Tip: For the best texture, make sure your diced vegetables and meat are all cut to a similar, small size—about ½cm dice. This ensures they cook evenly and fit neatly inside the omelette without causing it to tear.
How to Make Denver Omelette
- Prepare the filling: Heat the vegetable oil in a small, non-stick frying pan over a medium heat. Add the diced onion and cook for 2 minutes, until it turns translucent and releases a sweet, mellow aroma. Add the diced green and red peppers and cook for another 2–3 minutes, until they soften and smell fragrant. Toss in the diced chicken or turkey and cook for 1 minute, just to warm it through. The pan should look vibrant and the edges of the vegetables will be just beginning to brown. Transfer this mixture to a bowl and set aside. Wipe the pan clean with a piece of kitchen roll.
- Whisk the eggs: Crack the eggs into a medium bowl. Add the milk or cream, salt, and a good grind of black pepper. Whisk vigorously with a fork or a small whisk for about 30 seconds. You are looking for a uniform, pale yellow liquid with no visible streaks of white. The mixture should feel light and airy, and you’ll hear the bubbles popping as you whisk.
- Heat the pan: Place the clean, non-stick pan back over a medium-low heat. Add the butter and let it melt slowly, tilting the pan to coat the entire base. The butter should foam gently but not brown—if it sizzles loudly or turns brown, your heat is too high. The kitchen will fill with a nutty, creamy scent.
- Pour in the eggs: Once the butter has melted and the foam has subsided slightly, pour the whisked eggs into the centre of the pan. Let them settle for a few seconds, then use a silicone spatula to gently stir the eggs in a circular motion, dragging the cooked edges towards the centre. Do this for about 20 seconds, until the eggs are about 70% set but still look soft and glossy on top. The sound will shift from a loud sizzle to a gentle, quiet hiss.
- Add the filling: Smooth the surface of the eggs with your spatula. Spoon the cooked filling evenly over one half of the omelette. Sprinkle the grated cheese over the filling, if using. The eggs should still look slightly wet and custardy around the edges—this is the sign of a tender omelette.
- Fold and finish: Use your spatula to carefully lift the empty half of the omelette and fold it over the filling. Gently press down on the top to seal. Let it cook for another 30–45 seconds. The base should be a light golden brown and the omelette should feel firm but give slightly when you press it. The aroma will be a wonderful blend of buttery eggs, sweet peppers, and savoury meat.
- Slide and serve: Tilt the pan over a warm plate and gently slide the omelette out, seam-side down. The surface should be glossy and smooth, with a delicate, golden-brown underside. Serve immediately, while the cheese is still molten and the eggs are perfectly tender.
Tips From My Kitchen
- Use a non-stick pan: This is non-negotiable for a first-timer. A good non-stick surface means you can use less butter and still have the omelette slide out effortlessly. A well-seasoned cast-iron or carbon steel pan also works, but requires more careful temperature control.
- Don’t over-whisk the eggs: You want a uniform mixture, but over-whisking incorporates too much air, which can make the omelette puff up and then deflate, turning it rubbery. A fork is actually better than a whisk here because it gives you more control.
- Cook the filling first, always: Raw peppers and onion release water as they cook. If you add them directly to the eggs, that moisture will seep out and make the omelette watery. Pre-cooking the filling concentrates the flavour and removes excess liquid.
- Medium-low heat is your friend: High heat is the enemy of a tender omelette. It will brown the outside before the inside is set, leaving you with a tough, leathery result. Patience at a gentle heat gives you a soft, creamy texture throughout.
- Trust the visual and audio cues: The eggs will tell you when they’re ready. When they shift from a loud sizzle to a quiet hiss, and the top surface looks glossy but not runny, you’re in the perfect window to add the filling and fold.
- Have everything ready before you start: This is a fast-moving recipe once the eggs hit the pan. Have your cooked filling, cheese, and plate all within arm’s reach. I make this at least once a week – it’s become a family favourite, and having a clear workspace makes all the difference.
Delicious Variations to Try
- Spicy Version: Add a finely diced red chilli or a generous pinch of smoked paprika and cayenne pepper to the vegetables as they cook. For extra heat, stir a teaspoon of harissa paste into the whisked eggs before pouring them into the pan.
- Vegetarian Option: Omit the chicken or turkey and double the volume of vegetables. Sautéed mushrooms, sliced spring onions, and a handful of baby spinach leaves (added just until they wilt) make a wonderfully earthy and satisfying filling.
- Different Protein: Leftover roast beef, diced cooked prawns, or small pieces of firm tofu (pressed and dry-fried first) all work beautifully. The key is to have the protein pre-cooked and diced small so it warms through quickly.
What to Serve With Denver Omelette
- A handful of crisp, peppery rocket dressed with a squeeze of lemon juice and a drizzle of olive oil.
- Buttered, toasted sourdough soldiers for dipping into the soft, cheesy centre.
- A simple side of roasted cherry tomatoes, blistered in the oven until sweet and juicy.
- For a heartier meal, serve alongside a Fresh Yogurt Parfait for a sweet and tangy counterpoint.
- A tall glass of freshly squeezed orange juice to cut through the richness.
Frequently Asked Questions
Denver Omelette
Ingredients
Method
- Prepare the filling: Heat the vegetable oil in a small, non-stick frying pan over a medium heat. Add the diced onion and cook for 2 minutes, until it turns translucent and releases a sweet, mellow aroma. Add the diced green and red peppers and cook for another 2–3 minutes, until they soften and smell fragrant. Toss in the diced chicken or turkey and cook for 1 minute, just to warm it through. The pan should look vibrant and the edges of the vegetables will be just beginning to brown. Transfer this mixture to a bowl and set aside. Wipe the pan clean with a piece of kitchen roll.
- Whisk the eggs: Crack the eggs into a medium bowl. Add the milk or cream, salt, and a good grind of black pepper. Whisk vigorously with a fork or a small whisk for about 30 seconds. You are looking for a uniform, pale yellow liquid with no visible streaks of white. The mixture should feel light and airy, and you’ll hear the bubbles popping as you whisk.
- Heat the pan: Place the clean, non-stick pan back over a medium-low heat. Add the butter and let it melt slowly, tilting the pan to coat the entire base. The butter should foam gently but not brown—if it sizzles loudly or turns brown, your heat is too high. The kitchen will fill with a nutty, creamy scent.
- Pour in the eggs: Once the butter has melted and the foam has subsided slightly, pour the whisked eggs into the centre of the pan. Let them settle for a few seconds, then use a silicone spatula to gently stir the eggs in a circular motion, dragging the cooked edges towards the centre. Do this for about 20 seconds, until the eggs are about 70% set but still look soft and glossy on top. The sound will shift from a loud sizzle to a gentle, quiet hiss.
- Add the filling: Smooth the surface of the eggs with your spatula. Spoon the cooked filling evenly over one half of the omelette. Sprinkle the grated cheese over the filling, if using. The eggs should still look slightly wet and custardy around the edges—this is the sign of a tender omelette.
- Fold and finish: Use your spatula to carefully lift the empty half of the omelette and fold it over the filling. Gently press down on the top to seal. Let it cook for another 30–45 seconds. The base should be a light golden brown and the omelette should feel firm but give slightly when you press it. The aroma will be a wonderful blend of buttery eggs, sweet peppers, and savoury meat.
- Slide and serve: Tilt the pan over a warm plate and gently slide the omelette out, seam-side down. The surface should be glossy and smooth, with a delicate, golden-brown underside. Serve immediately, while the cheese is still molten and the eggs are perfectly tender.
Notes
I hope this recipe becomes a beloved part of your weekend rhythm, just as it has in my kitchen. There’s something truly special about taking twenty-five minutes to create a meal that feels both indulgent and wholesome. I’d love to hear how you get on—do you add any secret ingredients? Do you prefer your omelette with a side of Light Tuna Salad Wrap for a different kind of lunch, or perhaps a Berry Breakfast Parfait to follow? Drop your thoughts and questions in the comments below—your stories and tips make this community so special.