Classic Onion Rings
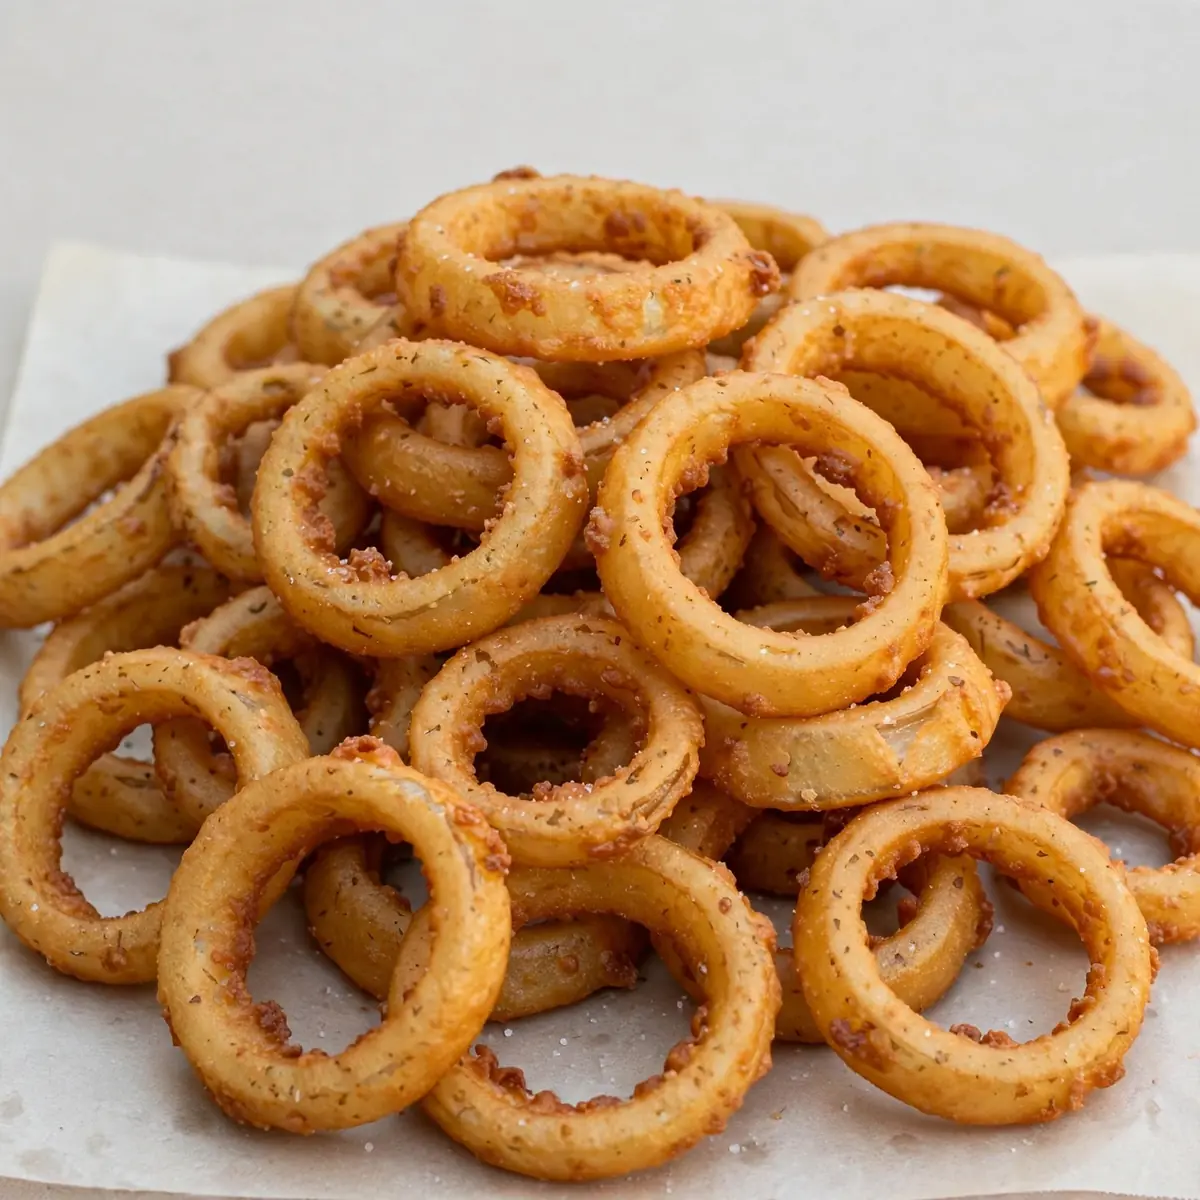
There are some weekends that simply call for a project, something that fills the kitchen with a gentle, savoury warmth and demands a little patience. For me, that project is often a batch of Classic Onion Rings. I love the slow, methodical rhythm of slicing the onions, the satisfying sizzle as the battered rings hit the hot oil, and the way the whole house gradually fills with that irresistible, golden aroma. This is my guide to making them at home, turning a simple snack into a truly cosy weekend ritual.
Recipe Overview
- Preparation Time: 25 minutes
- Cooking Time: 15 minutes
- Total Time: 40 minutes
- Servings: 4 as a side dish
- Difficulty: Medium
Why You’ll Love This Classic Onion Rings
- Deeply Satisfying Crunch: The double-dip method creates a shatteringly crisp shell that gives way to a sweet, tender onion interior. It’s a textural experience that homemade versions truly deliver.
- Perfectly Seasoned Batter: We build flavour right into the coating, using a blend of spices that complements the natural sweetness of the onion without overwhelming it.
- No More Soggy Rings: We tackle the common pitfalls head-on, ensuring each ring stays crisp and golden from the first bite to the last.
- A Wonderful Weekend Activity: This is not a rushed weeknight meal. It’s a chance to slow down, focus on the process, and enjoy the sensory pleasures of cooking.
- Customisable to Your Taste: The basic recipe is a brilliant canvas for your own favourite spices and dipping sauces, making it endlessly adaptable.

Ingredients You’ll Need
- 2 large Spanish onions (or sweet onions like Vidalia)
- 250g plain flour
- 50g cornflour
- 2 teaspoons baking powder
- 1 teaspoon fine sea salt
- 1 teaspoon smoked paprika
- ½ teaspoon garlic powder
- ½ teaspoon freshly ground black pepper
- 1 large egg, lightly beaten
- 300ml cold buttermilk
- 2 litres vegetable or sunflower oil, for frying
- Flaky sea salt, for finishing
Tip: For the best results, use a large, heavy-based pot like a Dutch oven for frying. It holds the temperature much more steadily than a thin saucepan.
How to Make Classic Onion Rings
- Prepare the onions: Peel the onions and slice them into 1cm-thick rounds. Gently separate the rings, discarding the tiny inner ones or the very small outer ones. You want nice, sturdy rings. You’ll hear a clean, crisp snap as you separate them.
- Soak the rings (optional but recommended): Place the separated rings in a bowl of ice-cold water and leave them for 20 minutes. This step tempers the raw, pungent bite of the onion, making them sweeter and more mellow when cooked. Drain them and pat them extremely dry with a clean tea towel. Any moisture here will cause the batter to slide off.
- Make the dry mix: In a wide, shallow bowl, whisk together the plain flour, cornflour, baking powder, salt, smoked paprika, garlic powder, and black pepper. The cornflour is our secret weapon for that extra-light, crispy texture.
- Make the wet batter: In a separate bowl, whisk the beaten egg into the cold buttermilk until fully combined. The mixture will look smooth and pale.
- Heat the oil: Pour the oil into your heavy-based pot, ensuring it’s no more than a third full. Heat it to 180°C (350°F). If you don’t have a thermometer, a cube of bread dropped in will turn golden brown in about 60 seconds. The oil should shimmer and have a gentle, rolling heat.
- Set up your dredging station: Take a handful of dry mix and toss a few onion rings in it, shaking off any excess. Then, dip them into the wet batter, letting any extra drip off. Finally, return them to the dry mix for a second coating. Press the flour gently onto the rings. This double-dip creates the characteristic craggy, crunchy crust.
- Fry in batches: Carefully lower 4-5 battered rings into the hot oil. Do not overcrowd the pot; the temperature will drop and you’ll end up with greasy rings. You should hear a vigorous, steady sizzle as they hit the oil. Fry for 2-3 minutes, turning once with a slotted spoon, until they are a deep, burnished gold.
- Drain and season: Use the slotted spoon to transfer the cooked rings to a wire rack set over a baking tray. Sprinkle them immediately with flaky sea salt while they are still hot. The sizzle will subside, and you’ll see the salt crystals glisten on the hot, crispy surface.
- Repeat and serve: Continue with the remaining rings, allowing the oil to come back up to temperature between batches. Serve them straight away, while the crunch is at its absolute peak.
Tips From My Kitchen
- Use a Cold Wet Batter: The temperature shock between the cold batter and the hot oil is what creates an immediate, crispy seal. If your batter is warm, it will absorb more oil and become soggy. Keep the buttermilk and egg in the fridge until the very last moment.
- Don’t Skip the Cornflour: Cornflour has a lower protein content than plain flour, which means it produces less gluten. Less gluten equals a more tender, delicate, and shatteringly crisp crust. It’s a non-negotiable ingredient for me.
- Dry the Onions Thoroughly: After soaking (if you choose to do so), it is vital to pat the onion rings bone-dry. Any residual water will cause the batter to steam and separate from the onion as soon as it hits the hot oil, leaving you with a naked, soggy ring.
- The Wire Rack is Essential: Never drain fried foods on paper towels. The steam trapped by the paper will soften the bottom of your beautiful, crispy rings. A wire rack allows air to circulate all around, keeping them perfectly crisp for longer.
- Work in Small Batches: I cannot stress this enough. Adding too many rings at once drops the oil temperature drastically. The batter will soak up oil instead of instantly frying, resulting in a heavy, greasy, and disappointing ring. Patience is the key to that golden crunch.
Common Mistakes to Avoid
- Overcrowding the pan: As mentioned above, this is the number one culprit for soggy onion rings. The oil needs to stay at a consistent high heat to instantly crisp the batter. Crowding the pan chokes the heat, leading to oily, pale results. Always fry in small, manageable batches.
- Wrong temperature: If the oil isn’t hot enough, the batter will absorb oil and become heavy. If it’s too hot, the outside will burn before the onion inside has had a chance to cook and soften. Rely on a kitchen thermometer for accuracy; 180°C (350°F) is your sweet spot.
- Skipping the rest time: After you’ve coated the rings in the dry mix for the second time, let them sit on the wire rack for 5 minutes before frying. This allows the coating to adhere fully to the onion, preventing it from slipping off in the hot oil and leaving you with a bare ring.
Delicious Variations to Try
- Spicy Version: Add 1 teaspoon of cayenne pepper and ½ teaspoon of chilli flakes to the dry flour mixture. For an even deeper heat, a few dashes of your favourite hot sauce stirred into the buttermilk batter works wonders.
- Vegetarian/Vegan Option: This recipe is already vegetarian. To make it vegan, substitute the buttermilk by mixing 300ml of unsweetened plant-based milk (like oat or soya) with 1 tablespoon of lemon juice. Let it sit for 5 minutes to curdle. Use a flax egg (1 tablespoon ground flaxseed mixed with 3 tablespoons water) in place of the chicken egg.
- Different Protein: While onion rings are the star, you can use this same foolproof batter to create crispy chicken tenders. Simply cut chicken breasts into strips, season them with salt and pepper, and follow the same double-dip dredging and frying process. They pair beautifully with the same dipping sauces. For a different take on a classic, try serving them alongside my Juicy Steak Bites Garlic Butter Recipe for a truly indulgent meal.
What to Serve With Classic Onion Rings
These rings are a wonderful side to a hearty meal, but they also shine as the main event. Here are a few of my favourite pairings:
- A classic dipping sauce like a smoky chipotle mayo or a tangy ranch dressing.
- As a crunchy topping for a juicy burger, perhaps one inspired by the flavours in this Grilled Lamb Chops Mint Yogurt Sauce recipe (minus the chops, of course!).
- Alongside a simple, crisp green salad to cut through the richness.
- Piled high next to a plate of Crispy Baked Chicken Tenders Recipe for a truly comforting, crunchy dinner.
Frequently Asked Questions
Classic Onion Rings
Ingredients
Method
- Prepare the onions: Peel the onions and slice them into 1cm-thick rounds. Gently separate the rings, discarding the tiny inner ones or the very small outer ones. You want nice, sturdy rings. You’ll hear a clean, crisp snap as you separate them.
- Soak the rings (optional but recommended): Place the separated rings in a bowl of ice-cold water and leave them for 20 minutes. This step tempers the raw, pungent bite of the onion, making them sweeter and more mellow when cooked. Drain them and pat them extremely dry with a clean tea towel. Any moisture here will cause the batter to slide off.
- Make the dry mix: In a wide, shallow bowl, whisk together the plain flour, cornflour, baking powder, salt, smoked paprika, garlic powder, and black pepper. The cornflour is our secret weapon for that extra-light, crispy texture.
- Make the wet batter: In a separate bowl, whisk the beaten egg into the cold buttermilk until fully combined. The mixture will look smooth and pale.
- Heat the oil: Pour the oil into your heavy-based pot, ensuring it’s no more than a third full. Heat it to 180°C (350°F). If you don’t have a thermometer, a cube of bread dropped in will turn golden brown in about 60 seconds. The oil should shimmer and have a gentle, rolling heat.
- Set up your dredging station: Take a handful of dry mix and toss a few onion rings in it, shaking off any excess. Then, dip them into the wet batter, letting any extra drip off. Finally, return them to the dry mix for a second coating. Press the flour gently onto the rings. This double-dip creates the characteristic craggy, crunchy crust.
- Fry in batches: Carefully lower 4-5 battered rings into the hot oil. Do not overcrowd the pot; the temperature will drop and you’ll end up with greasy rings. You should hear a vigorous, steady sizzle as they hit the oil. Fry for 2-3 minutes, turning once with a slotted spoon, until they are a deep, burnished gold.
- Drain and season: Use the slotted spoon to transfer the cooked rings to a wire rack set over a baking tray. Sprinkle them immediately with flaky sea salt while they are still hot. The sizzle will subside, and you’ll see the salt crystals glisten on the hot, crispy surface.
- Repeat and serve: Continue with the remaining rings, allowing the oil to come back up to temperature between batches. Serve them straight away, while the crunch is at its absolute peak.
Notes
I hope this guide encourages you to embrace the process of making Classic Onion Rings from scratch. It’s a little bit of effort for a truly wonderful reward, and the smell alone is worth the time. I make this at least once a month – it’s become a family favourite. My husband, who’s usually picky, asked for seconds the very first time I made them! I would love to hear how you get on in the comments below, and what dips you choose to serve alongside them.