Classic Hash Browns (Crispy)
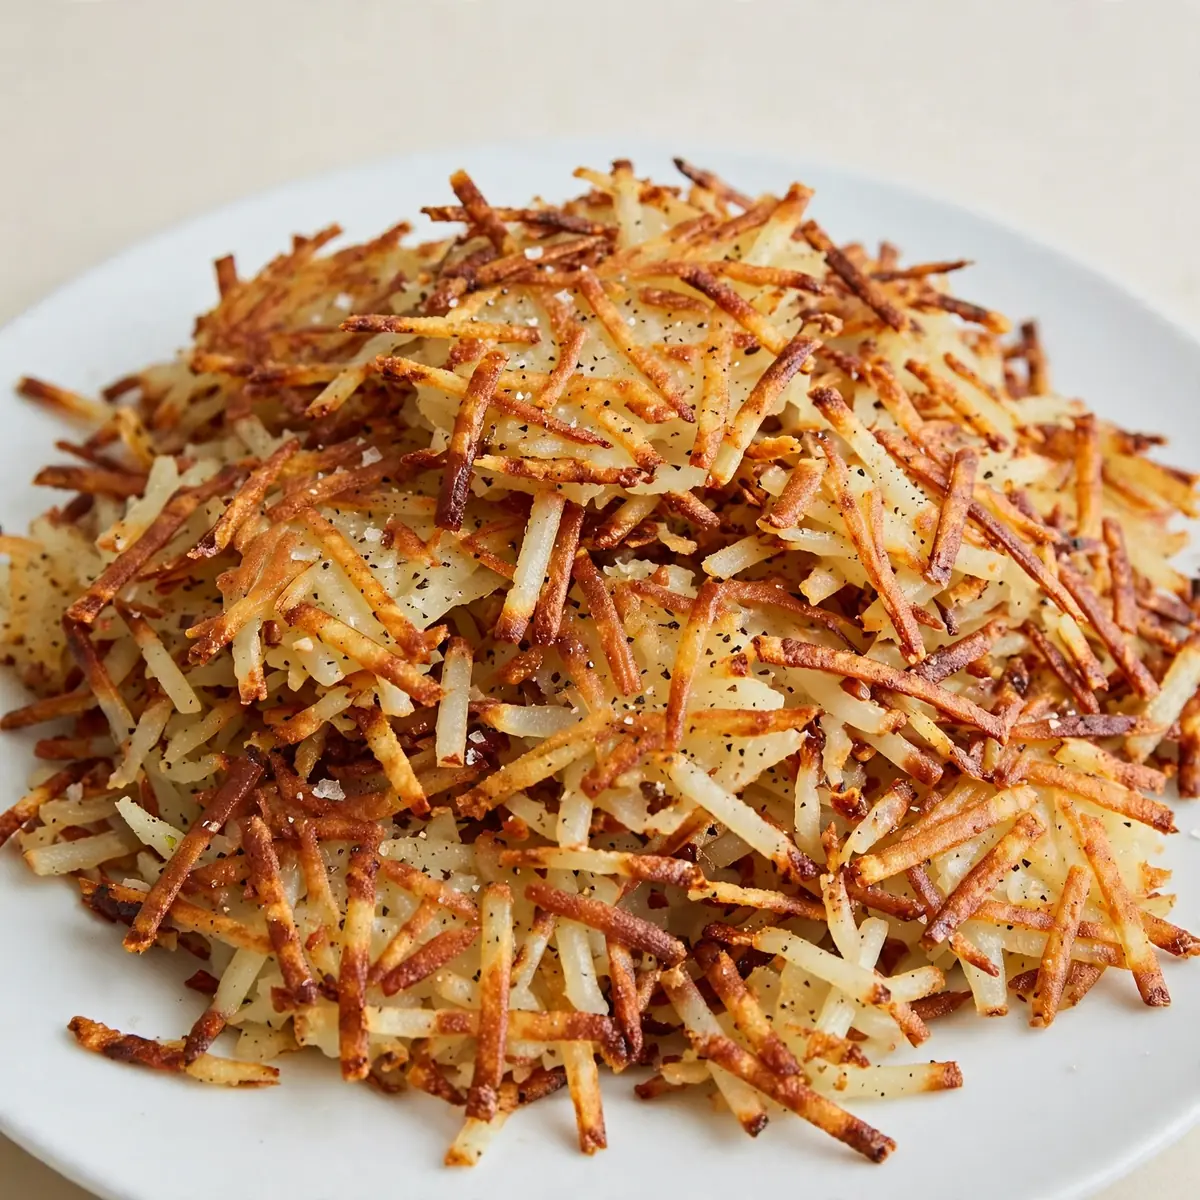
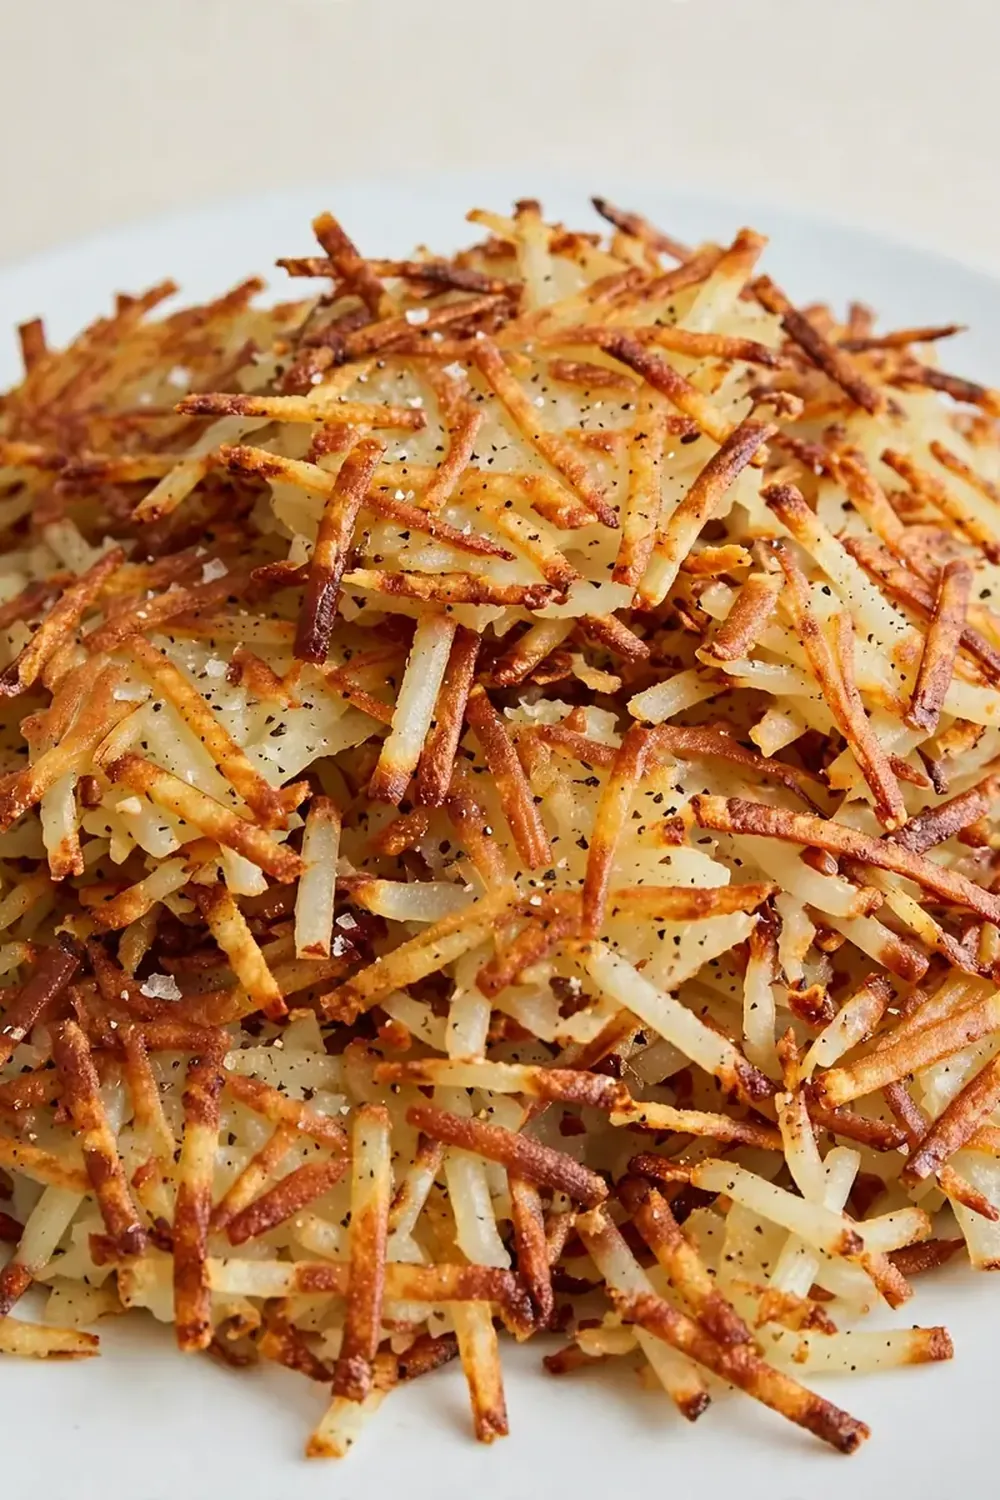
There’s a particular stillness to a Saturday morning that demands a proper, unhurried breakfast, and nothing fills the kitchen with that promise of comfort quite like the sound of butter sizzling in a hot pan. I’ve been making this for over 9 years, and it never disappoints; this is your guide to achieving the most gloriously crunchy, golden Classic Hash Browns (Crispy) right in your own kitchen.
Recipe Overview
- Prep time: 20 minutes
- Cook time: 15 minutes
- Total time: 35 minutes
- Servings: 4 generous portions
- Difficulty: Easy (with a touch of patience)
Why You’ll Love This Classic Hash Browns (Crispy)
- Deeply satisfying crunch: Each bite shatters with a golden, craggy exterior that gives way to a soft, fluffy centre. It’s the textural contrast that makes a truly great hash brown.
- A slow, meditative process: This isn’t a rushed weekday affair; it’s a weekend project. The gentle rhythm of grating, rinsing, and squeezing is a form of culinary therapy.
- Pure, simple ingredients: Just potatoes, a little fat, and salt. The magic comes from technique, not a long list of store-bought items.
- Utterly customisable: While perfect on its own, this base recipe is a blank canvas for adding herbs, spices, or a touch of cheese for a new flavour profile every time.
- A true family favourite: My kids absolutely devour this every time I make it. The golden colour and satisfying crunch are a universal language of deliciousness.
Ingredients You’ll Need
- 1 kg (about 4 large) Maris Piper or King Edward potatoes
- 1 large onion (optional, but recommended for depth of flavour)
- 1½ teaspoons fine sea salt
- ½ teaspoon freshly ground black pepper
- 2 tablespoons plain flour (or cornflour for a gluten-free option)
- 3 tablespoons unsalted butter, plus more for frying
- 2 tablespoons sunflower or rapeseed oil
Tip: Using a floury potato is non-negotiable. Waxy varieties hold too much moisture and will steam rather than crisp. Maris Piper potatoes are my go-to for their perfect starch content.
How to Make Classic Hash Browns (Crispy)
- Prepare your potatoes: Wash and peel the potatoes. Using a box grater or a food processor with a grating disc, grate them into a large bowl. If using an onion, grate it coarsely and add it to the bowl. The mixture will look a little wet and stark white at this stage.
- The crucial rinse: Tip the grated potato and onion into a colander and rinse thoroughly under cold running water. Keep going until the water runs clear instead of milky. This washes away the excess starch that would otherwise make your hash browns gluey. You’ll feel the texture change as the water clears.
- Squeeze out every drop of moisture: This is the most important step. Take handfuls of the rinsed mixture and squeeze them as hard as you can over the sink. You want the shreds to feel quite dry to the touch. Transfer the squeezed shreds to a clean tea towel, gather the corners, and wring it tightly over the sink. You’ll be amazed at how much water comes out—this is what guarantees a crisp exterior.
- Season and rest: Place the dry shreds in a clean bowl. Sprinkle over the salt, pepper, and flour. Toss everything together with your fingers until evenly coated. The shreds should look separate and slightly fluffy. Let the mixture rest for 10 minutes. This allows the salt to draw out any remaining moisture and gives the flour time to absorb it.
- Heat the pan: Place a large, heavy-based frying pan or skillet over a medium-high heat. Add a generous knob of butter and a splash of oil. The oil stops the butter from burning. Swirl the pan until the butter has melted and is foaming, and you hear a gentle, happy sizzle. The aroma of browning butter is the signal you’re ready.
- Form the hash browns: Using clean hands, take a generous handful of the potato mixture and shape it into a flat, rough patty about 1cm thick. Don’t pack it too tightly or it will become dense. Gently place the patty into the hot fat. You should hear a loud sizzle immediately. Repeat with the remaining mixture, leaving a little space between each patty. Do not overcrowd the pan.
- Cook the first side: Let the hash browns cook undisturbed for 4-5 minutes. The edges will begin to turn a deep, nutty brown. Peek underneath with a spatula; you’re looking for a rich, deep golden colour with darker, craggy spots. The sound will change from a loud sizzle to a quieter, steady hiss as the moisture cooks off.
- Flip and finish: Carefully flip each hash brown. The cooked side should be a beautiful mosaic of gold and brown. Cook for another 3-4 minutes until the second side is equally crisp and golden. The finished hash brown will feel firm and sound hollow when tapped with the spatula.
- Drain and serve: Transfer the cooked hash browns to a plate lined with kitchen paper. This absorbs any excess fat and keeps them crunchy. Serve immediately while they are still blazing hot and singing with crispness.
Tips From My Kitchen
- Embrace the squeeze: I cannot overstate how vital the squeezing step is. If you skip it, your hash browns will steam in the pan, turning into a pale, soggy mess. The goal is to remove as much moisture as possible so the potatoes fry, not stew. Your hands should ache a little from the effort—that’s a good sign.
- Use a combination of fats: Butter gives incredible flavour and promotes browning, but it burns at a lower temperature. Adding a neutral oil with a high smoke point, like sunflower or rapeseed, raises the overall smoke point of the fat, allowing you to get that deep golden colour without the butter scorching.
- Resist the urge to move them: Once your hash browns hit the pan, leave them alone. If you nudge, poke, or slide them around before a crust has formed, they will stick and break apart. Let the heat do the work. You’ll know the crust is ready when the hash brown releases easily from the pan with a gentle lift of your spatula.
- Keep them warm in the oven: If you are cooking multiple batches, preheat your oven to 120°C (250°F). Place the finished hash browns on a wire rack set over a baking tray and keep them warm in the oven while you finish the rest. This keeps them from going soggy in a pile on a plate.
- Grate just before cooking: Once grated, potatoes begin to oxidise and turn pinkish-grey. This is harmless but not very appetising. For the brightest, most appealing colour, grate your potatoes right before you start the rinsing and squeezing process.
Equipment You’ll Need
- Large frying pan or skillet (non-stick or cast iron works best)
- Sharp knife and cutting board
- Mixing bowls (one large, one medium)
- Wooden spoon or spatula
- Box grater or food processor with grating disc
- Colander
- Clean tea towel or several layers of muslin
- Kitchen paper
Common Mistakes to Avoid
- Overcrowding the pan: When you crowd the pan, the temperature of the fat drops dramatically. Instead of frying, the potatoes release steam and begin to braise. This results in a soft, pale, and oily hash brown. Cook in batches, leaving a generous finger’s width of space between each patty.
- Wrong temperature: If the pan is not hot enough, the potatoes will absorb the fat and become greasy. If it is too hot, the outside will burn before the inside has cooked through. Aim for a steady medium-high heat. The butter should foam and sizzle immediately when the potato hits the pan, but not smoke.
- Skipping the rest time: The 10-minute rest after seasoning is not a mere suggestion. The salt draws out residual moisture from the potato shreds, and the flour absorbs it, creating a thin, starchy slurry that acts like a glue. This helps the hash browns hold their shape and creates a more cohesive, crisp crust.
Delicious Variations to Try
- Spicy Version: Add one finely chopped red chilli (seeds removed for less heat) and a teaspoon of smoked paprika to the grated potato mixture. The warmth of the paprika complements the earthy potato flavour beautifully.
- Vegetarian/Vegan Option: This recipe is naturally vegetarian. To make it vegan, simply substitute the butter with a high-quality, plant-based butter alternative that is suitable for frying. The oil will still provide the necessary crispness.
- Different Protein: For a heartier breakfast, serve these hash browns alongside a perfectly cooked omelette. For a complete meal, try them with a side of Spiced Grilled Chicken Shawarma Bowl for a fusion of textures and flavours. Alternatively, a simple Fluffy Spinach Feta Omelette Recipe makes for a wonderfully balanced plate.
What to Serve With Classic Hash Browns (Crispy)
- A trio of fried eggs with runny yolks to dip into
- Grilled tomatoes and sautéed mushrooms
- Heinz baked beans (a British classic)
- A dollop of soured cream and a sprinkling of fresh chives
- Smoked salmon and a squeeze of lemon
- Alongside a Cheesy Vegetable Quesadillas Recipe for an indulgent brunch
Still hungry for ideas? You might also love Savory And Healthy Sweet Potato Hash Browns Recipe from our sister kitchens.
Frequently Asked Questions
Classic Hash Browns (Crispy)
Ingredients
Method
- Prepare your potatoes: Wash and peel the potatoes. Using a box grater or a food processor with a grating disc, grate them into a large bowl. If using an onion, grate it coarsely and add it to the bowl. The mixture will look a little wet and stark white at this stage.
- The crucial rinse: Tip the grated potato and onion into a colander and rinse thoroughly under cold running water. Keep going until the water runs clear instead of milky. This washes away the excess starch that would otherwise make your hash browns gluey. You’ll feel the texture change as the water clears.
- Squeeze out every drop of moisture: This is the most important step. Take handfuls of the rinsed mixture and squeeze them as hard as you can over the sink. You want the shreds to feel quite dry to the touch. Transfer the squeezed shreds to a clean tea towel, gather the corners, and wring it tightly over the sink. You'll be amazed at how much water comes out—this is what guarantees a crisp exterior.
- Season and rest: Place the dry shreds in a clean bowl. Sprinkle over the salt, pepper, and flour. Toss everything together with your fingers until evenly coated. The shreds should look separate and slightly fluffy. Let the mixture rest for 10 minutes. This allows the salt to draw out any remaining moisture and gives the flour time to absorb it.
- Heat the pan: Place a large, heavy-based frying pan or skillet over a medium-high heat. Add a generous knob of butter and a splash of oil. The oil stops the butter from burning. Swirl the pan until the butter has melted and is foaming, and you hear a gentle, happy sizzle. The aroma of browning butter is the signal you’re ready.
- Form the hash browns: Using clean hands, take a generous handful of the potato mixture and shape it into a flat, rough patty about 1cm thick. Don’t pack it too tightly or it will become dense. Gently place the patty into the hot fat. You should hear a loud sizzle immediately. Repeat with the remaining mixture, leaving a little space between each patty. Do not overcrowd the pan.
- Cook the first side: Let the hash browns cook undisturbed for 4-5 minutes. The edges will begin to turn a deep, nutty brown. Peek underneath with a spatula; you’re looking for a rich, deep golden colour with darker, craggy spots. The sound will change from a loud sizzle to a quieter, steady hiss as the moisture cooks off.
- Flip and finish: Carefully flip each hash brown. The cooked side should be a beautiful mosaic of gold and brown. Cook for another 3-4 minutes until the second side is equally crisp and golden. The finished hash brown will feel firm and sound hollow when tapped with the spatula.
- Drain and serve: Transfer the cooked hash browns to a plate lined with kitchen paper. This absorbs any excess fat and keeps them crunchy. Serve immediately while they are still blazing hot and singing with crispness.
Notes
There you have it—a plate of golden, shatteringly crisp hash browns that taste of a weekend well spent. It’s a simple ritual, but one that rewards a little patience and attention with profound deliciousness. I’d love to hear how you get on in your own kitchen. What’s your secret to the perfect crunch? Drop a comment below and let’s chat about breakfast.