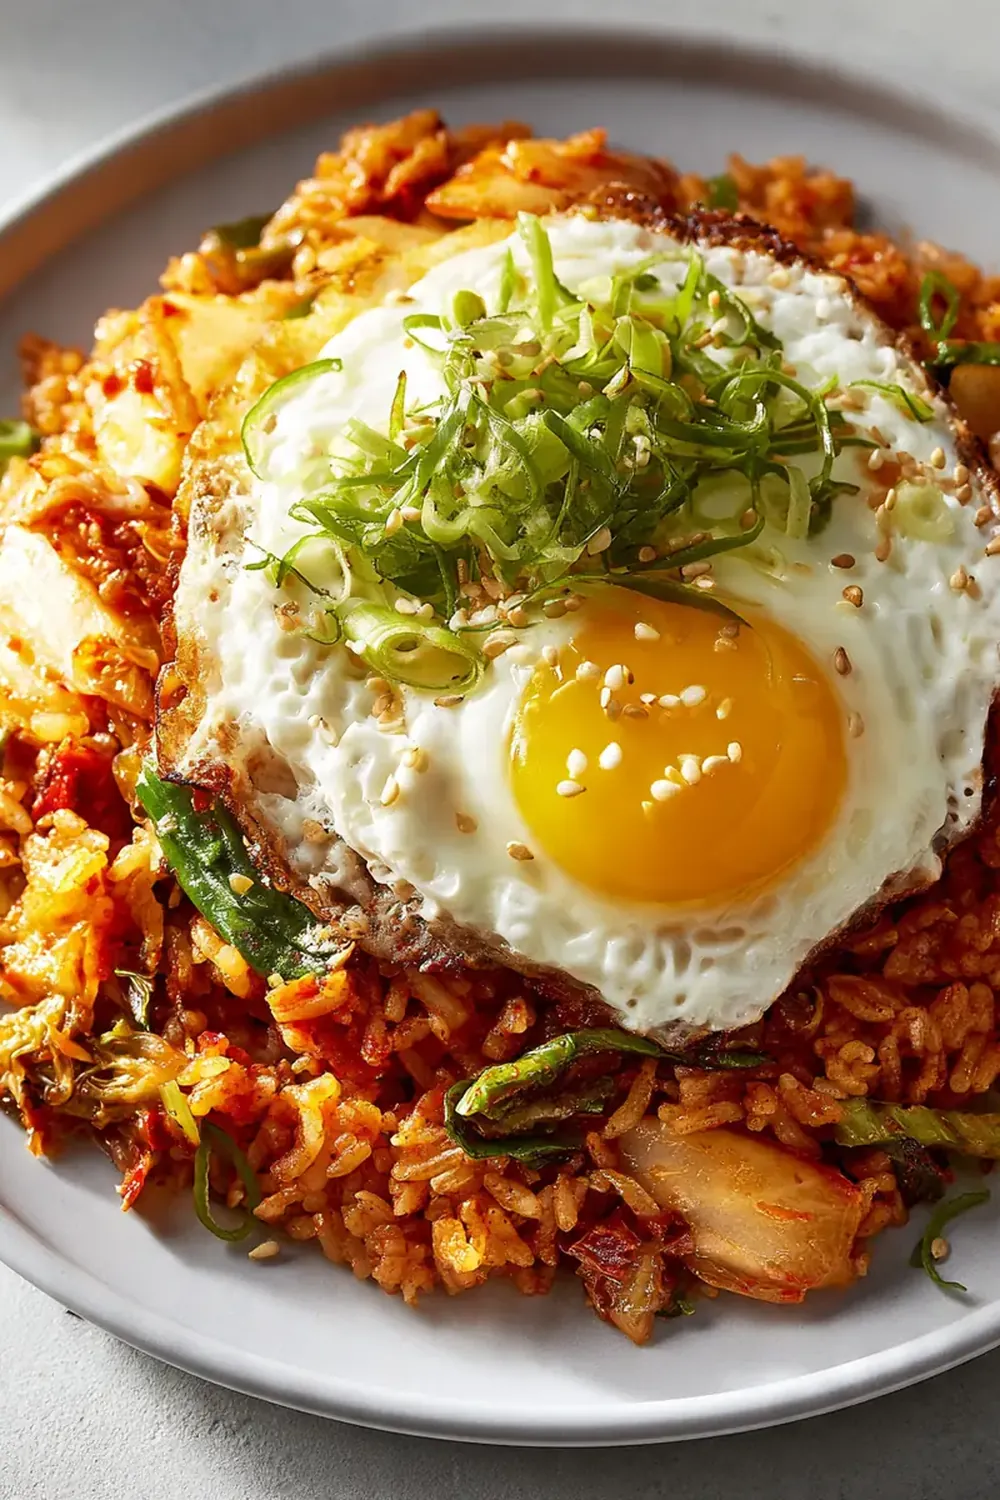
Spicy Korean Kimchi Fried Rice
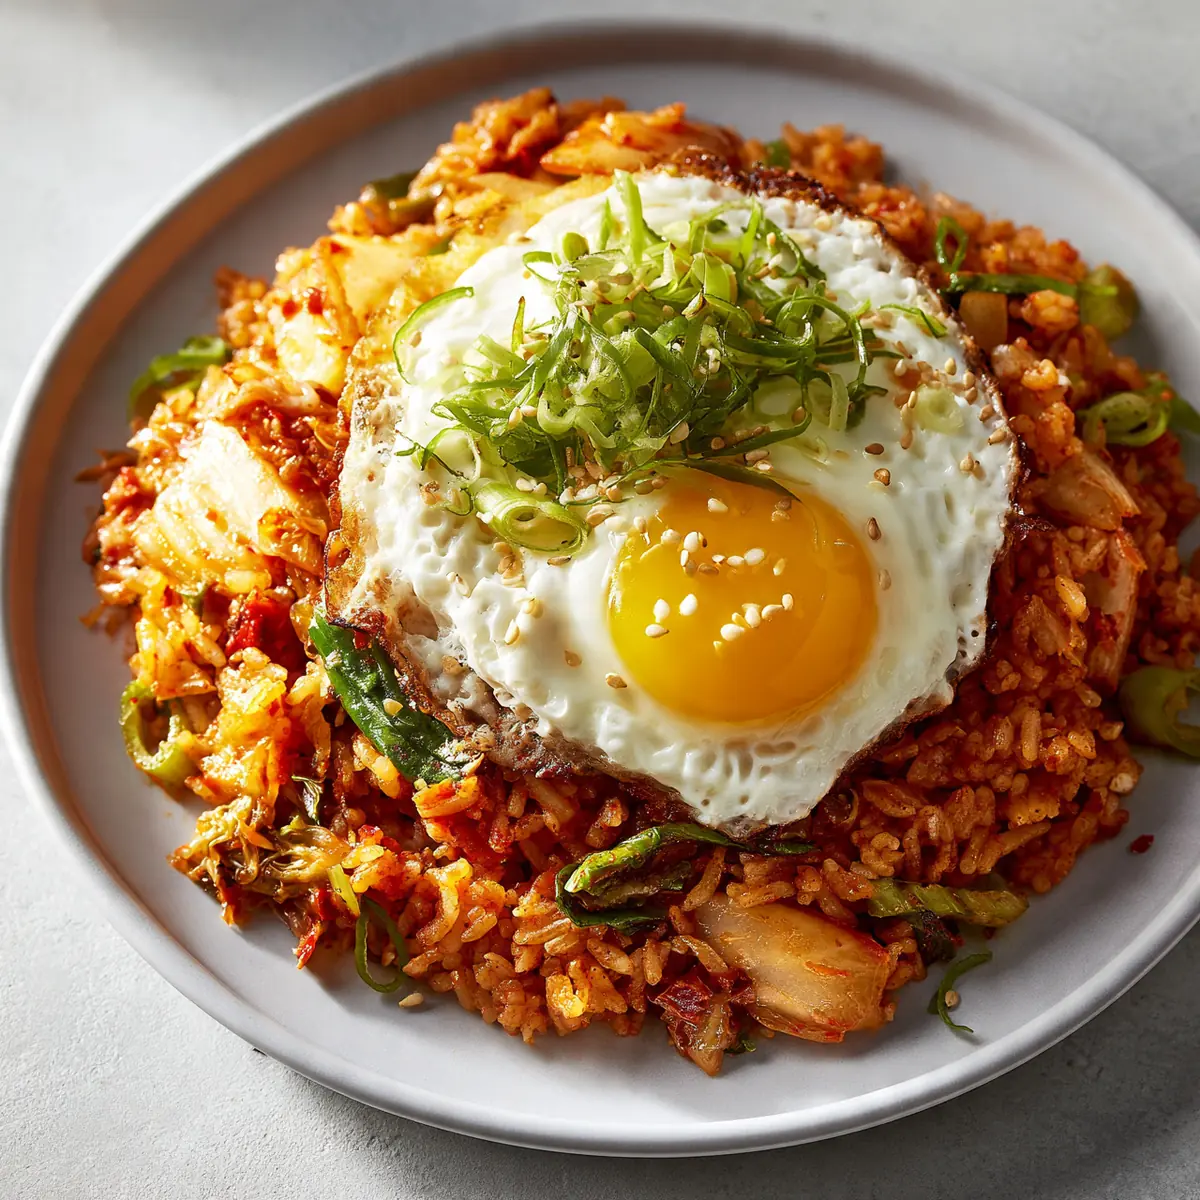
I remember the first time I truly nailed this dish. After testing this recipe five times, I finally got it just right — that perfect balance where the fiery kick of gochugaru meets the tangy, fermented depth of well-aged kimchi. I make this at least once a week — it’s become a family favourite, especially on those busy weeknights when we need something deeply satisfying without spending hours in the kitchen.
Recipe Overview
- Prep Time: 10 minutes
- Cook Time: 15 minutes
- Total Time: 25 minutes
- Servings: 2 generous portions
- Difficulty: Easy
Why You’ll Love This Spicy Korean Kimchi Fried Rice
- Bold, layered heat: The spice comes from a combination of gochujang (Korean chilli paste) and gochugaru (coarse chilli flakes), creating a warmth that builds slowly rather than overwhelming you all at once.
- Uses up leftover rice: Day-old rice is actually superior here — it’s drier and less sticky, which means every grain gets beautifully coated in the sauce without turning mushy.
- Fermented goodness: Well-fermented kimchi adds a complex umami and subtle sourness that shortcuts hours of flavour development into a single pan.
- Customisable protein: Whether you use leftover chicken, beef strips, or keep it vegetarian with tofu, the dish adapts effortlessly to whatever you have on hand.
- One-pan wonder: From start to finish, you only need a single wok or large frying pan, which means minimal washing up and maximum flavour.
Ingredients You’ll Need
- 300g cooked jasmine or short-grain rice, preferably day-old and refrigerated
- 150g well-fermented kimchi, chopped into bite-sized pieces
- 2 tablespoons kimchi juice (the liquid from the jar)
- 1½ tablespoons gochujang (Korean chilli paste)
- 1 tablespoon gochugaru (Korean chilli flakes)
- 2 tablespoons sesame oil, divided
- 3 cloves garlic, finely minced
- 1 teaspoon fresh ginger, grated
- 100g cooked chicken thigh or beef strips, shredded or sliced
- 2 spring onions, sliced diagonally, white and green parts separated
- 1 tablespoon soy sauce
- 1 teaspoon brown sugar
- 2 eggs (for frying on top)
- 1 teaspoon toasted sesame seeds for garnish
- 1 sheet roasted seaweed (gim), torn into strips (optional)
Tip: The kimchi juice is liquid gold here — don’t discard it! If your kimchi jar is nearly empty, add a splash of water, shake it well, and use that flavoured liquid. For the rice, basmati works in a pinch, but short-grain or medium-grain rice gives that authentic sticky-yet-separate texture we’re after.
How to Make Spicy Korean Kimchi Fried Rice
- Prepare your ingredients: Before you turn on the heat, have everything chopped, measured, and within arm’s reach. This dish comes together fast — you won’t have time to hunt for ingredients mid-cook. Break up any clumps of cold rice with your fingers so the grains separate easily.
- Heat the wok: Place a large wok or non-stick frying pan over high heat and add 1 tablespoon of sesame oil. Swirl it around until it shimmers and you see the first wisp of smoke — this takes about 30 seconds. The oil should ripple like water when you tilt the pan.
- Sear the protein: Add your cooked chicken or beef strips in a single layer. Let them sit undisturbed for 45 seconds — you’ll hear a satisfying sizzle. When the edges turn golden brown and release easily from the pan (that’s the sound of a good sear), stir-fry for another 30 seconds. Remove to a plate and set aside.
- Cook the aromatics: Reduce the heat to medium and add the remaining 1 tablespoon sesame oil. Toss in the minced garlic, grated ginger, and white parts of the spring onions. Stir constantly for 20-30 seconds until the garlic turns pale gold and releases a fragrant, nutty aroma — don’t let it burn, or the dish will taste bitter.
- Bloom the kimchi and paste: Add the chopped kimchi, gochujang, gochugaru, and kimchi juice. Stir everything together and cook for 2 minutes. The kimchi should soften and deepen in colour to a rich brick-red, and you’ll smell a sweet-spicy tang rising from the pan. The sugar in the gochujang will start to caramelise slightly.
- Add the rice: Tip in the cold rice, breaking up any remaining clumps with your spatula. Use a folding motion to coat every grain in the red sauce. Spread the rice into an even layer and press it down gently — let it sit for 45 seconds without stirring. This creates those coveted crispy bits (nurungji) at the bottom. The rice should sizzle and pop as it hits the hot pan. Repeat this press-and-fold process 2-3 times until the rice is evenly coloured and you see golden-brown patches forming.
- Season and combine: Drizzle the soy sauce and sprinkle the brown sugar over the rice. Toss everything together until the sugar dissolves and the rice looks glossy. Return the cooked meat to the pan and stir-fry for another minute until everything is piping hot. The rice should look vibrant red-orange, with occasional darker spots from caramelised sauce.
- Fry the eggs: Push the rice to one side of the pan. Crack the eggs into the empty space. Let them cook undisturbed for 2-3 minutes over medium heat until the whites are set but the yolks are still runny — you’ll see the edges go crisp and lacy. Alternatively, fry them separately in a non-stick pan if you prefer.
- Finish and serve: Divide the rice between two bowls. Top each with a fried egg, then sprinkle the green spring onion slices, toasted sesame seeds, and torn seaweed strips over the top. Serve immediately while the yolk is still molten.
Tips From My Kitchen
- Use day-old rice, not fresh: Freshly cooked rice contains too much moisture, which makes the fried rice turn into a sticky, gluey mess. Refrigerating cooked rice for at least 4 hours (or overnight) allows the starch to retrograde, meaning the grains firm up and separate beautifully when stir-fried. If you’re in a rush, spread hot rice on a baking tray and pop it in the freezer for 15 minutes to dry it out quickly.
- Choose your kimchi wisely: Not all kimchi is created equal for this dish. Look for kimchi that’s at least 2-3 weeks old — it should taste noticeably sour and funky, with softened cabbage leaves. Fresh, crunchy kimchi won’t deliver the same depth of flavour. The older the kimchi, the more umami it contributes to the final dish. I sometimes buy two jars: one fresh for eating as a side, and one that I let age in the back of my fridge specifically for cooking.
- Control the heat with gochugaru: Gochujang provides the base sweetness and moderate heat, but gochugaru is where you can dial the spiciness up or down. Gochugaru has a smoky, slightly fruity flavour that’s distinct from other chilli flakes. If you’re sensitive to heat, reduce the gochugaru to 1 teaspoon. If you want serious fire, add an extra tablespoon — just be aware that the heat intensifies as the dish sits.
- Don’t overcrowd the pan: A crowded pan traps steam instead of allowing the rice to fry. The ideal amount of rice for a standard 28cm wok is 300g (cooked weight). If you’re doubling the recipe, cook it in two batches. You’ll know the pan is too full if the rice releases a lot of steam and looks wet rather than sizzling and jumping in the oil.
- Build crispy bits on purpose: Those caramelised, crunchy patches of rice at the bottom of the pan aren’t a mistake — they’re called nurungji in Korean, and they’re the best part of the dish. To encourage them, press the rice down firmly with your spatula after each stir and resist the urge to toss it constantly. Let it sit for 45-60 seconds between folds. The sound should shift from a gentle sizzle to a louder, crackling sound — that’s the crisp forming.
- Season in layers, not all at once: Don’t dump all your soy sauce and sugar in at the beginning. Add the kimchi juice first (it’s already salty and tangy), then the gochujang, and finally adjust with soy sauce and sugar at the end. This way you can taste as you go and avoid an overly salty or sweet result. The dish should taste balanced — spicy, savoury, slightly tangy, and just a whisper of sweetness.
What to Serve With Spicy Korean Kimchi Fried Rice
- A simple side of pickled radish or cucumber salad — the cool crunch contrasts beautifully with the warm, spicy rice.
- A bowl of clear soup, like a light miso or seaweed soup, to round out the meal.
- For a heartier spread, pair it with Juicy Steak Bites Garlic Butter Recipe — the buttery, garlicky notes complement the spicy rice perfectly.
- Leftover Tangy Sweet And Sour Chicken Recipe also works wonderfully chopped into the rice for a fusion twist.
Frequently Asked Questions
Spicy Korean Kimchi Fried Rice
Ingredients
Method
- Prepare your ingredients: Before you turn on the heat, have everything chopped, measured, and within arm's reach. This dish comes together fast — you won't have time to hunt for ingredients mid-cook. Break up any clumps of cold rice with your fingers so the grains separate easily.
- Heat the wok: Place a large wok or non-stick frying pan over high heat and add 1 tablespoon of sesame oil. Swirl it around until it shimmers and you see the first wisp of smoke — this takes about 30 seconds. The oil should ripple like water when you tilt the pan.
- Sear the protein: Add your cooked chicken or beef strips in a single layer. Let them sit undisturbed for 45 seconds — you'll hear a satisfying sizzle. When the edges turn golden brown and release easily from the pan (that's the sound of a good sear), stir-fry for another 30 seconds. Remove to a plate and set aside.
- Cook the aromatics: Reduce the heat to medium and add the remaining 1 tablespoon sesame oil. Toss in the minced garlic, grated ginger, and white parts of the spring onions. Stir constantly for 20-30 seconds until the garlic turns pale gold and releases a fragrant, nutty aroma — don't let it burn, or the dish will taste bitter.
- Bloom the kimchi and paste: Add the chopped kimchi, gochujang, gochugaru, and kimchi juice. Stir everything together and cook for 2 minutes. The kimchi should soften and deepen in colour to a rich brick-red, and you'll smell a sweet-spicy tang rising from the pan. The sugar in the gochujang will start to caramelise slightly.
- Add the rice: Tip in the cold rice, breaking up any remaining clumps with your spatula. Use a folding motion to coat every grain in the red sauce. Spread the rice into an even layer and press it down gently — let it sit for 45 seconds without stirring. This creates those coveted crispy bits (nurungji) at the bottom. The rice should sizzle and pop as it hits the hot pan. Repeat this press-and-fold process 2-3 times until the rice is evenly coloured and you see golden-brown patches forming.
- Season and combine: Drizzle the soy sauce and sprinkle the brown sugar over the rice. Toss everything together until the sugar dissolves and the rice looks glossy. Return the cooked meat to the pan and stir-fry for another minute until everything is piping hot. The rice should look vibrant red-orange, with occasional darker spots from caramelised sauce.
- Fry the eggs: Push the rice to one side of the pan. Crack the eggs into the empty space. Let them cook undisturbed for 2-3 minutes over medium heat until the whites are set but the yolks are still runny — you'll see the edges go crisp and lacy. Alternatively, fry them separately in a non-stick pan if you prefer.
- Finish and serve: Divide the rice between two bowls. Top each with a fried egg, then sprinkle the green spring onion slices, toasted sesame seeds, and torn seaweed strips over the top. Serve immediately while the yolk is still molten.
Notes
There you have it — my go-to Spicy Korean Kimchi Fried Rice that’s earned a permanent spot in our weekly rotation. I’d love to hear how yours turns out. Did you add any extra vegetables? Did you go for extra crispy rice with those golden bits at the bottom? Drop a comment below and let me know your favourite twist on this dish. Happy cooking!