Honey Sriracha Chicken Skillet

There are some dishes that demand you slow down, that fill your kitchen with a warmth that goes beyond the heat of the stove. This Honey Sriracha Chicken Skillet is one of them. It’s a project for a lazy Saturday afternoon, a way to measure time in sizzles and sweet, spicy aromas rather than minutes. We’ll build layers of flavour from the ground up, ending with a glossy, sticky sauce that clings to every piece of chicken, and it’s entirely worth the gentle focus it asks of you.
Recipe Overview
- Prep time: 20 minutes
- Cook time: 35 minutes
- Total time: 55 minutes
- Servings: 4
- Difficulty: Medium (requires a watchful eye on the pan)
Why You’ll Love This Honey Sriracha Chicken Skillet
- Deep, layered heat: The sriracha provides a fermented, garlicky warmth that builds as you eat, never just a single punch of chilli. It mingles with the honey in a way that feels complex and rewarding.
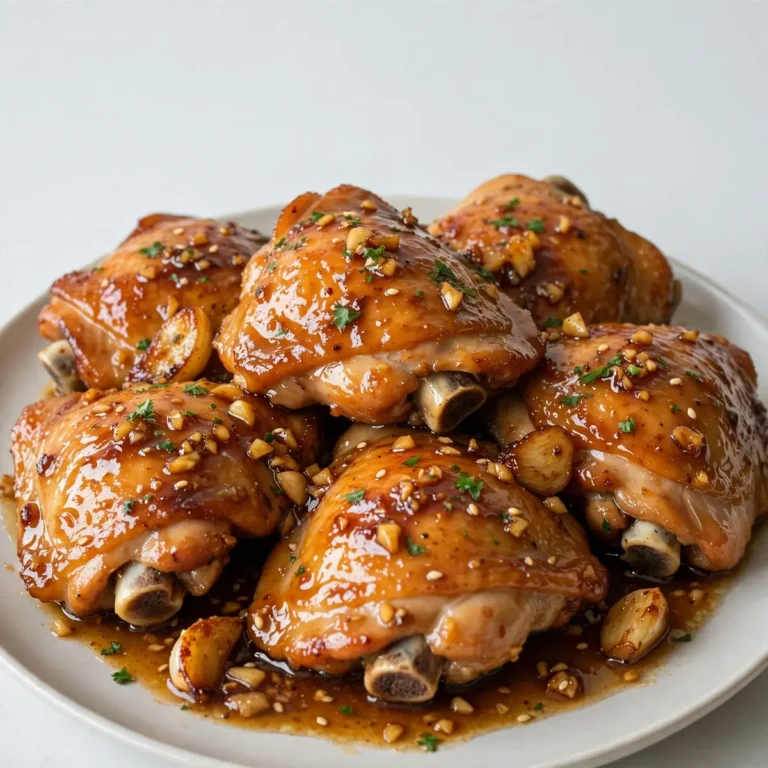
- That glossy, sticky finish: We reduce the sauce down until it coats the back of a spoon, creating a lacquered look on the chicken that is deeply satisfying. It’s the kind of sauce you want to mop up with everything on the plate, perhaps even a comforting side like Classic Green Bean Casserole or a hearty main course such as Smothered Chicken In Creamy Gravy.cuisinespicy.com/classic-green-bean-casserole/”>Classic Green Bean Casserole.
- A single-skillet affair: The whole process happens in one pan, meaning less washing up and a more concentrated flavour. The fond that builds on the bottom of the skillet is the secret to the sauce’s depth.
- A true weekend project: This isn’t a thirty-minute midweek rush. The process of searing, deglazing, and reducing is a form of culinary meditation, a chance to truly engage with your cooking.
- Impressive without being fussy: After testing this recipe five times, I finally got it just right, and it now looks and tastes like something from a smart restaurant. Friends always ask me for this recipe after trying it at dinner parties, amazed that it came from a single skillet.

Ingredients You’ll Need
- 600g boneless, skinless chicken thighs (about 4-5 thighs)
- 1 teaspoon fine sea salt
- ½ teaspoon freshly ground black pepper
- 2 tablespoons neutral oil (like sunflower or rapeseed)
- 4 cloves garlic, finely minced
- 1 thumb-sized piece fresh ginger, peeled and grated
- 60ml (¼ cup) sriracha sauce
- 100ml (⅓ cup plus 1 tablespoon) runny honey
- 60ml (¼ cup) soy sauce (or tamari for gluten-free)
- 2 tablespoons rice vinegar
- 1 tablespoon tomato purée
- 120ml (½ cup) chicken stock
- 1 tablespoon cornflour mixed with 2 tablespoons cold water (slurry)
- 2 spring onions, finely sliced, for garnish
- 1 tablespoon toasted sesame seeds, for garnish
Tip: For the best texture, use chicken thighs rather than breasts. They stay juicier during the longer cooking time and the higher fat content adds richness to the sauce. If you only have breasts, reduce the initial searing time by a couple of minutes per side.
How to Make Honey Sriracha Chicken Skillet
- Prepare the chicken. Pat the chicken thighs dry with kitchen paper. This is vital for a good sear. Season them all over with the salt and pepper. Let them sit at room temperature for 10 minutes while you gather your other ingredients. You will see the salt begin to draw out a little moisture, which we will pat dry again just before cooking.
- Sear the chicken. Heat the neutral oil in a large, heavy-based skillet (cast iron is ideal) over a medium-high heat until it shimmers and a wisp of smoke appears. Gently lay the chicken thighs in the pan, skin-side down if they have skin, or presentation-side down if not. Listen for that satisfying, immediate sizzle. Cook without moving them for 5-6 minutes, or until the underside is a deep, burnished gold. The edges will look crisp and the chicken should release easily from the pan. Flip and cook for another 4 minutes. The second side won’t get as dark, but it should be a warm golden brown. Transfer the chicken to a plate. You should see a sticky, brown fond (the caramelised bits) left in the pan.
- Sweat the aromatics. Reduce the heat to medium. Add the minced garlic and grated ginger to the hot pan. They will immediately sizzle and release a fragrant, heady perfume. Stir constantly for 30-40 seconds until they become fragrant and just start to soften. Do not let them burn, or they will become bitter. You want them to smell sweet and savoury.
- Build the sauce base. Pour in the sriracha, honey, soy sauce, rice vinegar, and tomato purée. Stir everything together with a wooden spoon, scraping up all those delicious browned bits from the bottom of the pan. This is the deglazing step, where we incorporate all the flavour from the seared chicken. The mixture will bubble and steam, becoming a dark, rich reddish-brown. Let it cook for 2 minutes, stirring, until it thickens slightly and smells intensely sweet and spicy.
- Simmer the chicken. Pour in the chicken stock and bring the sauce to a gentle boil. You will see large, lazy bubbles across the surface. Return the seared chicken thighs to the skillet, nestling them into the sauce. They should be partially submerged. Reduce the heat to low, cover the pan with a lid, and let it simmer gently for 20 minutes. The kitchen will fill with a sweet, spicy, savoury steam. The chicken should be fork-tender and cooked through.
- Thicken the sauce. Remove the lid and increase the heat to medium-high. The sauce will be bubbling more vigorously. Give the cornflour slurry a quick stir (it settles quickly) and pour it into the pan, stirring constantly. Within 30 seconds, you will see the sauce change from a thin liquid to a glossy, thick glaze that coats the back of your spoon. Let it bubble for another 1-2 minutes until it reaches your desired consistency. The colour will deepen to a rich mahogany.
- Glaze and rest. Spoon the thickened sauce over the chicken pieces to give them a final, glossy coat. Turn off the heat and let the skillet rest for 5 minutes. This is a crucial step; it allows the chicken to reabsorb some of its juices and the sauce to set slightly. Sprinkle with the sliced spring onions and toasted sesame seeds just before serving.
Tips From My Kitchen
- Dry the chicken thoroughly: Moisture is the enemy of a good sear. If the chicken is wet, it will steam in the pan instead of browning. Use plenty of kitchen paper to get it as dry as possible before seasoning. This ensures you get that deep, golden crust that adds so much flavour to the final dish.
- Don’t crowd the pan during the sear: If your skillet isn’t large enough, sear the chicken in two batches. If you overcrowd the pan, the temperature drops, and the chicken releases its juices instead of browning. You want to hear a steady, constant sizzle. A crowded pan produces a sad, grey sear.
- Scrape the fond, don’t scrub it: Those brown bits stuck to the bottom of the pan after searing are pure flavour. When you add the sauce ingredients and stock, use your wooden spoon to scrape them up. This is called deglazing, and it’s the single most important step for building a complex, savoury sauce. If you scrub the pan clean between steps, you lose that depth.
- Taste and adjust the heat: Sriracha brands vary in heat and sweetness. After you’ve added the sriracha and honey to the pan, dip a clean spoon in and taste the sauce base. If you want more heat, add another teaspoon of sriracha. If you want it sweeter, add a little more honey. This is your dish, so adjust it to your palate.
- The slurry is your best friend: Adding the cornflour slurry directly to the hot sauce is the most reliable way to get that perfect, glossy thickness. Make sure you stir it again just before pouring, as the cornflour settles at the bottom of the cup. Pour it in a steady stream while stirring to avoid any lumps.
Common Mistakes to Avoid
- Overcrowding the pan: This is the most common error. If you add all the chicken at once, the pan cools down and the chicken steams rather than sears. The result is pale, rubbery meat and a watery sauce. Work in batches if needed, giving each piece of chicken its own space in the hot oil.
- Wrong temperature: The searing stage requires a medium-high heat that is hot enough to sizzle but not so hot that the oil smokes and burns. If the heat is too low, the chicken will release its juices and boil. If it’s too high, the outside will burn before the inside is cooked. A steady, shimmering oil is your visual cue.
- Skipping the rest time: I know it’s tempting to dive straight in, but letting the skillet rest for 5 minutes off the heat is vital. It allows the juices inside the chicken to redistribute, ensuring every bite is moist. The sauce also has a moment to set into a more cohesive glaze, rather than running all over the plate.
Delicious Variations to Try
- Spicy Version: For those who like serious heat, add a finely chopped red bird’s eye chilli along with the garlic and ginger. You can also stir in a teaspoon of gochujang (Korean chilli paste) into the sauce base for a deeper, funkier spice. A final drizzle of chilli oil over the finished dish is a welcome addition.
- Vegetarian/Vegan Option: This works beautifully with firm tofu or king oyster mushrooms. Press a block of extra-firm tofu for 30 minutes, then slice into thick steaks. Sear them until golden and follow the same recipe. For mushrooms, slice them into thick planks and sear until they release their liquid and brown. Use vegetable stock instead of chicken stock.
- Different Protein: Chicken thighs are my favourite here, but this sauce is a star on its own. Try it with a similar approach for Smoky Grilled Chicken Skewers, or use it as a glaze for a whole roasted cauliflower. You could also substitute the chicken with thick pork loin steaks or turkey escalopes, adjusting the cooking time as needed.
What to Serve With Honey Sriracha Chicken Skillet
The sauce is rich and intense, so you need something to soak it up and balance the heat. Here are my favourite accompaniments:
- Steamed jasmine rice: The classic choice. The fluffy grains are perfect for catching every last drop of that sticky, spicy sauce.
- Simple steamed greens: Tenderstem broccoli or green beans, lightly steamed, provide a fresh, clean contrast to the richness of the dish.
- A crisp cucumber salad: Toss sliced cucumber with a little rice vinegar, a pinch of sugar, and some fresh coriander. The cool, sharp crunch is a brilliant palate cleanser against the heat.
- Fluffy naan bread: For a more indulgent meal, use warm naan bread to scoop up the chicken and sauce. It’s messy, but utterly wonderful.
- Roasted vegetables: Consider a side of Baked Stuffed Bell Peppers for a more substantial meal, or simply roast some sweet potatoes and peppers alongside the chicken.
Still hungry for ideas? You might also love Creamy Ranch Chicken Recipe Skillet, Sweet And Savory Honey Butter Chicken Recipe from our sister kitchens.
Frequently Asked Questions
Honey Sriracha Chicken Skillet
Ingredients
Method
- Prepare the chicken. Pat the chicken thighs dry with kitchen paper. This is vital for a good sear. Season them all over with the salt and pepper. Let them sit at room temperature for 10 minutes while you gather your other ingredients. You will see the salt begin to draw out a little moisture, which we will pat dry again just before cooking.
- Sear the chicken. Heat the neutral oil in a large, heavy-based skillet (cast iron is ideal) over a medium-high heat until it shimmers and a wisp of smoke appears. Gently lay the chicken thighs in the pan, skin-side down if they have skin, or presentation-side down if not. Listen for that satisfying, immediate sizzle. Cook without moving them for 5-6 minutes, or until the underside is a deep, burnished gold. The edges will look crisp and the chicken should release easily from the pan. Flip and cook for another 4 minutes. The second side won’t get as dark, but it should be a warm golden brown. Transfer the chicken to a plate. You should see a sticky, brown fond (the caramelised bits) left in the pan.
- Sweat the aromatics. Reduce the heat to medium. Add the minced garlic and grated ginger to the hot pan. They will immediately sizzle and release a fragrant, heady perfume. Stir constantly for 30-40 seconds until they become fragrant and just start to soften. Do not let them burn, or they will become bitter. You want them to smell sweet and savoury.
- Build the sauce base. Pour in the sriracha, honey, soy sauce, rice vinegar, and tomato purée. Stir everything together with a wooden spoon, scraping up all those delicious browned bits from the bottom of the pan. This is the deglazing step, where we incorporate all the flavour from the seared chicken. The mixture will bubble and steam, becoming a dark, rich reddish-brown. Let it cook for 2 minutes, stirring, until it thickens slightly and smells intensely sweet and spicy.
- Simmer the chicken. Pour in the chicken stock and bring the sauce to a gentle boil. You will see large, lazy bubbles across the surface. Return the seared chicken thighs to the skillet, nestling them into the sauce. They should be partially submerged. Reduce the heat to low, cover the pan with a lid, and let it simmer gently for 20 minutes. The kitchen will fill with a sweet, spicy, savoury steam. The chicken should be fork-tender and cooked through.
- Thicken the sauce. Remove the lid and increase the heat to medium-high. The sauce will be bubbling more vigorously. Give the cornflour slurry a quick stir (it settles quickly) and pour it into the pan, stirring constantly. Within 30 seconds, you will see the sauce change from a thin liquid to a glossy, thick glaze that coats the back of your spoon. Let it bubble for another 1-2 minutes until it reaches your desired consistency. The colour will deepen to a rich mahogany.
- Glaze and rest. Spoon the thickened sauce over the chicken pieces to give them a final, glossy coat. Turn off the heat and let the skillet rest for 5 minutes. This is a crucial step; it allows the chicken to reabsorb some of its juices and the sauce to set slightly. Sprinkle with the sliced spring onions and toasted sesame seeds just before serving.
Notes
So there it is—a proper weekend project that rewards your patience with a deep, glossy, and deliciously sticky meal. I hope you find the same joy in the slow sizzle and the sweet, spicy steam that fills the kitchen as I do. If you give this Honey Sriracha Chicken Skillet a try, I’d love to know how you get on. Leave a comment below and tell me about your own experience with this dish. Happy cooking.