Classic Chocolate Cake

There are few things more comforting on a grey, lazy Sunday than the scent of a Classic Chocolate Cake slowly filling the kitchen. I find the process almost meditative—the soft sift of flour, the rich, dark promise of cocoa, the gentle hum of the mixer. This isn’t a recipe for speed; it’s an invitation to slow down, to measure carefully, and to enjoy the simple, profound pleasure of baking something truly wonderful from scratch.
Recipe Overview
- Prep Time: 25 minutes
- Cook Time: 35 minutes
- Total Time: 1 hour (plus cooling)
- Servings: 10-12 generous slices
- Difficulty: Comfortably Intermediate
Why You’ll Love This Classic Chocolate Cake
- Deeply Rich Flavour: The combination of good quality cocoa and hot coffee deepens the chocolate notes without making the cake taste of coffee at all. It’s a little secret that makes all the difference.
- Unbeatably Moist Crumb: Buttermilk and oil ensure this cake stays tender and luscious for days, not hours. It’s the kind of texture that makes you close your eyes with the first bite.
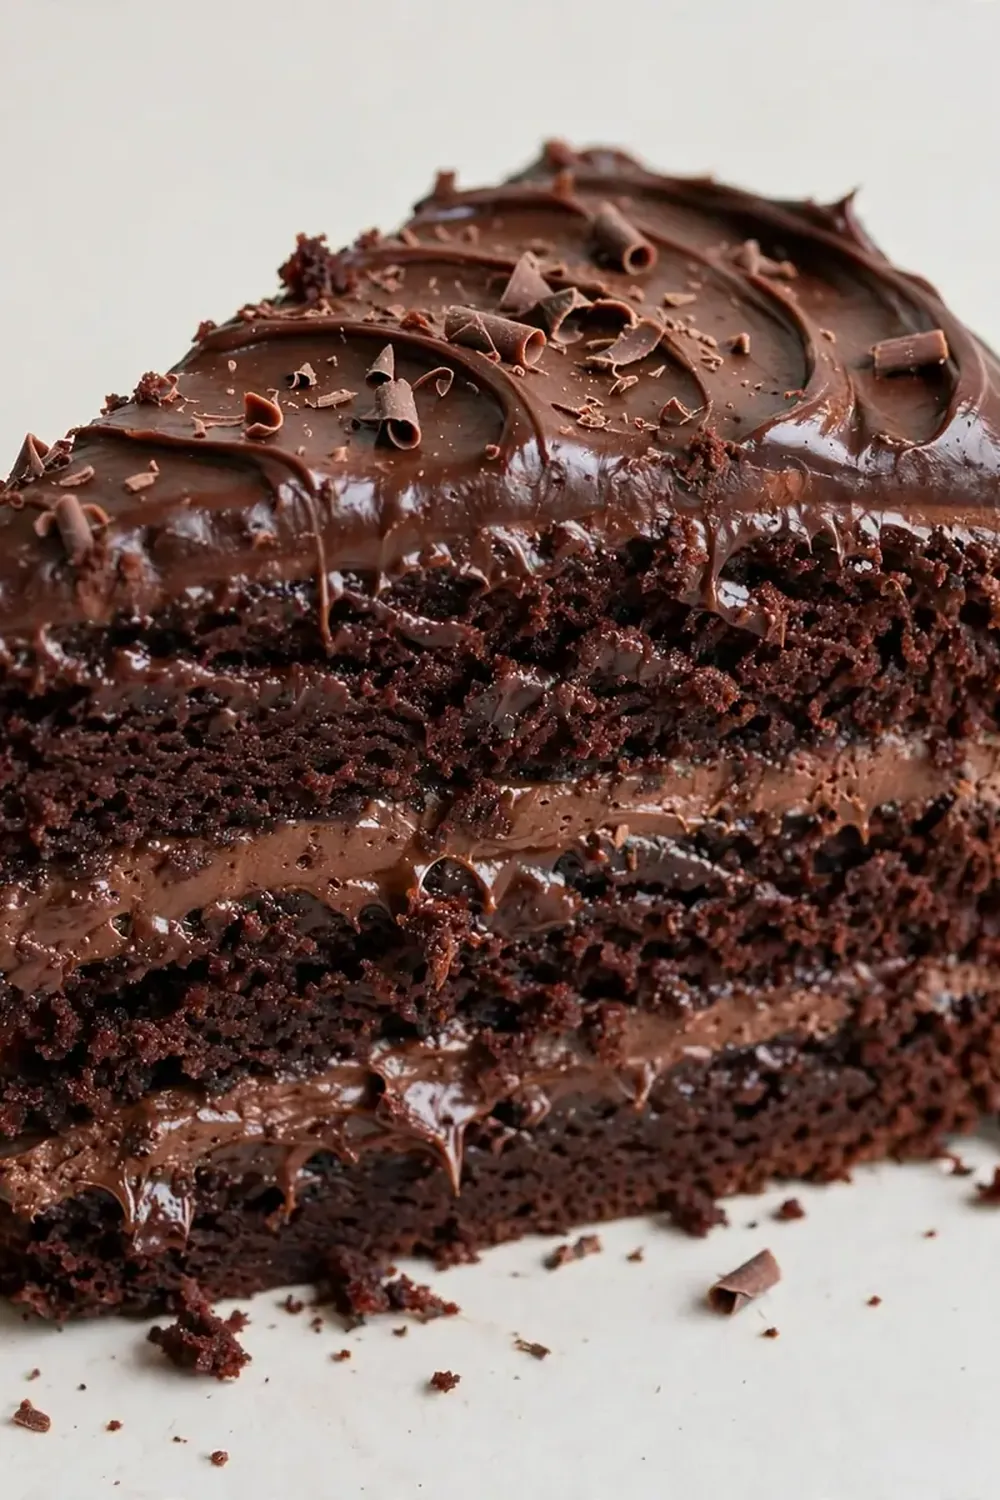
- Perfectly Balanced Sweetness: This isn’t a sickly-sweet confection. The dark chocolate ganache frosting provides a sophisticated, slightly bitter counterpoint to the soft, sweet sponge.
- A Genuine Weekend Project: From the first stir to the final glossy swirl of frosting, this recipe is designed to be savoured. It’s a perfect way to spend a cosy afternoon, with a rewarding result that feels like a real achievement.
- Consistently Reliable: After testing this recipe five times, I finally got it just right. Friends always ask me for this recipe after trying it at dinner parties, and I’m always happy to share it.
Ingredients You’ll Need
- 250g plain flour
- 65g good quality cocoa powder (not drinking chocolate)
- 1½ tsp bicarbonate of soda
- ½ tsp fine sea salt
- 300g golden caster sugar
- 2 large free-range eggs, at room temperature
- 240ml buttermilk, shaken
- 120ml sunflower or vegetable oil
- 2 tsp vanilla extract
- 240ml freshly brewed hot coffee (or strong black tea)
- For the Ganache Frosting:
- 200g dark chocolate (70% cocoa), finely chopped
- 200ml double cream
- 1 tbsp golden syrup
- A pinch of sea salt flakes
Tip: For the most intense chocolate flavour, use a high-quality cocoa powder. The hot coffee is non-negotiable here; it blooms the cocoa, unlocking a depth you simply can’t achieve with water alone.
How to Make Classic Chocolate Cake
- Preheat and prepare: Set your oven to 180°C (160°C fan) and grease two 20cm round cake tins. Line the bases with a disc of baking paper. The tins should feel lightly greased to the touch.
- Combine the dry ingredients: In a large bowl, sift together the flour, cocoa powder, bicarbonate of soda, and salt. Whisk in the golden caster sugar. The mixture should look a pale, even brown and smell faintly of rich cocoa.
- Mix the wet ingredients: In a separate jug or bowl, lightly beat the eggs. Add the buttermilk, oil, and vanilla extract. Whisk until the mixture is a uniform, pale caramel colour and completely combined.
- Bring it together: Pour the wet mixture into the bowl of dry ingredients. Stir gently with a wooden spoon or spatula until just combined. The batter will look thick and slightly lumpy—do not overmix.
- Add the hot coffee: Pour the hot coffee into the batter and stir slowly but steadily. Watch as the thick paste transforms into a very thin, silky, dark liquid. It will smell deeply of chocolate and coffee. Scrape the sides and bottom of the bowl to ensure everything is incorporated.
- Bake the sponges: Divide the batter evenly between the two prepared tins. The batter is very runny, so pour carefully. Bake for 30-35 minutes. The cakes are ready when a skewer inserted into the centre comes out clean, and the tops spring back when lightly pressed. The edges will have started to pull away from the tin, and a warm, heady chocolate aroma will fill your kitchen.
- Cool completely: Leave the cakes in their tins for 10 minutes, then turn them out onto a wire rack to cool completely. This is vital—a warm cake will melt your ganache into a puddle. The sponges should feel firm but light and smell irresistibly rich.
- Make the ganache: Place the finely chopped dark chocolate in a heatproof bowl. Gently heat the double cream and golden syrup in a small saucepan until it just begins to steam and small bubbles appear around the edge. Do not let it boil. Pour the hot cream over the chocolate and let it sit undisturbed for 2 minutes. Stir slowly from the centre outwards until you have a perfectly smooth, glossy, dark ganache. Stir in the salt flakes.
- Assemble and frost: Set aside a few tablespoons of ganache for the top. Place one cooled cake layer on your serving plate. Spread a generous layer of ganache over the top. Place the second layer on top. Pour the remaining ganache over the centre of the cake, letting it flow naturally down the sides. Use a palette knife to smooth it if you like, or leave a rustic finish. Drizzle the reserved ganache on top and create swirls with a toothpick.
Tips From My Kitchen
- Weigh your flour correctly: The most common mistake is using too much flour. Spoon the flour into your measuring cup or use a digital scale for accuracy. A heavy hand results in a dry, dense cake instead of a light, tender crumb. The texture should feel soft and airy, not tight.
- Room temperature ingredients are crucial: Cold eggs or buttermilk can cause your batter to curdle or not emulsify properly. Take them out of the fridge at least 30 minutes before you start. This helps the batter come together into a smooth, homogenous mixture that bakes evenly.
- Don’t skip the buttermilk: Buttermilk’s acidity tenderises the gluten in the flour, which is why this cake is so exceptionally moist. If you don’t have any, you can make a quick substitute by adding 1 tablespoon of lemon juice or white vinegar to 240ml of whole milk and letting it sit for 5 minutes to curdle.
- Let the ganache set: For the neatest finish, allow the assembled cake to sit at room temperature for about 30 minutes after frosting. This gives the ganache time to firm up slightly, making it easier to slice without the layers sliding. The final sheen should be glossy but set.
- Use a serrated knife for slicing: To get clean, beautiful slices without squashing the delicate sponge, use a long, sharp serrated knife. Use a gentle sawing motion rather than pressing down. The cake should cut cleanly, revealing a dark, moist crumb.
Common Mistakes to Avoid
- Overcrowding the pan: Ensure your tins are the correct size (20cm). Using smaller tins will cause the batter to overflow, resulting in a messy oven and a lopsided cake. The batter should fill the tins about two-thirds full to allow for a proper, even rise.
- Wrong temperature: An oven that’s too hot will cause the cake to dome and crack on top, while a cool oven will produce a dense, gummy texture. Invest in an oven thermometer to guarantee your oven is at a true 180°C. The cakes should rise evenly with a flat, slightly domed top.
- Skipping the rest time: Resisting the urge to cut into a warm cake is the hardest part, but it’s essential. A warm cake is fragile and will crumble. Cooling it completely on a wire rack allows the structure to set, ensuring neat, sliceable pieces that hold their shape beautifully.
Delicious Variations to Try
- Spicy Version: Add a teaspoon of ground cinnamon and a generous pinch of cayenne pepper to the dry ingredients. The gentle heat from the cayenne wonderfully complements the deep chocolate flavour, creating a surprisingly sophisticated twist.
- Vegetarian/Vegan Option: This cake is naturally vegetarian. For a vegan version, replace the eggs with a “flax egg” (1 tbsp ground flaxseed mixed with 3 tbsp water per egg, left to gel for 5 minutes). Use a plant-based buttermilk (soya or oat milk with a splash of lemon juice) and replace the double cream in the ganache with full-fat coconut cream. The result is still wonderfully rich and moist.
- Different Protein: While this is a classic chocolate cake, you can easily turn it into a showstopper dessert. Slice the cooled cake horizontally to create three layers, and fill with a layer of whipped cream and fresh raspberries. It transforms the cake into a stunning celebration centrepiece.
What to Serve With Classic Chocolate Cake
A slice of this cake is magnificent on its own, but a few thoughtful accompaniments can elevate it into a proper dessert experience.
- A dollop of softly whipped, lightly sweetened double cream.
- A scoop of good quality vanilla or honeycomb ice cream.
- A handful of fresh, sharp raspberries or sliced strawberries to cut through the richness.
- A perfectly brewed cup of strong black coffee or a pot of English breakfast tea.
- For a savoury contrast before you indulge, try this Sticky Sweet Teriyaki Chicken Bowls for dinner—the balance is divine.
Still hungry for ideas? You might also love Indulgent Chocolate Tray Cake Recipe, Decadent Chocolate Cake With Creamy Frosting from our sister kitchens.
Frequently Asked Questions
Classic Chocolate Cake
Ingredients
Method
- Preheat and prepare: Set your oven to 180°C (160°C fan) and grease two 20cm round cake tins. Line the bases with a disc of baking paper. The tins should feel lightly greased to the touch.
- Combine the dry ingredients: In a large bowl, sift together the flour, cocoa powder, bicarbonate of soda, and salt. Whisk in the golden caster sugar. The mixture should look a pale, even brown and smell faintly of rich cocoa.
- Mix the wet ingredients: In a separate jug or bowl, lightly beat the eggs. Add the buttermilk, oil, and vanilla extract. Whisk until the mixture is a uniform, pale caramel colour and completely combined.
- Bring it together: Pour the wet mixture into the bowl of dry ingredients. Stir gently with a wooden spoon or spatula until just combined. The batter will look thick and slightly lumpy—do not overmix.
- Add the hot coffee: Pour the hot coffee into the batter and stir slowly but steadily. Watch as the thick paste transforms into a very thin, silky, dark liquid. It will smell deeply of chocolate and coffee. Scrape the sides and bottom of the bowl to ensure everything is incorporated.
- Bake the sponges: Divide the batter evenly between the two prepared tins. The batter is very runny, so pour carefully. Bake for 30-35 minutes. The cakes are ready when a skewer inserted into the centre comes out clean, and the tops spring back when lightly pressed. The edges will have started to pull away from the tin, and a warm, heady chocolate aroma will fill your kitchen.
- Cool completely: Leave the cakes in their tins for 10 minutes, then turn them out onto a wire rack to cool completely. This is vital—a warm cake will melt your ganache into a puddle. The sponges should feel firm but light and smell irresistibly rich.
- Make the ganache: Place the finely chopped dark chocolate in a heatproof bowl. Gently heat the double cream and golden syrup in a small saucepan until it just begins to steam and small bubbles appear around the edge. Do not let it boil. Pour the hot cream over the chocolate and let it sit undisturbed for 2 minutes. Stir slowly from the centre outwards until you have a perfectly smooth, glossy, dark ganache. Stir in the salt flakes.
- Assemble and frost: Set aside a few tablespoons of ganache for the top. Place one cooled cake layer on your serving plate. Spread a generous layer of ganache over the top. Place the second layer on top. Pour the remaining ganache over the centre of the cake, letting it flow naturally down the sides. Use a palette knife to smooth it if you like, or leave a rustic finish. Drizzle the reserved ganache on top and create swirls with a toothpick.
Notes
I hope this recipe becomes a treasured part of your weekend repertoire, just as it has in mine. There is nothing quite like the quiet satisfaction of pulling a perfectly risen, deeply chocolatey cake from your own oven. If you give it a go, I would love to hear how you get on—share your thoughts, your own little twists, or just a story of a cosy afternoon well spent in the comments below.