Baked Bbq Chicken Thighs
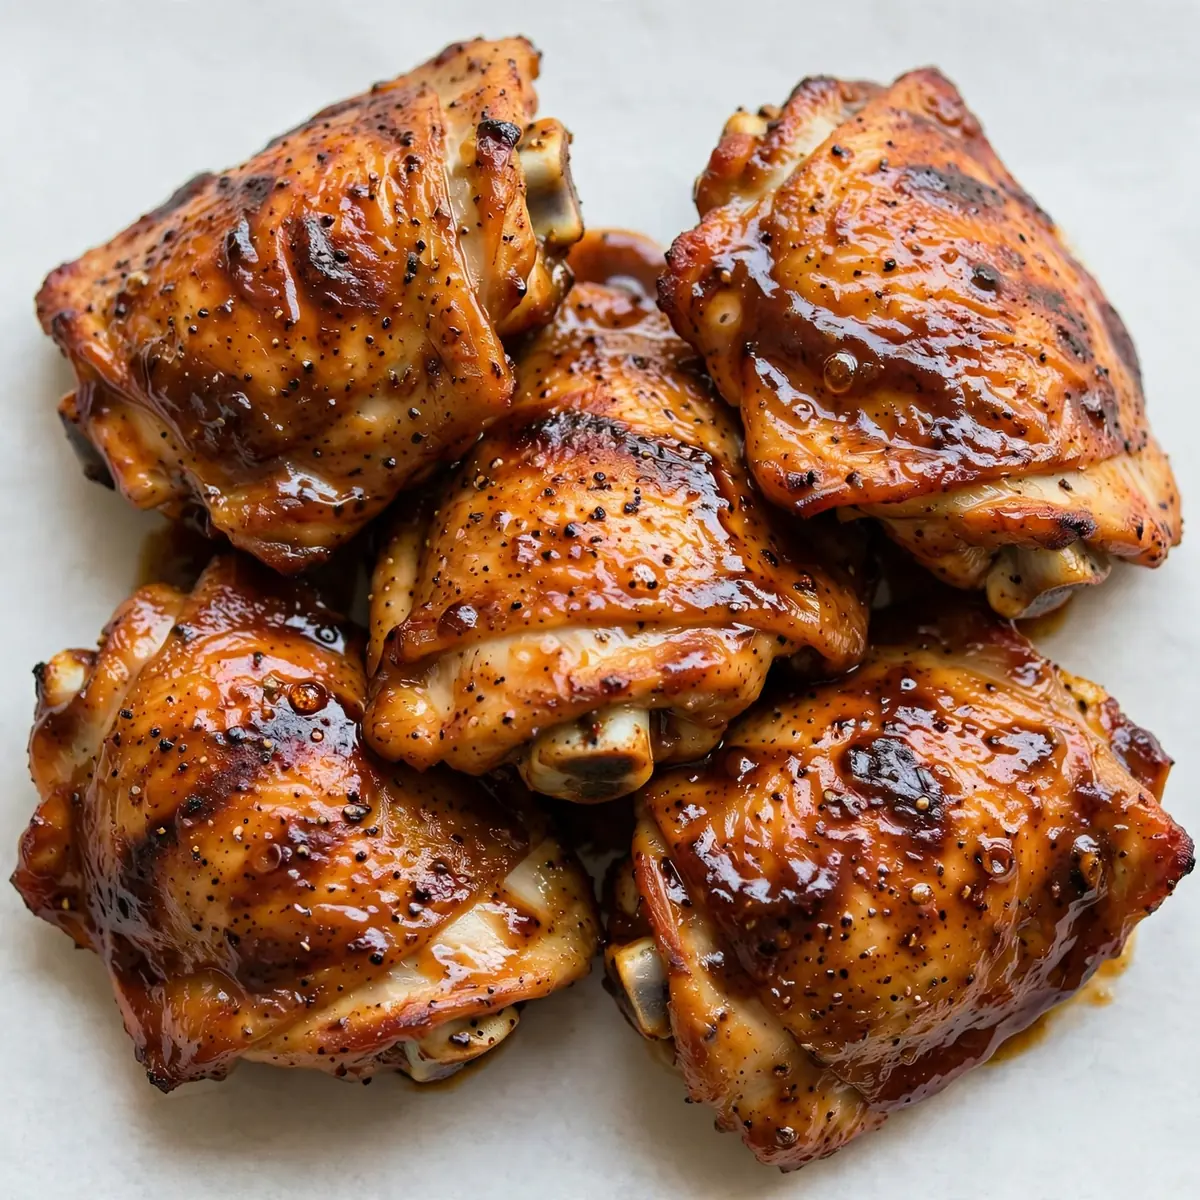
There are some evenings when only a low, slow bake will do, filling the house with the sort of sweet, smoky scent that makes the whole week melt away. This recipe for Baked BBQ Chicken Thighs is my favourite weekend project, a deeply satisfying way to spend an hour or two pottering about the kitchen, and the reward is impossibly tender, sticky, and gloriously caramelised chicken.
Recipe Overview
- Prep Time: 20 minutes (plus 1 hour minimum for marinating)
- Cook Time: 45-55 minutes
- Total Time: 1 hour 15 minutes (plus marinating time)
- Servings: 4-6
- Difficulty: Easy
Why You’ll Love This Baked BBQ Chicken Thighs
- Deeply Satisfying Aromas: The kitchen fills with a complex, sweet-savoury fragrance long before dinner is ready, building anticipation with every minute.
- Unbeatably Tender Texture: Baking chicken thighs low and slow renders the fat beautifully, resulting in meat that pulls apart with the gentlest nudge of a fork.
- That Perfect, Sticky Glaze: We build layers of flavour, finishing with a final brush of sauce that creates a glossy, caramelised crust without a hint of burning.
- A Proper Weekend Rhythm: This isn’t a rushed midweek meal. It encourages you to slow down, enjoy the process, and savour the anticipation as much as the eating.
- Foolproof for Any Cook: The method is forgiving and the sensory cues are clear, making it a wonderful confidence-building dish for anyone learning their way around the oven.

Ingredients You’ll Need
- 1 kg bone-in, skin-on chicken thighs (about 6-8 thighs)
- 2 tablespoons olive oil
- 4 cloves garlic, minced
- 2 teaspoons smoked paprika
- 1 teaspoon onion powder
- 1 teaspoon ground cumin
- ½ teaspoon cayenne pepper (optional, for a gentle warmth)
- 1 teaspoon fine sea salt
- ½ teaspoon black pepper
For the BBQ Glaze:
- 200 ml tomato ketchup
- 60 ml apple cider vinegar
- 60 ml honey
- 2 tablespoons dark brown sugar
- 1 tablespoon Worcestershire sauce (ensure it’s halal-certified, or use tamari)
- 1 teaspoon mustard powder
- 1 teaspoon smoked paprika
Tip: For the most flavourful result, try to buy chicken thighs that are roughly the same size. This ensures they all finish cooking at the same time, giving you a beautifully consistent batch.
How to Make Baked BBQ Chicken Thighs
- Prepare the Chicken: Pat the chicken thighs dry with kitchen paper. This is a crucial first step—dry skin will crisp up far better in the oven. In a small bowl, mix the olive oil, minced garlic, smoked paprika, onion powder, cumin, cayenne (if using), salt, and pepper. Rub this fragrant, deep-red paste all over the chicken thighs, working it gently under the skin if you can. The smell of the smoked paprika and garlic alone is deeply comforting.
- Let the Flavours Mingle: Place the seasoned thighs in a single layer in a dish, cover, and refrigerate for at least an hour, or overnight for a more profound flavour. When you open the fridge, you’ll be greeted by a wonderfully aromatic promise of what’s to come.
- Make the BBQ Glaze: While the chicken marinates, combine all the glaze ingredients in a small saucepan. Bring it to a gentle simmer over a medium heat, stirring occasionally. You’ll notice the colour deepen from bright red to a rich, mahogany hue, and the vinegar smell will soften into a sweet, tangy perfume. Let it bubble gently for about 10 minutes, until it has thickened enough to coat the back of a spoon. Set aside to cool.
- Preheat and Prepare for Baking: Preheat your oven to 180°C (350°F). Line a large, rimmed baking tray with foil or parchment paper for easier cleanup. Place a wire rack on top of the tray—this allows hot air to circulate all around the chicken, helping the skin to render and crisp.
- The First Bake: Arrange the marinated chicken thighs on the wire rack, skin-side up. Slide the tray into the oven and bake for 30 minutes. At this stage, the skin will have started to turn a light golden brown and the kitchen will be filled with the comforting scent of roasting spices and chicken. The fat will have begun to render, sizzling quietly.
- Glaze and Bake Again: Remove the tray from the oven. Using a basting brush, paint a generous, even layer of the BBQ glaze over each piece of chicken. The sizzle as the cool sauce hits the hot skin is a wonderful sound. Return the tray to the oven and bake for another 10 minutes. The glaze will start to set and become sticky.
- Final Glaze and Rest: Take the chicken out again and apply another, final coat of the glaze. Bake for a final 10-15 minutes. The chicken is ready when the internal temperature reads 74°C (165°F) on a meat thermometer, and the skin is a deep, glossy bronze with slightly charred, caramelised edges. The smell at this point is utterly intoxicating—sweet, smoky, and savoury. Let the thighs rest on the wire rack for 5-10 minutes before serving. This allows the juices to redistribute, ensuring every bite is succulent.
Tips From My Kitchen
- Low and Slow is the Golden Rule: Baking at 180°C (350°F) is the sweet spot. A higher temperature might char the sugar in the glaze before the chicken is cooked through, while a lower temperature won’t give you that desirable sticky finish. This gentle heat renders the fat slowly, resulting in impossibly tender meat.
- Always Use a Rack: Placing the chicken on a wire rack is non-negotiable for the best texture. It lifts the thighs out of the rendered fat, preventing them from stewing in their own juices. The hot air circulates underneath, crisping the skin evenly all over. Without it, the bottom of the chicken will be soft and pale.
- Don’t Rush the Glaze: The two-stage glazing process is key. The first coat sets a sticky base, and the second coat, applied towards the end of cooking, creates that glorious, lacquered finish without burning. If you apply all the glaze at once, it can slide off or become overly caramelised and bitter.
- Trust Your Thermometer, Not the Clock: Ovens vary, and chicken thighs can differ in size. A meat thermometer is your most reliable friend here. The safe internal temperature for chicken is 74°C (165°F). Insert it into the thickest part of the thigh, avoiding the bone, for an accurate reading. This takes all the guesswork out of cooking.
- Let it Rest for Juicy Results: This step is often overlooked but is vital. Resting the chicken allows the muscle fibres to relax and reabsorb the juices that have been forced to the centre during cooking. If you cut into it immediately, those precious juices will run out onto the board, leaving you with drier meat. Patience is its own reward here.
Equipment You’ll Need
- Rimmed baking tray
- Wire rack that fits inside the tray
- Small saucepan for the glaze
- Meat thermometer
- Basting brush
- Kitchen tongs
Delicious Variations to Try
- Spicy Version: For a real kick, add a finely chopped red chilli or a teaspoon of chilli flakes to the dry rub. You can also stir a tablespoon of your favourite hot sauce into the BBQ glaze for an extra layer of heat that builds beautifully.
- Vegetarian/Vegan Option: This glaze and method work wonderfully with large portobello mushroom caps or thick slices of firm tofu. Press the tofu well first, then marinate and bake. For mushrooms, score the tops lightly to help the glaze penetrate. Reduce the baking time to around 20-25 minutes, glazing halfway through.
- Different Protein: This exact recipe and timing is also fantastic with chicken drumsticks. For a beef option, try it with short ribs, though you will need to increase the cooking time significantly (closer to 2 hours at the same temperature) until they are fork-tender. The same glaze is a wonderful match for the richness of beef.
What to Serve With Baked BBQ Chicken Thighs
This dish calls for sides that can soak up all that extra, glorious glaze. Here are a few of my favourite companions:
- Creamy Coleslaw: The sharp, cool crunch of a simple vinegar-based or creamy coleslaw is a perfect foil for the rich, sticky chicken.
- Buttered Corn on the Cob: Sweet, juicy corn, slathered in butter, is a classic for a reason. It’s a wonderful, messy, and joyous side.
- Fluffy Mashed Potatoes: A bed of smooth, buttery mashed potatoes is the ideal canvas for any extra BBQ sauce pooling on the plate. It’s pure comfort.
- Grilled or Roasted Vegetables: Asparagus, courgette, and bell peppers, simply charred or roasted with a little olive oil, salt, and pepper, add a lovely freshness.
- Cornbread or Soft Bread Rolls: Something fluffy and slightly sweet, like cornbread, is perfect for mopping up every last bit of that sticky, tangy glaze from the plate.
If you are looking for more ideas for a full spread, explore the Dinner section on Www.Cuisinespicy.Com for plenty of inspiration.
Still hungry for ideas? You might also love Crispy Baked Chicken Thighs Easy Recipe The Ultimate Guide To Golden Juicy, Savory Soy Garlic Chicken Thighs Recipe For Dinner from our sister kitchens.
Frequently Asked Questions
Baked BBQ Chicken Thighs
Ingredients
Method
- Prepare the Chicken: Pat the chicken thighs dry with kitchen paper. This is a crucial first step—dry skin will crisp up far better in the oven. In a small bowl, mix the olive oil, minced garlic, smoked paprika, onion powder, cumin, cayenne (if using), salt, and pepper. Rub this fragrant, deep-red paste all over the chicken thighs, working it gently under the skin if you can. The smell of the smoked paprika and garlic alone is deeply comforting.
- Let the Flavours Mingle: Place the seasoned thighs in a single layer in a dish, cover, and refrigerate for at least an hour, or overnight for a more profound flavour. When you open the fridge, you'll be greeted by a wonderfully aromatic promise of what's to come.
- Make the BBQ Glaze: While the chicken marinates, combine all the glaze ingredients in a small saucepan. Bring it to a gentle simmer over a medium heat, stirring occasionally. You'll notice the colour deepen from bright red to a rich, mahogany hue, and the vinegar smell will soften into a sweet, tangy perfume. Let it bubble gently for about 10 minutes, until it has thickened enough to coat the back of a spoon. Set aside to cool.
- Preheat and Prepare for Baking: Preheat your oven to 180°C (350°F). Line a large, rimmed baking tray with foil or parchment paper for easier cleanup. Place a wire rack on top of the tray—this allows hot air to circulate all around the chicken, helping the skin to render and crisp.
- The First Bake: Arrange the marinated chicken thighs on the wire rack, skin-side up. Slide the tray into the oven and bake for 30 minutes. At this stage, the skin will have started to turn a light golden brown and the kitchen will be filled with the comforting scent of roasting spices and chicken. The fat will have begun to render, sizzling quietly.
- Glaze and Bake Again: Remove the tray from the oven. Using a basting brush, paint a generous, even layer of the BBQ glaze over each piece of chicken. The sizzle as the cool sauce hits the hot skin is a wonderful sound. Return the tray to the oven and bake for another 10 minutes. The glaze will start to set and become sticky.
- Final Glaze and Rest: Take the chicken out again and apply another, final coat of the glaze. Bake for a final 10-15 minutes. The chicken is ready when the internal temperature reads 74°C (165°F) on a meat thermometer, and the skin is a deep, glossy bronze with slightly charred, caramelised edges. The smell at this point is utterly intoxicating—sweet, smoky, and savoury. Let the thighs rest on the wire rack for 5-10 minutes before serving. This allows the juices to redistribute, ensuring every bite is succulent.
Notes
This recipe was inspired by a dish I had at a little restaurant in the American South, where the smell of smoke and sweet sauce seemed to hang in the air itself. I stumbled upon this particular combination of spices and glaze by accident one rainy Sunday, and it’s been a firm favourite in my kitchen ever since. The whole process is a gentle, aromatic meditation, and the result is a plate of chicken that feels like a proper, heartfelt hug. I’d love to know how you get on—please do share your thoughts and any tweaks you made in the comments below!