Lemon Garlic Butter Chicken Thighs
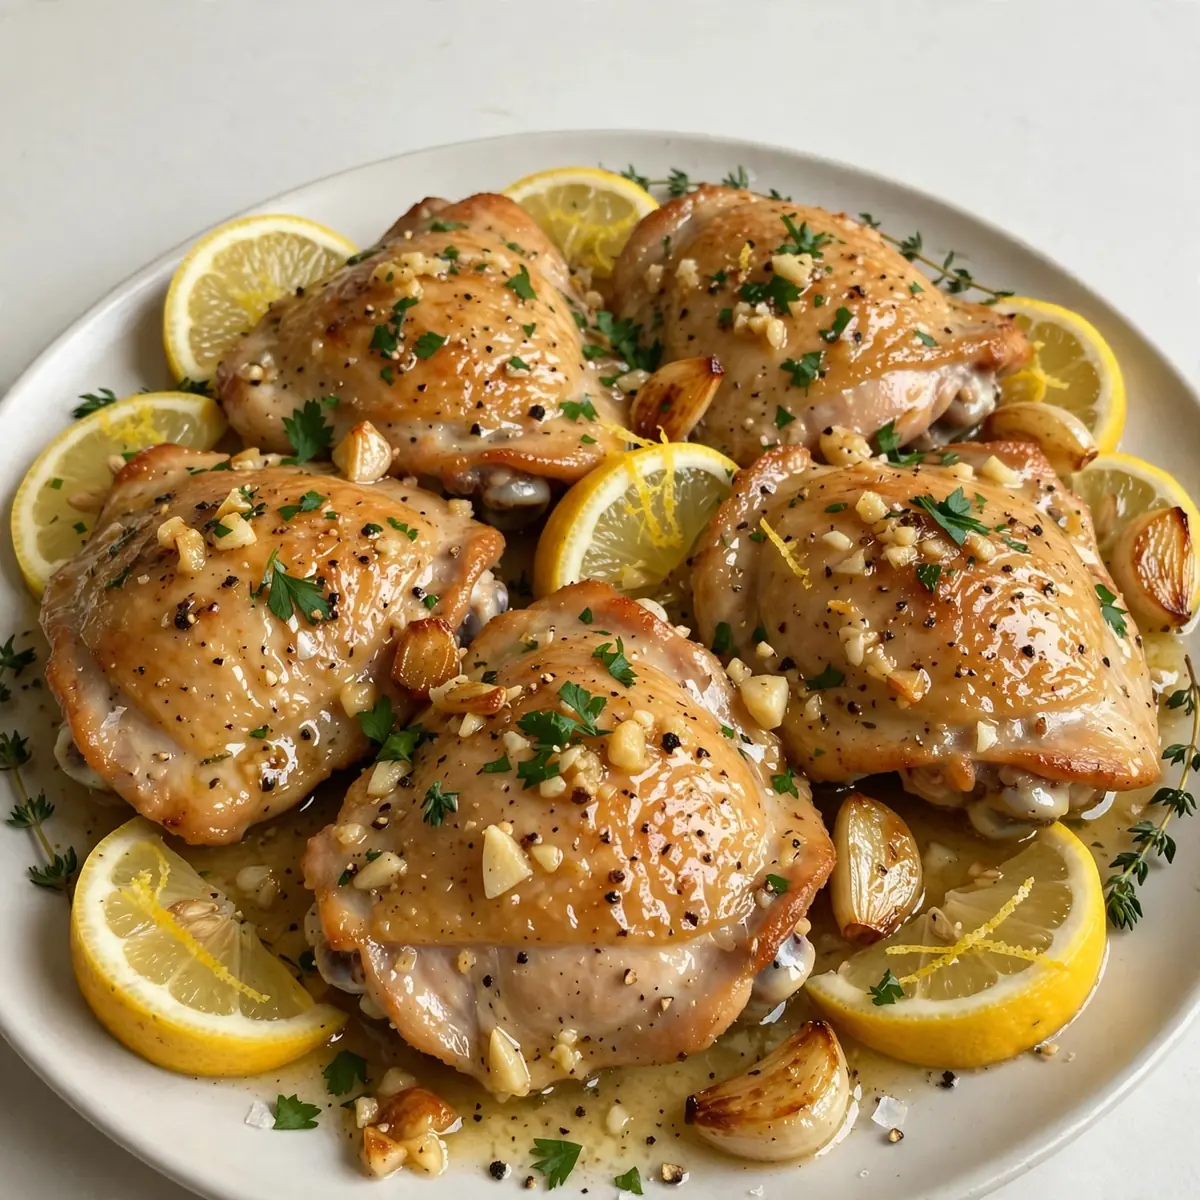
There are evenings when the only sensible thing to do is to surrender to the kitchen, let the phone buzz unanswered in your pocket, and allow a single pan to transform a handful of ordinary ingredients into something that feels like a proper hug. This lemon garlic butter chicken thighs recipe is my weekend anchor, a low-and-slow project that fills the house with the kind of buttery, garlicky perfume that makes everyone wander into the kitchen asking, “What’s for dinner?” before you’ve even finished searing the first batch.
Recipe Overview
- Prep time: 15 minutes
- Cook time: 35 minutes
- Total time: 50 minutes
- Servings: 4
- Difficulty: Easy
Why You’ll Love This Lemon Garlic Butter Chicken Thighs
- One pan, very little washing up. Everything happens in a single ovenproof skillet, from the initial sizzle of the skin to the final glossy bath of butter and lemon. You get all the flavour without a mountain of dishes.
- That golden, crackling skin. We’re not just cooking chicken; we’re building a crust. The skin turns shatteringly crisp, a textural contrast to the impossibly tender meat beneath, and it soaks up the garlic butter like a sponge.
- The aroma alone is worth the effort. The moment that butter hits the hot pan with the garlic and lemon, your kitchen becomes the cosiest room in the house. It’s a scent that signals comfort, slowness, and something deeply satisfying on the horizon.
- Forgiving and flexible. This recipe doesn’t demand precision. A few minutes extra in the oven won’t ruin it, and you can easily swap in different herbs or a splash of stock if that’s what you have on hand.
- Leftovers are a secret weapon. Cold, shredded chicken from this dish makes a phenomenal sandwich filling the next day, or you can toss it through pasta with a little extra butter for a lunch that feels like a second dinner.
Ingredients You’ll Need
- 8 bone-in, skin-on chicken thighs (about 1.2 kg)
- 2 teaspoons sea salt flakes
- 1 teaspoon freshly ground black pepper
- 1 tablespoon olive oil
- 60g unsalted butter
- 6 cloves garlic, thinly sliced (not crushed)
- 2 medium lemons (1 zested and juiced, 1 thinly sliced into rounds)
- 120ml chicken stock (low-sodium)
- 2 tablespoons fresh thyme leaves (or 2 teaspoons dried)
- 1 tablespoon fresh rosemary, finely chopped
- 1 teaspoon smoked paprika (optional, for colour)
- Fresh flat-leaf parsley, to garnish (a small handful, chopped)
Tip: If you can only find boneless thighs, reduce the cooking time by about 10 minutes and check for doneness early. The skin-on, bone-in version gives you that extra layer of flavour and moisture that makes this dish so special, so I’d recommend seeking them out if you can.
How to Make Lemon Garlic Butter Chicken Thighs
- Prepare the chicken and preheat your oven. Set your oven to 200°C (180°C fan). Pat the chicken thighs thoroughly dry with kitchen paper – this is the single most important step for crispy skin. Season them generously on both sides with the salt, pepper, and smoked paprika, if using. Let them rest at room temperature for ten minutes while the pan heats up. You should see the salt begin to draw a little moisture from the skin, which you can blot away.
- Sear the skin to a deep gold. Place a large, ovenproof skillet (preferably cast iron) over medium-high heat and add the olive oil. When the oil shimmers and you see the faintest wisp of smoke, lay the chicken thighs in the pan, skin-side down. Do not crowd them – work in batches if necessary. Listen for that immediate, sharp sizzle. Let them cook undisturbed for 6-7 minutes. The skin will transform from pale and flabby to a deep amber, crackled and crisp. The edges will look lacy and dark. Flip the thighs and cook for another 3 minutes on the flesh side, just until browned. Transfer them to a plate; the pan will be hot and fragrant with browned bits.
- Build the butter sauce. Reduce the heat to medium. Add the butter to the skillet. Watch it melt and foam, then turn a gentle nutty brown – this takes about a minute. Toss in the sliced garlic and the fresh thyme and rosemary. Stir constantly for 30 seconds. The garlic should soften and become fragrant, but not colour beyond pale gold. The smell at this stage is intoxicating: herbal, buttery, and warm. Pour in the chicken stock, lemon juice, and lemon zest. Stir with a wooden spoon, scraping up all those browned bits from the bottom of the pan – that’s where the flavour lives. Let the sauce bubble and reduce for 2 minutes, until it looks slightly thickened and glossy.
- Nestle the chicken and lemon slices. Return the chicken thighs to the skillet, skin-side up, arranging them snugly. Tuck the lemon slices between the thighs. Spoon some of the buttery sauce over the top of each piece of chicken. The liquid should come about a third of the way up the sides of the chicken – if it looks too shallow, add a splash more stock.
- Roast until tender and golden. Transfer the skillet to the preheated oven. Roast for 25-30 minutes. Halfway through, baste the chicken with the pan juices using a large spoon. You’ll see the skin darken further and the sauce around the edges bubble and reduce. The chicken is ready when the internal temperature reaches 74°C at the thickest part, or when the juices run clear when you pierce the thigh with a skewer. The meat should feel tender, almost pulling away from the bone with a gentle nudge.
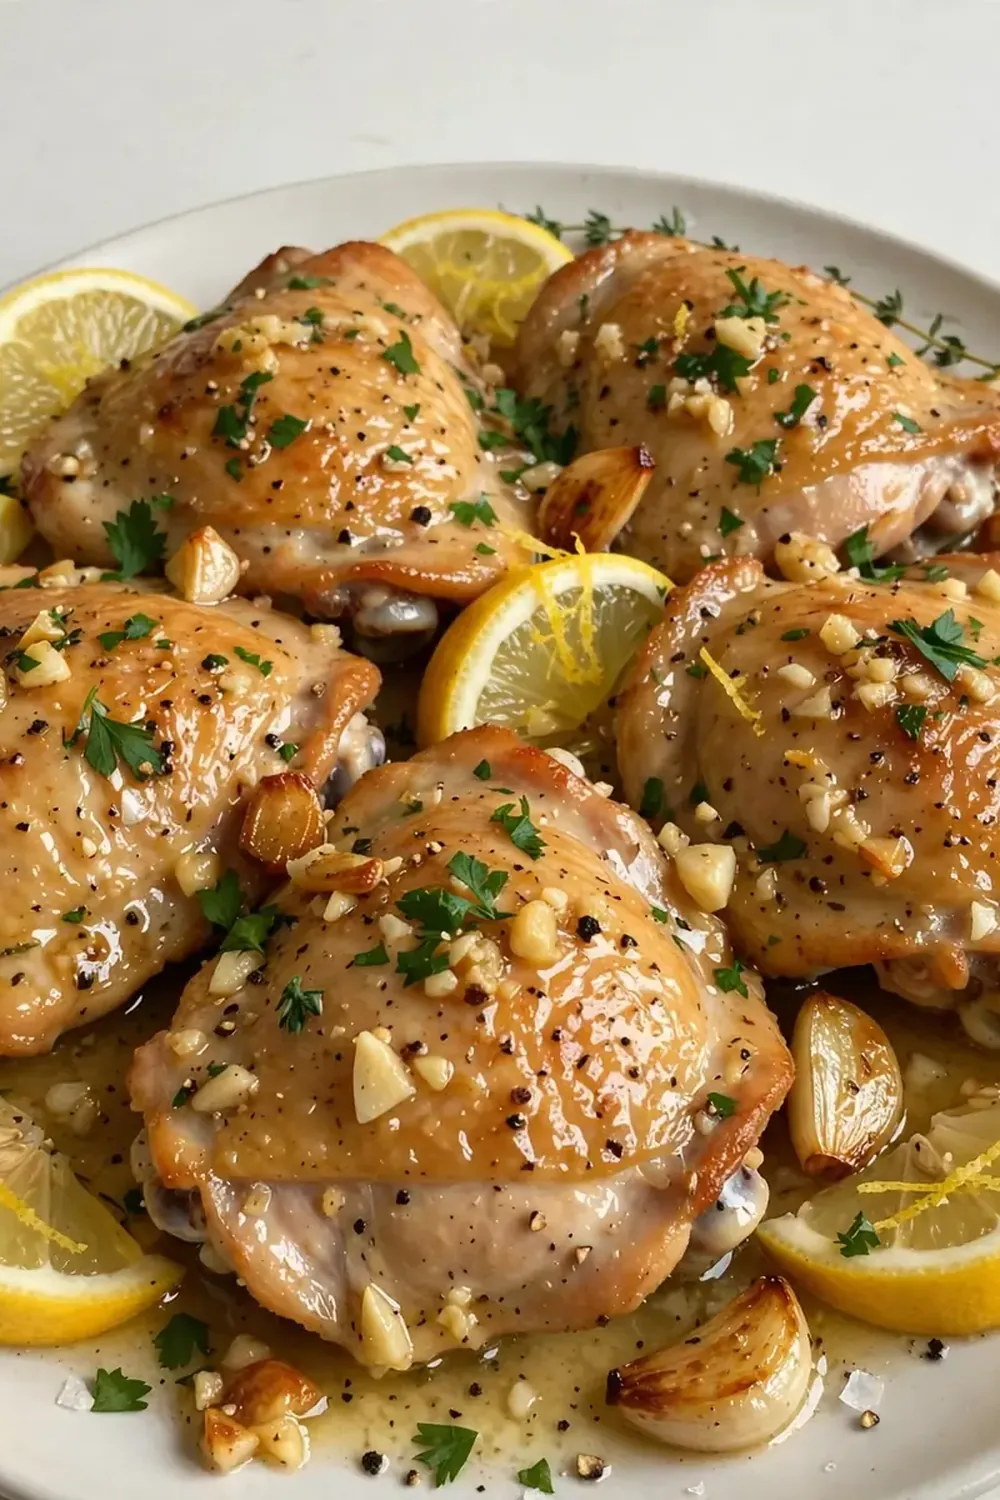
- Rest and finish. Remove the skillet from the oven and let it rest for 5 minutes. This allows the juices to redistribute so every bite is succulent. Scatter over the chopped fresh parsley. The sauce will have thickened into a rich, buttery, lemony glaze that coats the back of a spoon. Spoon it over the chicken one last time before serving.
Tips From My Kitchen
- Dry the chicken skin like your dinner depends on it. Moisture is the enemy of crisp skin. After patting the thighs dry, leave them uncovered in the fridge for an hour if you have time. The air circulation dries the surface even further. When you sear, that dry skin hits the hot fat and immediately begins to crisp, rather than steaming and turning rubbery. I’ve rushed this step before and ended up with pale, flabby skin – never again.
- Don’t move the chicken while it sears. It’s tempting to peek and prod, but the skin needs uninterrupted contact with the hot pan to form that golden crust. If you try to flip it too early, the skin will stick and tear. Let it cook for the full 6-7 minutes. You’ll know it’s ready when the skin releases easily from the pan and the edges look caramelised. The sound will shift from a frantic sizzle to a calmer, deeper crackle.
- Slice your garlic, don’t crush it. Crushed garlic burns quickly in hot butter and turns bitter. Thin slices soften and perfume the butter without scorching. They also look lovely scattered over the finished dish. If you prefer a milder garlic flavour, you can even leave the cloves whole and let them roast alongside the chicken; they’ll turn sweet and jammy.
- Use a pan you can take from hob to oven. This is a one-pan recipe at its finest. Cast iron is ideal, but any ovenproof skillet or shallow casserole dish will work. Avoid pans with plastic or wooden handles, and be careful when handling the hot skillet – that handle will be blazing. A good oven mitt is your best friend here.
- Adjust the lemon to your taste. Some lemons are more tart than others. If you prefer a brighter, sharper sauce, add the zest of a second lemon. For a milder, more buttery finish, use just the slices and skip the extra juice. Taste the sauce before it goes into the oven – it should be balanced, not mouth-puckering. A tiny pinch of sugar can soften any harsh acidity if needed.
- Let the chicken rest, even if you’re hungry. I know it’s hard, especially when the kitchen smells this good. But those five minutes of resting are crucial. If you cut into the chicken immediately, all those lovely juices will flood onto the plate, leaving the meat dry. A short rest lets the fibres relax and hold onto the moisture. Your patience will be rewarded with every tender, juicy bite.
What to Serve With Lemon Garlic Butter Chicken Thighs
- Fluffy rice or buttery mashed potatoes – both are perfect for soaking up every last drop of that garlic butter sauce. The starchiness balances the acidity of the lemon beautifully.
- Steamed green beans or tenderstem broccoli – a quick blanch in salted water, then tossed in a little of the pan sauce, keeps things fresh and vibrant. The bright green against the golden chicken is a lovely sight.
- A crisp green salad with a simple vinaigrette – the sharpness of the dressing cuts through the richness of the chicken. A few rocket leaves and shaved parmesan work wonderfully here.
- Crusty sourdough bread – because you’ll want to wipe the pan clean. Tear off a chunk and drag it through the buttery, lemony juices. It’s the best part of the meal, if I’m honest.
- Roasted new potatoes or baby potatoes – tossed in olive oil and rosemary, they can go into the oven on a separate tray while the chicken cooks. Their crispy edges and fluffy centres are a dream alongside this dish.
Still hungry for ideas? You might also love Lemon Garlic Chicken, Garlic Butter Chicken Rigatoni from our sister kitchens.
Frequently Asked Questions
Lemon Garlic Butter Chicken Thighs
Ingredients
Method
- Prepare the chicken and preheat your oven. Set your oven to 200°C (180°C fan). Pat the chicken thighs thoroughly dry with kitchen paper – this is the single most important step for crispy skin. Season them generously on both sides with the salt, pepper, and smoked paprika, if using. Let them rest at room temperature for ten minutes while the pan heats up. You should see the salt begin to draw a little moisture from the skin, which you can blot away.
- Sear the skin to a deep gold. Place a large, ovenproof skillet (preferably cast iron) over medium-high heat and add the olive oil. When the oil shimmers and you see the faintest wisp of smoke, lay the chicken thighs in the pan, skin-side down. Do not crowd them – work in batches if necessary. Listen for that immediate, sharp sizzle. Let them cook undisturbed for 6-7 minutes. The skin will transform from pale and flabby to a deep amber, crackled and crisp. The edges will look lacy and dark. Flip the thighs and cook for another 3 minutes on the flesh side, just until browned. Transfer them to a plate; the pan will be hot and fragrant with browned bits.
- Build the butter sauce. Reduce the heat to medium. Add the butter to the skillet. Watch it melt and foam, then turn a gentle nutty brown – this takes about a minute. Toss in the sliced garlic and the fresh thyme and rosemary. Stir constantly for 30 seconds. The garlic should soften and become fragrant, but not colour beyond pale gold. The smell at this stage is intoxicating: herbal, buttery, and warm. Pour in the chicken stock, lemon juice, and lemon zest. Stir with a wooden spoon, scraping up all those browned bits from the bottom of the pan – that’s where the flavour lives. Let the sauce bubble and reduce for 2 minutes, until it looks slightly thickened and glossy.
- Nestle the chicken and lemon slices. Return the chicken thighs to the skillet, skin-side up, arranging them snugly. Tuck the lemon slices between the thighs. Spoon some of the buttery sauce over the top of each piece of chicken. The liquid should come about a third of the way up the sides of the chicken – if it looks too shallow, add a splash more stock.
- Roast until tender and golden. Transfer the skillet to the preheated oven. Roast for 25-30 minutes. Halfway through, baste the chicken with the pan juices using a large spoon. You’ll see the skin darken further and the sauce around the edges bubble and reduce. The chicken is ready when the internal temperature reaches 74°C at the thickest part, or when the juices run clear when you pierce the thigh with a skewer. The meat should feel tender, almost pulling away from the bone with a gentle nudge.
- Rest and finish. Remove the skillet from the oven and let it rest for 5 minutes. This allows the juices to redistribute so every bite is succulent. Scatter over the chopped fresh parsley. The sauce will have thickened into a rich, buttery, lemony glaze that coats the back of a spoon. Spoon it over the chicken one last time before serving.
Notes
This is my go-to recipe when I need something that feels like a proper weekend project without being complicated. My kids absolutely devour this every time I make it – they fight over the last lemon slice, of all things. I’d love to hear how yours turns out. Did you add any twists? Did the aromas lure everyone into the kitchen? Drop a comment below and let me know. And if you’re in the mood for more cosy, one-pan meals, have a look at my Quick Garlic Butter Shrimp Recipe or the Sticky Sweet Teriyaki Chicken Bowls for another night of low-effort, high-reward cooking. Happy cooking, friends.