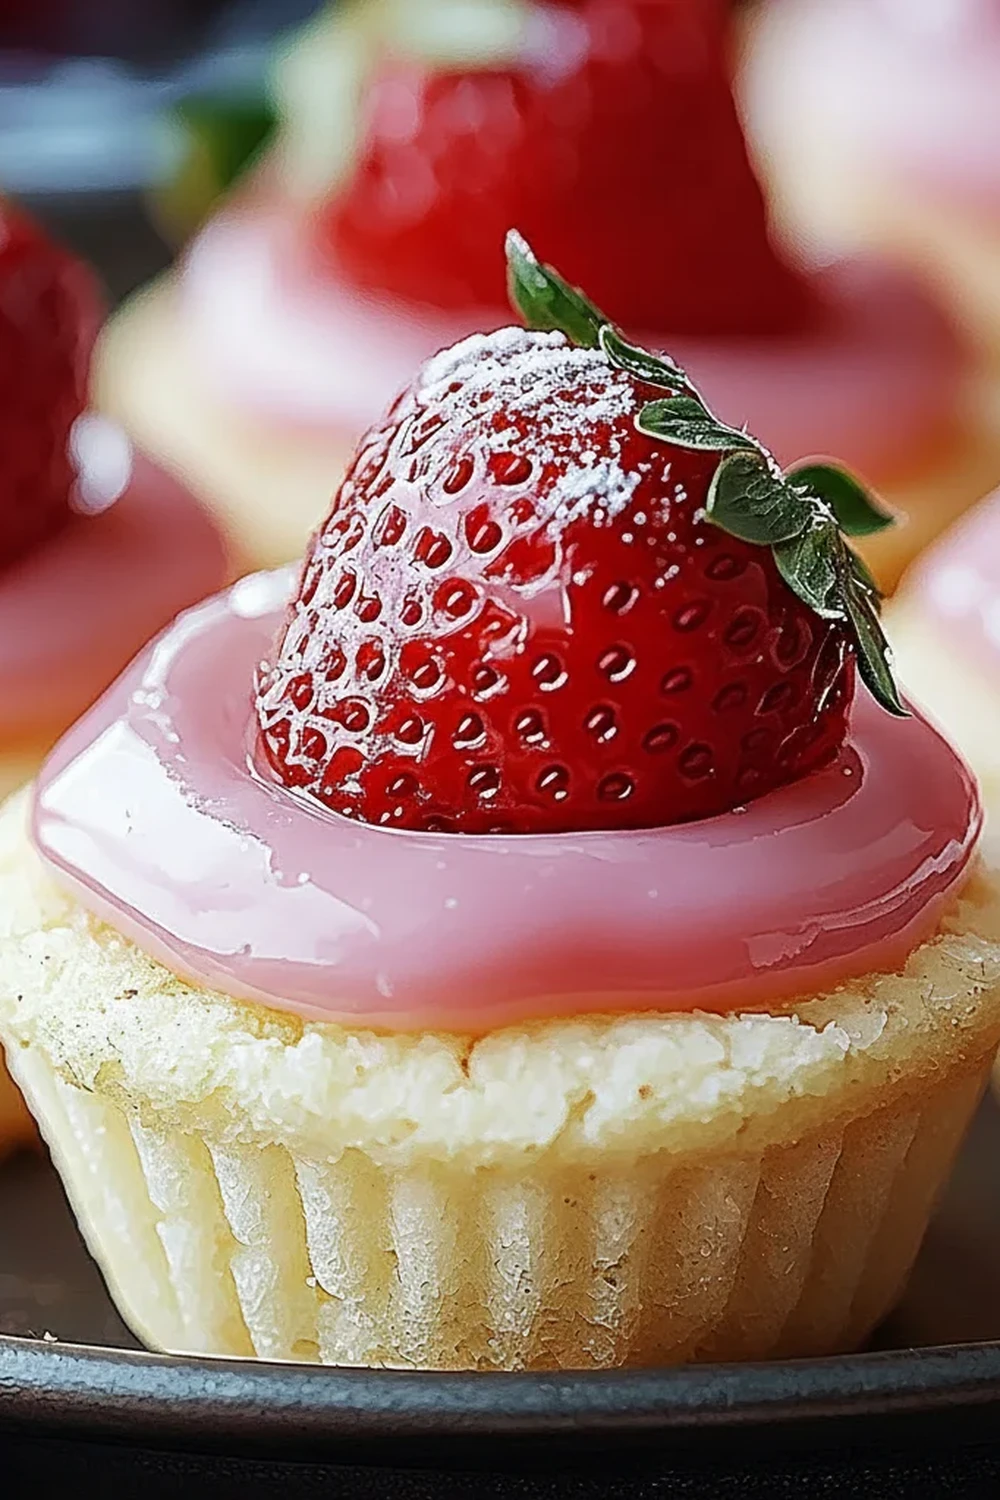
Strawberry Sugar Cookie Cups
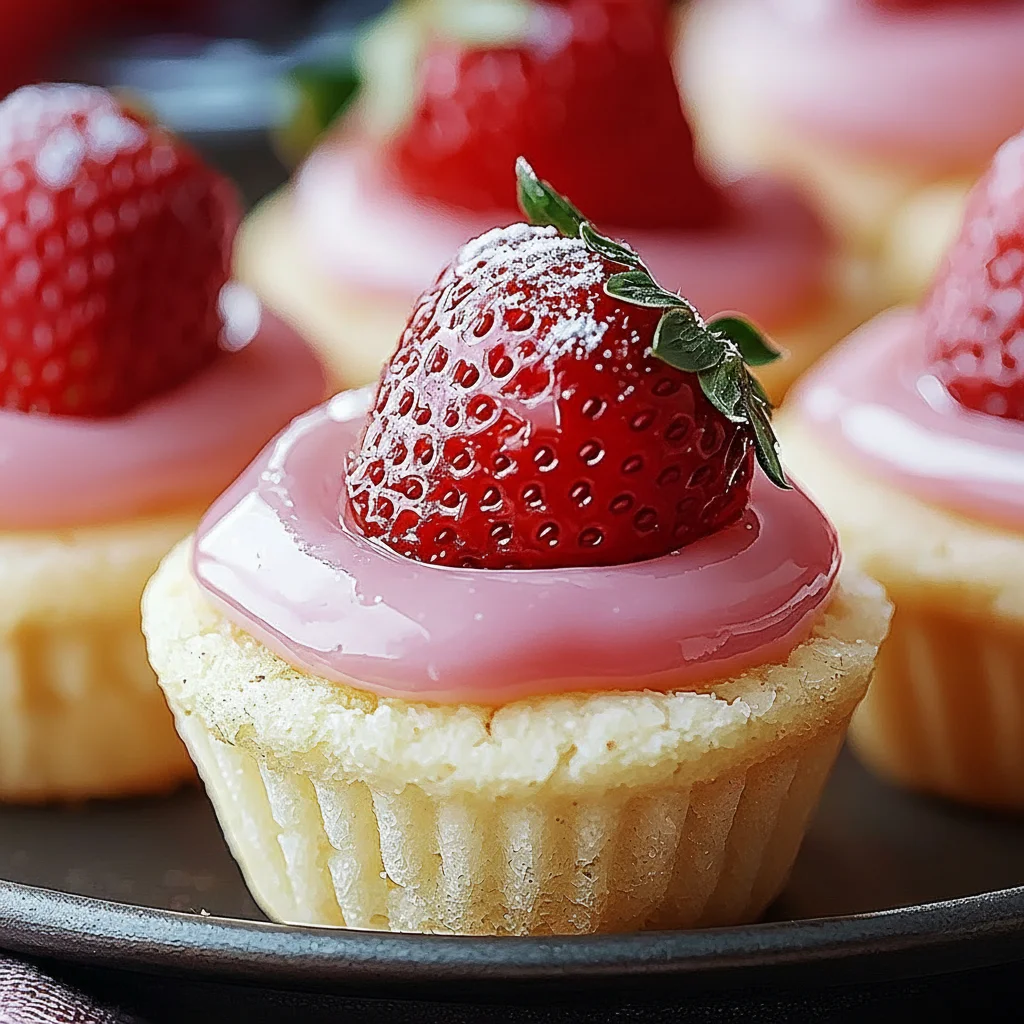
There are some desserts that just capture the essence of a season, and for me, these Strawberry Sugar Cookie Cups are the taste of British summertime in a single bite. They bring together three of my favourite things: a soft, buttery sugar cookie, a luscious cream cheese filling, and a perfectly ripe, juicy strawberry perched on top. They look so elegant and inviting on a platter, yet they are wonderfully straightforward to assemble. I’ve been making this for over 7 years, and it never disappoints; the combination of textures and fresh flavour is just divine.
What I adore most is how they transform a simple sugar cookie into something truly special. The cookie base isn’t crisp; we bake it just long enough to be sturdy but leave it with a delightful chewiness in the centre. This soft base then cradles a sweet, slightly tangy cream cheese frosting that we whip until it’s light and airy. It’s the perfect little vessel for a fresh strawberry, which adds a bright, sharp sweetness that cuts through the richness beautifully.
These mini desserts are ideal when you want to serve something impressive for a garden party, an afternoon tea, or even a weekend family gathering. Everyone seems to love having their own individual portion, and they disappear from the plate in record time. If you’re building a menu, they make a wonderful sweet finish after something savoury like our Smoky Grilled Chicken Skewers Recipe.
Recipe Overview
This recipe guides you through creating soft, chewy sugar cookie cups, a smooth cream cheese filling, and assembling them into a beautiful strawberry dessert. The final result is a balanced treat where the buttery cookie, tangy filling, and fresh fruit all shine. I’ve found that the secret to the perfect texture is to slightly under-bake the cookie cups; pulling them from the oven when the edges are just beginning to turn golden ensures they remain wonderfully soft.
- Prep Time: 25 minutes
- Cook Time: 15 minutes
- Total Time: 1 hour 20 minutes (includes cooling)
- Servings: 24 mini cookie cups
- Difficulty: Easy
Why You’ll Love This Strawberry Sugar Cookie Cups
- Wonderful Texture and Flavour: The contrast is what makes these so special. You get the soft, yielding chew of the vanilla-infused cookie base, followed by the pillowy, cool cream cheese filling, and finished with the fresh, juicy snap of a real strawberry.
- Ready in Under 45 Minutes (Active Time): From creaming the butter to piping the filling, the hands-on part of this recipe comes together efficiently, making it a great option for a bake that looks more complicated than it is.
- A Truly Flexible Recipe: This is a brilliant base for experimentation. You can swap the strawberries for raspberries or blueberries, add a teaspoon of lemon zest to the frosting for a citrus kick, or even fold mini chocolate chips into the cookie dough.
- Great for Social Gatherings: These are ideal for serving at a baby shower, a birthday party, or a spring bank holiday get-together. Because they’re individual portions, they are easy for guests to handle and enjoy while mingling.
- Family Tested and Approved: I’ve been making this for over 3 years, and it never disappoints. My whole family adores them, and my son always requests them for his birthday celebrations, preferring them over a traditional cake.
Ingredients You’ll Need
For the best results, we’ll use standard baking ingredients, but quality really does make a difference here. I always opt for a good quality vanilla extract, like Nielsen-Massey, as its flavour is much more pronounced than essence. Ensure your butter and cream cheese are at room temperature to achieve the smoothest possible texture in both the dough and the filling.
- For the Sugar Cookie Cups:
- 230g unsalted butter, softened to room temperature
- 150g caster sugar
- 1 large free-range egg
- 2 tsp vanilla extract
- 340g plain flour
- 1/2 tsp baking powder
- 1/4 tsp salt
- For the Cream Cheese Filling:
- 225g full-fat cream cheese, softened
- 100g icing sugar, sifted
- 1 tsp vanilla extract
- 60ml double cream, cold
- For the Topping:
- 24 small to medium fresh strawberries, hulled
- Icing sugar, for dusting (optional)
Elena’s Tip: Don’t be tempted to use low-fat cream cheese for the filling. The full-fat version is essential for a firm, rich, and pipeable consistency that holds its shape beautifully.
How to Make Strawberry Sugar Cookie Cups
The process is quite straightforward. We’ll make a simple sugar cookie dough, shape it in a mini muffin tin to create the ‘cups’, and then fill them once they’ve cooled completely. The key is to work quickly when you create the indentation in the centre of each cookie.
- Preheat and Prepare: First, preheat your oven to 180°C (160°C fan). Lightly grease a 24-hole mini muffin tin.
- Cream Butter and Sugar: In a large bowl using a stand mixer or electric hand mixer, beat the softened butter and caster sugar together on medium-high speed for about 3-4 minutes. The mixture should become pale, light, and fluffy. This creaming method is vital for a tender cookie.
- Add Wet Ingredients: Add the egg and vanilla extract to the butter mixture and beat again until everything is well combined, scraping down the sides of the bowl as needed.
- Combine Dry Ingredients: In a separate bowl, whisk together the plain flour, baking powder, and salt. Gradually add this dry mixture to the wet ingredients, mixing on a low speed until just combined. Be careful not to overmix at this stage.
- Shape the Cookie Cups: Roll the dough into 24 equal-sized balls, about 1 tablespoon each. Place one ball into each hole of your prepared mini muffin tin.
- Bake Until Golden: Bake for 12-15 minutes, or until the edges are lightly golden brown. The centres should still look soft and slightly pale.
- Create the Indentation: This step is time-sensitive! As soon as you remove the tin from the oven, use the back of a rounded teaspoon measure (or the end of a wooden spoon) to gently press down in the centre of each cookie, creating a well. What works best for me is having my tool ready to go the moment the tray comes out.
- Cool Completely: Allow the cookie cups to cool in the tin for about 10 minutes before carefully transferring them to a wire rack to cool completely. They must be fully cool before you add the filling.
- Make the Filling: While the cups cool, beat the softened cream cheese in a bowl until smooth. Sift in the icing sugar and beat on low until combined, then increase the speed and beat until smooth. Add the vanilla extract and cold double cream, and whip on medium-high speed for 2-3 minutes until the filling is thick, light, and holds its shape.
- Assemble and Serve: Transfer the filling to a piping bag fitted with a star nozzle (or just use a spoon). Pipe or spoon the filling into each cooled cookie cup. Top each one with a fresh strawberry. For an extra touch, dust lightly with icing sugar just before serving.
Tips From My Kitchen
- Temperature Control: If your kitchen is warm, I recommend chilling the dough balls in the muffin tin for 15-20 minutes before baking. This helps prevent the cookies from spreading too much and ensures a well-defined cup shape.
- The Secret Step: I learned that the success of the ‘cup’ depends entirely on making the indent while the cookies are piping hot. If you wait even a few minutes, the cookies will set and are more likely to crack when you press into them.
- Make-Ahead Magic: You can bake the cookie cups up to two days in advance. Store them in an airtight container at room temperature. The cream cheese filling can be made a day ahead and kept in the fridge. Just give it a quick whip to loosen it up before piping.
- Storage: Once assembled, these strawberry sugar cookie cups are at their best on the day they are made. If you do have leftovers, store them in a single layer in an airtight container in the refrigerator for up to 2 days. The cookie will soften slightly.
Equipment You’ll Need
- Stand mixer or electric hand mixer
- 24-hole mini muffin tin
- Mixing bowls
- Wire cooling rack
- Piping bag and star nozzle (optional, but gives a lovely finish)
Delicious Variations to Try
One of the best things about this recipe is how easily it can be adapted. Here are a few variations my family and I have enjoyed over the years:
- Lemon and Blueberry: Add the finely grated zest of one lemon to the cookie dough and the cream cheese filling. Top with a fresh blueberry instead of a strawberry for a zesty, fruity alternative.
- Chocolate Hazelnut Dream: Fold 100g of mini chocolate chips into the cookie dough. For the filling, swap the cream cheese frosting for a simple mix of mascarpone and chocolate hazelnut spread.
- Raspberry and White Chocolate: Top the cookie cups with a fresh raspberry and a few white chocolate curls. The tartness of the raspberry is a wonderful contrast to the sweet cookie and creamy filling.
What to Serve With Strawberry Sugar Cookie Cups
These little treats are delightful on their own, but they also fit beautifully into a larger spread. Here are a few ideas:
- Afternoon Tea: Serve them on a tiered stand alongside classic finger sandwiches and scones for a proper British afternoon tea experience.
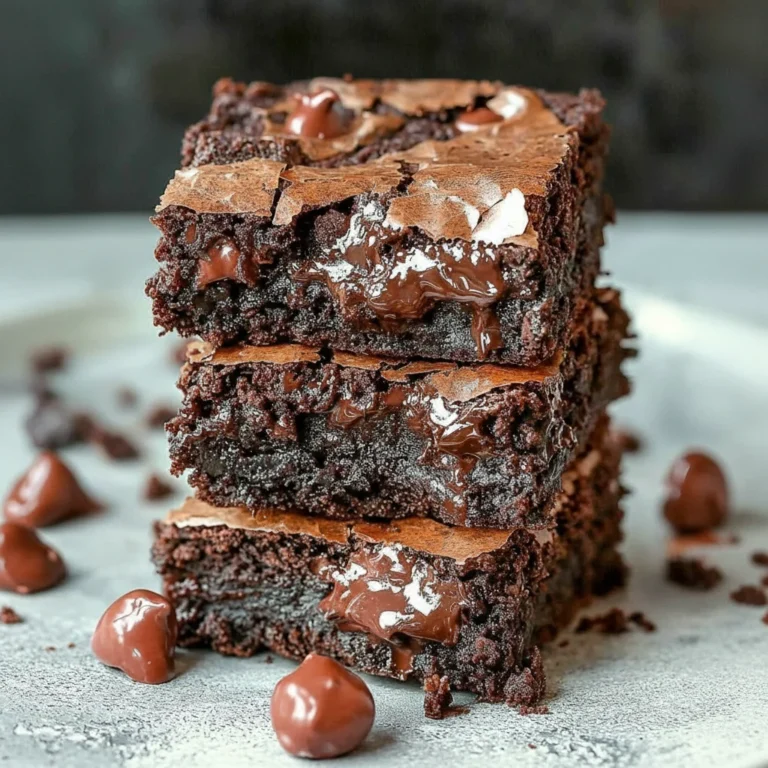
- Dessert Platter: Arrange them on a large platter with other mini desserts, like brownie bites or macarons, for a varied and visually appealing sweet course. For more party food inspiration, check out our easy Cheesy Tuna Melt Sandwich Recipe, which can be cut into small bites.
- Drink Pairing: They pair wonderfully with a cup of English Breakfast tea or a chilled glass of Prosecco or elderflower cordial, whose bubbles and floral notes complement the fresh strawberry.
Frequently Asked Questions
Strawberry Sugar Cookie Cups
Ingredients
Method
- Preheat and Prepare: First, preheat your oven to 180°C (160°C fan). Lightly grease a 24-hole mini muffin tin.
- Cream Butter and Sugar: In a large bowl using a stand mixer or electric hand mixer, beat the softened butter and caster sugar together on medium-high speed for about 3-4 minutes. The mixture should become pale, light, and fluffy. This creaming method is vital for a tender cookie.
- Add Wet Ingredients: Add the egg and vanilla extract to the butter mixture and beat again until everything is well combined, scraping down the sides of the bowl as needed.
- Combine Dry Ingredients: In a separate bowl, whisk together the plain flour, baking powder, and salt. Gradually add this dry mixture to the wet ingredients, mixing on a low speed until just combined. Be careful not to overmix at this stage.
- Shape the Cookie Cups: Roll the dough into 24 equal-sized balls, about 1 tablespoon each. Place one ball into each hole of your prepared mini muffin tin.
- Bake Until Golden: Bake for 12-15 minutes, or until the edges are lightly golden brown. The centres should still look soft and slightly pale.
- Create the Indentation: This step is time-sensitive! As soon as you remove the tin from the oven, use the back of a rounded teaspoon measure (or the end of a wooden spoon) to gently press down in the centre of each cookie, creating a well. What works best for me is having my tool ready to go the moment the tray comes out.
- Cool Completely: Allow the cookie cups to cool in the tin for about 10 minutes before carefully transferring them to a wire rack to cool completely. They must be fully cool before you add the filling.
- Make the Filling: While the cups cool, beat the softened cream cheese in a bowl until smooth. Sift in the icing sugar and beat on low until combined, then increase the speed and beat until smooth. Add the vanilla extract and cold double cream, and whip on medium-high speed for 2-3 minutes until the filling is thick, light, and holds its shape.
- Assemble and Serve: Transfer the filling to a piping bag fitted with a star nozzle (or just use a spoon). Pipe or spoon the filling into each cooled cookie cup. Top each one with a fresh strawberry. For an extra touch, dust lightly with icing sugar just before serving.
Notes
I truly hope you enjoy making these Strawberry Sugar Cookie Cups as much as I do. They are such a joyful little bake, perfect for sharing with people you love. If you give them a try, please let me know how they turned out in the comments below – I always love to hear from you! Happy baking, Elena.