Homemade Garlic Breadsticks
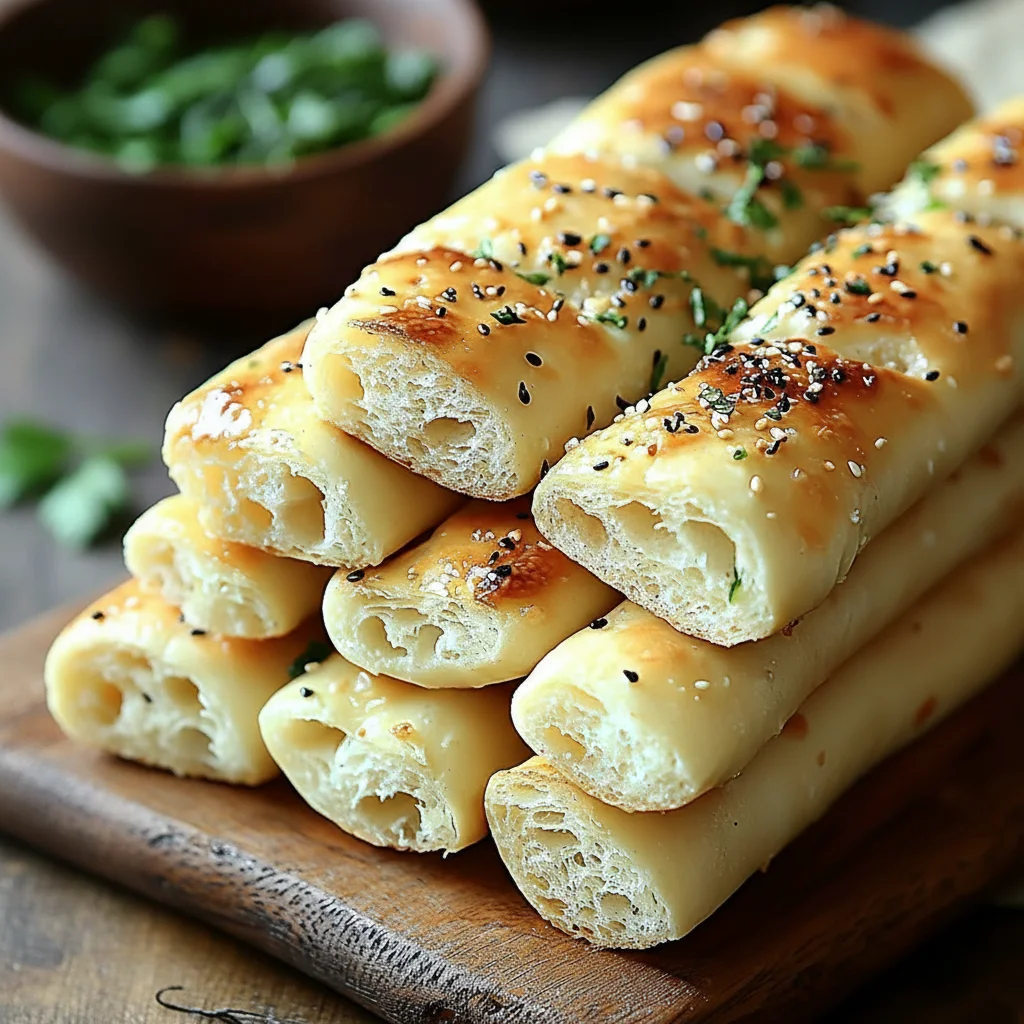
There’s something uniquely comforting about the aroma of bread baking in the oven, a scent that promises warmth and satisfaction. When that scent is mingled with the pungent, savoury perfume of garlic and butter, it becomes truly irresistible. These homemade garlic breadsticks are the result of many weekends spent tweaking and perfecting a recipe until it produced the exact texture I was after: a beautifully soft, chewy interior encased in a lightly crisp, golden-brown crust, all lavishly brushed with a fragrant garlic butter. I make this garlic breadsticks recipe at least once a month now – they’ve become essential for our family pasta nights.
This isn’t your average, dry breadstick. We’re aiming for something much more luxurious. Each bite is pillowy and rich, with the fresh, sharp notes of minced garlic and parsley cutting through the richness of the butter. They are substantial enough to be a satisfying snack on their own, yet they are the perfect companion for a whole host of main dishes. This recipe is for anyone who loves savory baking and wants to create a side dish that consistently gets compliments. They are wonderful for family dinners, casual get-togethers with friends, or simply for those moments when you need a little bit of homemade goodness.
Recipe Overview
This recipe will guide you through creating soft, chewy, and intensely flavourful garlic breadsticks from scratch. We’ll be making a simple yeast dough that is forgiving for beginners and yields beautifully consistent results. The flavour profile is classic and robust: rich butter, pungent fresh garlic, and a hint of freshness from parsley, all balanced with a sprinkle of sea salt. After a few tries, I found that brushing the butter on before the final short proof lets the flavour really sink into the dough.
- Prep Time: 20 minutes
- Proofing Time: 1 hour 10 minutes
- Cook Time: 15 minutes
- Total Time: 1 hour 45 minutes
- Servings: 12-16 breadsticks
- Difficulty: Medium
Why You’ll Love This Garlic Breadsticks Recipe
- Genuine Flavour: We use real butter, freshly minced garlic cloves, and chopped parsley. This combination provides a depth of flavour that you simply can’t achieve with garlic powder or dried herbs.
- Soft and Chewy Texture: The use of strong bread flour and a proper kneading and proofing process results in a delightful pillowy texture that’s incredibly moreish.
- A Straightforward Baking Project: While it involves yeast, the steps are clear and manageable. The active work is minimal, and the result is a truly impressive homemade bread.
- Works Wonderfully for Dipping: The sturdy yet soft structure of these breadsticks makes them ideal for scooping up the last bits of sauce from a hearty bowl of soup or a delicious pasta dish like Classic Shrimp Scampi.
- Family Tested: My children, who can be fussy eaters, absolutely demolish these every single time. They always get compliments when we take them to a friend’s house for dinner.

Ingredients You’ll Need
For the best results, I recommend using high-quality ingredients, especially the flour. A good strong white bread flour provides the gluten structure needed for that characteristic chewiness. I always have good results with Allinson’s or a similar high-protein bread flour.
- For the Dough:
- 500g strong white bread flour, plus extra for dusting
- 7g (1 sachet) fast-action dried yeast
- 1 tbsp caster sugar
- 1 ½ tsp fine sea salt
- 300ml lukewarm water (about 40°C)
- 2 tbsp extra virgin olive oil
- For the Garlic Butter Topping:
- 100g unsalted butter, melted
- 2 tbsp extra virgin olive oil
- 4-5 large garlic cloves, minced very finely
- 3 tbsp fresh flat-leaf parsley, finely chopped
- ½ tsp flaky sea salt (like Maldon)
Elena’s Tip: The temperature of your water is crucial for activating the yeast. Too cold and it won’t wake up; too hot and you’ll kill it. A digital kitchen thermometer is a baker’s best friend here – aim for between 40-46°C (105-115°F).
How to Make Garlic Breadsticks
The process is broken down into making the dough, letting it rise, shaping the breadsticks, and then baking them to golden perfection. Don’t rush the proofing stages; this is where the flavour and texture are developed.
- Activate the Yeast: In a small bowl or jug, whisk together the lukewarm water, caster sugar, and yeast. Set it aside for 5-10 minutes until it becomes frothy and bubbly on top. This is how you know your yeast is active and ready to work.
- Combine Dry Ingredients: In the bowl of a stand mixer fitted with a dough hook (or a large mixing bowl), combine the 500g of bread flour and the fine sea salt. Give it a quick mix to distribute the salt.
- Form the Dough: Pour the frothy yeast mixture and the 2 tbsp of olive oil into the flour. Mix on a low speed until a shaggy dough comes together.
- Knead the Dough: Increase the mixer speed to medium-low and knead for 7-8 minutes, or until the dough is smooth, elastic, and pulls away from the sides of the bowl. If kneading by hand, tip the dough onto a lightly floured surface and knead for a good 10-12 minutes. What works best for me is to use the heel of my hand to push the dough away, then fold it back on itself, repeating until it’s perfectly smooth.
- First Proof: Lightly oil a clean bowl. Shape the dough into a ball, place it in the bowl, and turn it over to coat lightly in oil. Cover the bowl with a clean tea towel or cling film and leave it in a warm, draught-free place for about 1 hour, or until doubled in size.
- Shape the Breadsticks: Line two large baking trays with parchment paper. Gently punch the air out of the risen dough and tip it onto a lightly floured surface. Divide the dough into 12-16 equal pieces. Roll each piece into a log about 20-25cm (8-10 inches) long. Place them on the prepared baking trays, leaving a few centimetres of space between each one.
- Prepare the Topping: In a small bowl, mix the melted butter, 2 tbsp olive oil, minced garlic, and most of the chopped parsley (save a little for sprinkling at the end).
- Second Proof & Flavouring: Gently brush about half of the garlic butter mixture over the shaped breadsticks. Cover them loosely with a tea towel and let them rest for another 10-15 minutes. This short second proof makes them extra light. Meanwhile, preheat your oven to 200°C (180°C fan).
- Bake to Perfection: Bake for 12-15 minutes, or until the breadsticks are a beautiful golden brown and sound hollow when tapped on the bottom. Rotate the trays halfway through baking for an even colour.
- Final Brush: As soon as the breadsticks come out of the oven, brush them generously with the remaining garlic butter. Sprinkle with the reserved fresh parsley and the flaky sea salt. Serve warm.
Tips From My Kitchen
- Yeast is Your Friend: Don’t be intimidated by yeast. The key is ensuring it’s in date and using lukewarm (not hot!) water. For a deep dive into how yeast works, BBC Good Food has a great guide.
- The Double Brush Technique: I learned that brushing the breadsticks with garlic butter both before and after baking is the secret to maximum flavour. The first brush infuses the dough as it bakes, and the second adds a fresh, glossy, potent garlic hit right at the end.
- Make-Ahead Dough: You can prepare the dough through to the end of step 5, then place the covered bowl in the fridge for up to 24 hours. This slow, cold fermentation actually develops a more complex flavour. Just let it come to room temperature for about 30-45 minutes before shaping.
- Storage: These are best eaten on the day they are made. However, you can store any leftovers in an airtight container at room temperature for up to 2 days. Reheat them in a warm oven for 5 minutes to refresh them.
Equipment You’ll Need
You don’t need lots of fancy equipment for this savory baking recipe, just a few kitchen essentials.
- Stand mixer with dough hook (optional, but helpful)
- Large mixing bowls
- Baking trays
- Parchment paper
- Pastry brush
- Wire cooling rack
Common Mistakes to Avoid
- Overcrowding the Baking Tray: Giving each breadstick enough space is vital for even baking. If they are too close together, they will steam instead of bake, resulting in pale, soft sides rather than a golden crust all around. Use two trays if necessary.
- Using Cold Ingredients: Ensure your water is lukewarm and allow refrigerated dough to come to room temperature before shaping. Cold dough is sluggish and won’t rise as well, leading to dense breadsticks.
- Skipping the Rest Time: Both the first and second proofing times are essential. The first rise develops the dough’s structure and flavour, while the short second rest after shaping allows the gluten to relax, ensuring a light and airy final texture.
Delicious Variations to Try
Once you’ve mastered the basic recipe, it’s fun to start experimenting. Here are a few variations we love in my house:
- Cheesy Garlic Breadsticks: After the first brush of garlic butter (before the second proof), sprinkle generously with grated Parmesan or a sharp, mature cheddar. The cheese gets gloriously melty and crisp in the oven.
- Spicy Version: Add 1/2 to 1 teaspoon of dried chilli flakes to your garlic butter mixture for a gentle, warming heat that complements the garlic beautifully.
- Herb Garden Breadsticks: Don’t just stop at parsley! Add other finely chopped fresh herbs like rosemary, thyme, or chives to the garlic butter for a more complex, aromatic flavour.
What to Serve With Garlic Breadsticks
These are incredibly versatile, but they truly shine when served alongside saucy, flavourful dishes that they can be dipped into.
- Hearty Soups and Stews: Their soft, absorbent texture is ideal for mopping up every last drop of a rich tomato soup, a creamy mushroom soup, or a robust beef stew.
- Pasta Dishes: A basket of these on the table next to a large bowl of spaghetti bolognese or a creamy carbonara is a classic combination. They work especially well with dishes that have plenty of sauce, like this Classic Shrimp Scampi.
- Salad Accompaniment: Serve them alongside a large, fresh salad for a more substantial lunch or light dinner.
- Wine Pairing: A crisp, dry white wine like a Sauvignon Blanc or an Italian Pinot Grigio cuts through the richness of the butter and garlic splendidly.
Frequently Asked Questions
Garlic Breadsticks
Ingredients
Method
- Activate the Yeast: In a small bowl or jug, whisk together the lukewarm water, caster sugar, and yeast. Set it aside for 5-10 minutes until it becomes frothy and bubbly on top. This is how you know your yeast is active and ready to work.
- Combine Dry Ingredients: In the bowl of a stand mixer fitted with a dough hook (or a large mixing bowl), combine the 500g of bread flour and the fine sea salt. Give it a quick mix to distribute the salt.
- Form the Dough: Pour the frothy yeast mixture and the 2 tbsp of olive oil into the flour. Mix on a low speed until a shaggy dough comes together.
- Knead the Dough: Increase the mixer speed to medium-low and knead for 7-8 minutes, or until the dough is smooth, elastic, and pulls away from the sides of the bowl. If kneading by hand, tip the dough onto a lightly floured surface and knead for a good 10-12 minutes. What works best for me is to use the heel of my hand to push the dough away, then fold it back on itself, repeating until it's perfectly smooth.
- First Proof: Lightly oil a clean bowl. Shape the dough into a ball, place it in the bowl, and turn it over to coat lightly in oil. Cover the bowl with a clean tea towel or cling film and leave it in a warm, draught-free place for about 1 hour, or until doubled in size.
- Shape the Breadsticks: Line two large baking trays with parchment paper. Gently punch the air out of the risen dough and tip it onto a lightly floured surface. Divide the dough into 12-16 equal pieces. Roll each piece into a log about 20-25cm (8-10 inches) long. Place them on the prepared baking trays, leaving a few centimetres of space between each one.
- Prepare the Topping: In a small bowl, mix the melted butter, 2 tbsp olive oil, minced garlic, and most of the chopped parsley (save a little for sprinkling at the end).
- Second Proof & Flavouring: Gently brush about half of the garlic butter mixture over the shaped breadsticks. Cover them loosely with a tea towel and let them rest for another 10-15 minutes. This short second proof makes them extra light. Meanwhile, preheat your oven to 200°C (180°C fan).
- Bake to Perfection: Bake for 12-15 minutes, or until the breadsticks are a beautiful golden brown and sound hollow when tapped on the bottom. Rotate the trays halfway through baking for an even colour.
- Final Brush: As soon as the breadsticks come out of the oven, brush them generously with the remaining garlic butter. Sprinkle with the reserved fresh parsley and the flaky sea salt. Serve warm.
Notes
I hope you adore making and eating these homemade garlic breadsticks as much as my family and I do. There’s a real sense of accomplishment in pulling a tray of these golden, fragrant beauties from the oven. They transform a simple meal into something special and always make the house smell wonderful. If you try this recipe, please leave a comment below and let me know how they turned out! I love hearing from you.
Happy baking,
Elena