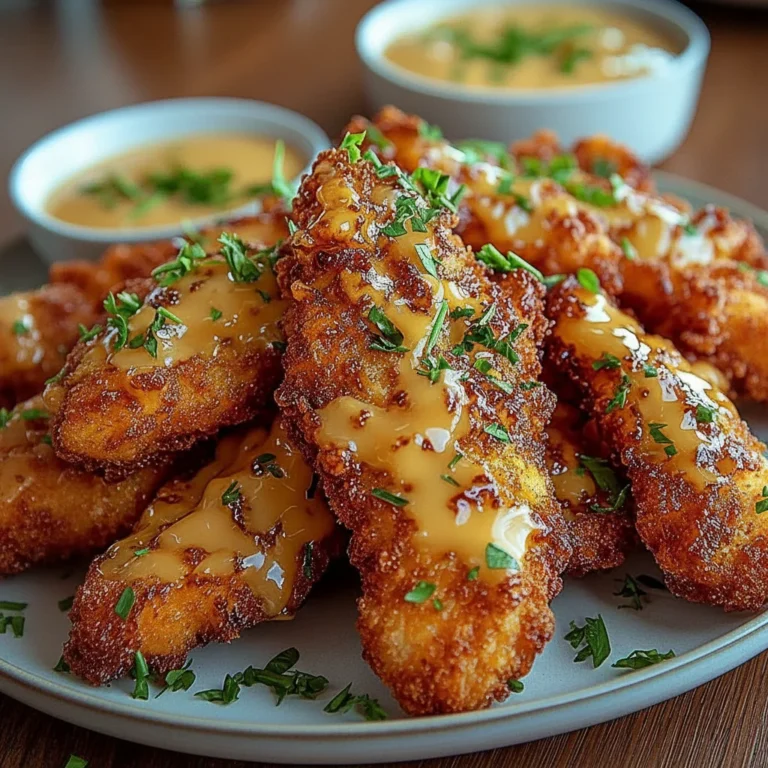
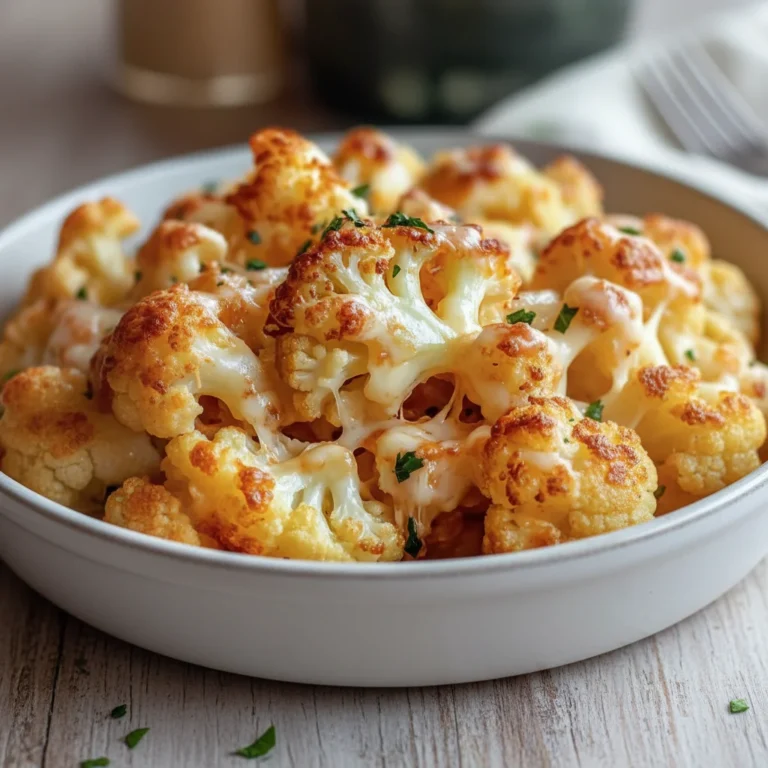
Golden Crispy Chicken Tenders Recipe

There is something utterly satisfying about the sound of a truly crispy coating giving way to perfectly tender, juicy chicken. It’s a sound that promises a delicious mouthful, and it’s a promise this Crispy Chicken Tenders Recipe delivers on every single time. Forget takeaways or frozen options; making chicken tenders from scratch transforms a simple meal into something special. We’re not just talking about a light dusting of flour here. We are aiming for a substantial, craggy, golden-brown crust that holds its own against any dip you can imagine. I’ve been making this for over 8 years, and it never disappoints; it’s the one recipe my family requests on a weekly basis.
What sets this recipe apart is a simple but crucial technique: a double dredge. This method ensures an extra-thick, ultra-crisp coating that clings to the chicken beautifully. The seasoning is a carefully balanced blend of savoury, smoky, and aromatic spices that permeate both the coating and the chicken itself, thanks to a quick buttermilk marinade. This recipe is for those evenings when you need a comforting, satisfying meal that comes together without too much fuss. It works wonderfully for a family dinner, a casual get-together with friends, or even as part of a fantastic lunch wrap the next day.
Recipe Overview
This recipe guides you through creating exceptionally crispy and flavourful chicken tenders at home. The process involves marinating the chicken in seasoned buttermilk to ensure it’s tender and juicy, followed by a double-dredging technique for that signature crunchy exterior. I once tried skipping the buttermilk step to save time, and the difference in tenderness was noticeable – it’s a step that’s definitely worth it.
- Prep Time: 20 minutes (plus 30 minutes marinating)
- Cook Time: 15 minutes
- Total Time: 1 hour 5 minutes
- Servings: 4 people
- Difficulty: Easy
Why You’ll Love This Crispy Chicken Tenders Recipe
- Magnificent Texture and Flavour: The coating is a masterpiece of crunch, seasoned with smoked paprika, garlic powder, and onion powder for a deep, savoury taste that complements the moist chicken within.
- Ready in About an Hour: Including marinating time, this entire dish comes together in just over an hour, making it a great option for a weekday treat.
- A Truly Flexible Recipe: You can easily adjust the spices to your liking. Add a pinch of cayenne for heat, or some dried oregano for a more herbaceous note.
- Ideal for Casual Dinners: This is what we make for movie nights or when my son has friends over. Serve them in a basket with some chips and a selection of dips.
- Family Tested and Approved: My youngest is a notoriously fussy eater, but he absolutely loves these tenders. It’s one of the few meals that always gets a clean plate, and that’s a huge win in my book.

Ingredients You’ll Need
For the best results, start with good quality ingredients. I always use free-range chicken breasts, as I find they have a better texture and flavour. When it comes to the flour coating, a simple plain flour works perfectly. I often use *Allinson’s* brand, which I find gives a consistently light result.
- 700g boneless, skinless chicken breasts, cut into 2-3 cm thick strips
- 250ml buttermilk
- 1 large egg
- 200g plain flour
- 50g cornflour
- 2 tsp smoked paprika
- 2 tsp garlic powder
- 1 tsp onion powder
- 1 tsp salt
- 1 tsp black pepper, freshly ground
- Approx. 750ml vegetable or sunflower oil, for frying
Elena’s Tip: Don’t have buttermilk? You can easily make your own. Just add 1 tablespoon of lemon juice or white vinegar to 250ml of whole milk and let it sit for 5-10 minutes until it curdles slightly. It works just as well to tenderise the chicken.
How to Make Crispy Chicken Tenders
The process is straightforward. We’ll marinate the chicken first to make it juicy, then create our seasoned flour, and finally, follow the double-dredge method for that incredible crust before frying to golden perfection.
- Marinate the Chicken: In a medium-sized bowl, whisk together the buttermilk and the egg. Add the chicken strips, ensuring they are all fully submerged. Cover the bowl and place it in the refrigerator to marinate for at least 30 minutes, or up to 4 hours for even more tender results.
- Prepare the Seasoned Flour: In a separate shallow dish or large bowl, combine the plain flour, cornflour, smoked paprika, garlic powder, onion powder, salt, and black pepper. Whisk everything together until the spices are evenly distributed.
- Set Up Your Dredging Station: Take the chicken out of the fridge. Place the bowl of marinated chicken next to your dish of seasoned flour. Have a clean plate or wire rack ready for the coated chicken. This little bit of organisation makes the process much smoother.
- The First Dredge: Working with one chicken strip at a time, lift it from the buttermilk, allowing any excess to drip off. Place it in the flour mixture and toss to coat it completely. Gently shake off the excess flour and place it on your clean plate. Repeat for all the chicken strips.
- The Second Dredge (The Crispy Secret): Once all the strips have their first coating, we do it again. Dip each floured strip back into the buttermilk mixture for just a second, and then return it to the seasoned flour for a final, thorough coating. Press the flour onto the chicken firmly to help it adhere. This second layer is what creates those wonderful, craggy, crispy bits.
- Heat the Oil: Pour the oil into a large, heavy-bottomed frying pan or skillet until it’s about 2-3 cm deep. Heat it over a medium-high heat to 175°C (350°F). What works best for me is using a kitchen thermometer for accuracy, but you can test it by dropping a small bit of flour into the oil – if it sizzles vigorously, it’s ready.
- Fry the Tenders: Carefully place a few chicken tenders into the hot oil, making sure not to overcrowd the pan. Fry for about 3-4 minutes on each side, until they are a deep golden brown and cooked through. The internal temperature should reach 74°C (165°F), which you can verify with a meat thermometer for food safety as recommended by the Food Standards Agency.
- Drain and Serve: Remove the cooked tenders from the oil using tongs and place them on a wire rack to drain. This keeps them crispy all over. If you’re cooking in batches, you can keep the cooked tenders warm in an oven set to a low temperature (around 100°C). Serve immediately with your favourite dips.
Tips From My Kitchen
- Temperature Control is Key: Maintaining the oil at a steady 175°C is crucial. If the oil is too cool, the chicken will absorb too much and become greasy. If it’s too hot, the coating will burn before the chicken inside is cooked. Let the oil come back up to temperature between batches.
- The Secret Step: The Drizzle: I learned that for an extra-shaggy coating, you can drizzle a tiny bit (about a teaspoon) of the buttermilk mixture into the dry flour mix and toss it with your fingers. This creates little clumps that will stick to the chicken during the second dredge, resulting in an even crispier finish.
- Make-Ahead Method: You can marinate the chicken for up to 4 hours in the fridge. The flour mixture can also be prepared and stored in an airtight container for weeks. However, the tenders are best fried just before serving for maximum crispiness.
- Storage: Leftover chicken tenders can be stored in an airtight container in the refrigerator for up to 3 days. To reheat, place them on a baking tray in a preheated oven at 200°C (180°C fan) for 10-15 minutes until hot and re-crisped.
Equipment You’ll Need
You don’t need any highly specialised equipment for this recipe, just some basic kitchen tools.
- Large, heavy-bottomed frying pan or skillet
- Tongs
- Kitchen thermometer (highly recommended)
- Two shallow bowls or dishes (for wet and dry mixtures)
- Wire rack
Delicious Variations to Try
Once you’ve mastered the basic recipe, it’s fun to experiment with different flavours.
- Spicy Chicken Tenders: Add 1-2 teaspoons of cayenne pepper or hot chilli powder to the flour mixture for a fiery kick that always gets compliments.
- Herbaceous Version: Mix 1 tablespoon of finely chopped fresh parsley or 1 teaspoon of dried herbs like oregano or thyme into the flour for a different flavour profile.
- Different Protein: This dredging and frying method also works wonderfully with thick strips of pork loin or firm white fish like cod. Just be sure to adjust the cooking time accordingly.
What to Serve With Crispy Chicken Tenders
These tenders are incredibly versatile and pair well with a wide range of sides. Creating a dipping sauce station is always a fun idea.
- Classic Dips: A homemade honey-mustard sauce, a smoky BBQ sauce, or a simple creamy ranch dip are all fantastic choices. The sweetness of honey-mustard cuts through the richness of the fried chicken beautifully.
- Hearty Sides: Serve alongside some chunky homemade chips, creamy coleslaw, or a simple green salad with a vinaigrette dressing.
- Creative Leftovers: If you happen to have any leftovers, they are brilliant chopped up and used in a Crispy Chicken Caesar Wrap for lunch the next day. They also add a great crunch to a main course salad. For a full meal, try serving them alongside my Smoky Grilled Chicken Skewers Recipe for a true chicken feast.
Frequently Asked Questions
Crispy Chicken Tenders Recipe
Ingredients
Method
- Marinate the Chicken: In a medium-sized bowl, whisk together the buttermilk and the egg. Add the chicken strips, ensuring they are all fully submerged. Cover the bowl and place it in the refrigerator to marinate for at least 30 minutes, or up to 4 hours for even more tender results.
- Prepare the Seasoned Flour: In a separate shallow dish or large bowl, combine the plain flour, cornflour, smoked paprika, garlic powder, onion powder, salt, and black pepper. Whisk everything together until the spices are evenly distributed.
- Set Up Your Dredging Station: Take the chicken out of the fridge. Place the bowl of marinated chicken next to your dish of seasoned flour. Have a clean plate or wire rack ready for the coated chicken. This little bit of organisation makes the process much smoother.
- The First Dredge: Working with one chicken strip at a time, lift it from the buttermilk, allowing any excess to drip off. Place it in the flour mixture and toss to coat it completely. Gently shake off the excess flour and place it on your clean plate. Repeat for all the chicken strips.
- The Second Dredge (The Crispy Secret): Once all the strips have their first coating, we do it again. Dip each floured strip back into the buttermilk mixture for just a second, and then return it to the seasoned flour for a final, thorough coating. Press the flour onto the chicken firmly to help it adhere. This second layer is what creates those wonderful, craggy, crispy bits.
- Heat the Oil: Pour the oil into a large, heavy-bottomed frying pan or skillet until it's about 2-3 cm deep. Heat it over a medium-high heat to 175°C (350°F). What works best for me is using a kitchen thermometer for accuracy, but you can test it by dropping a small bit of flour into the oil – if it sizzles vigorously, it's ready.
- Fry the Tenders: Carefully place a few chicken tenders into the hot oil, making sure not to overcrowd the pan. Fry for about 3-4 minutes on each side, until they are a deep golden brown and cooked through. The internal temperature should reach 74°C (165°F), which you can verify with a meat thermometer for food safety as recommended by the Food Standards Agency.
- Drain and Serve: Remove the cooked tenders from the oil using tongs and place them on a wire rack to drain. This keeps them crispy all over. If you're cooking in batches, you can keep the cooked tenders warm in an oven set to a low temperature (around 100°C). Serve immediately with your favourite dips.
Notes
I really hope you give this Crispy Chicken Tenders Recipe a go. It’s a staple in my kitchen for a reason, and seeing the look on my family’s faces when I bring a platter of these to the table is always a joy. They are so much better than anything you can buy, and the sense of satisfaction is immense. If you try them, please let me know how they turned out in the comments below. I love hearing from you! Enjoy!
– Elena