Crunchy Homemade Cheez Its
There’s a unique kind of satisfaction that comes from recreating a favourite shop-bought snack in your own kitchen. You know exactly what’s gone into it, and the flavour is always leagues ahead. That’s precisely the story with these homemade Cheez Its. The first time I pulled a tray of these golden, cheesy squares from the oven, the aroma alone was enough to convince me I’d never go back to the box. I make a batch of these homemade Cheez Its almost every weekend – they rarely last until Monday morning!
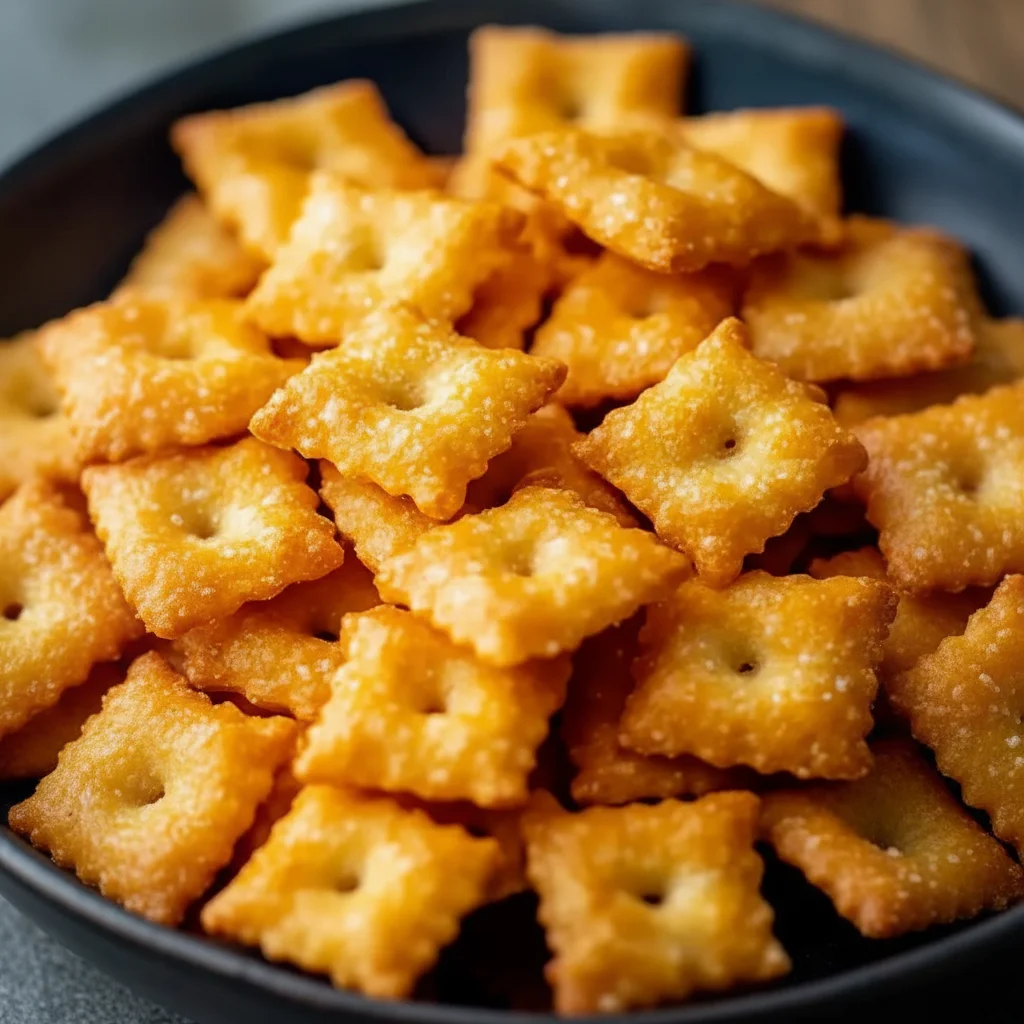
What makes this particular cheese cracker recipe so special is the intense, unapologetic cheddar flavour packed into every single bite. We use a really good, sharp, mature cheddar which melts into the buttery dough, creating a cracker that’s both flaky and crisp. The edges get beautifully toasted, and that tiny sprinkle of sea salt on top just makes the cheese sing. Forget pale, uniform crackers; these have character, with a rustic charm and a flavour that’s deeply savoury and moreish.
This is a brilliant baking idea for a lazy Sunday afternoon, and the resulting snack is a surefire hit with everyone. They are fantastic for popping into lunchboxes, serving alongside a bowl of soup, or simply having a jar on the counter for those moments when only a savoury, cheesy crunch will do. They are the ultimate homemade crackers, and I can’t wait for you to try them.
Recipe Overview
This recipe guides you through creating exceptionally crisp and cheesy homemade crackers that rival the famous Cheez Its. The flavour profile is intensely savoury, led by sharp cheddar cheese with a rich, buttery undertone and a hint of paprika for warmth. The texture is key here: a delicate, flaky snap that gives way to a satisfying crunch. After testing this recipe five times, I finally landed on the perfect ratio of butter to cheese for that signature flaky texture.
- Prep Time: 20 minutes
- Chill Time: 30 minutes
- Cook Time: 15-18 minutes
- Total Time: 1 hour 5 minutes
- Servings: Makes approx. 150 small crackers
- Difficulty: Easy
Why You’ll Love This Homemade Cheez Its Recipe
- Genuine Cheese Flavour: Unlike many commercial versions, these crackers lead with the authentic, sharp tang of real mature cheddar cheese. The buttery dough acts as the perfect vehicle for a flavour that is rich, savoury, and deeply satisfying.
- Ready in About an Hour: From start to finish, you can have a fresh batch of these incredible cheese crackers cooling on your counter in just over an hour, with most of that being hands-off chilling and baking time.
- Flexible Recipe: This is a wonderful base recipe. You can swap the paprika for a pinch of cayenne for a spicy kick, add a teaspoon of wholegrain mustard to the dough, or even mix in some finely chopped herbs like rosemary or chives.
- Works Wonderfully for Any Occasion: These are ideal for after-school snacks, packing for picnics, or arranging on a cheeseboard for guests. They also make a fantastic partner for a comforting bowl of tomato soup, much better than croutons!
- Family Tested: My children absolutely adore these, and my husband often requests them for his lunchbox. It’s one of those recipes that always gets compliments and disappears incredibly fast.

Ingredients You’ll Need
The beauty of this snack recipe is in its simplicity, relying on a few quality ingredients. I strongly recommend using a block of mature or extra-mature cheddar and grating it yourself. The pre-grated bags often contain anti-caking agents which can affect how the dough comes together. A good quality British Cheddar cheese will make all the difference here.
- 225g Mature Cheddar Cheese, finely grated
- 125g Plain Flour
- 1/2 tsp Smoked Paprika
- 1/2 tsp Fine Sea Salt, plus extra for sprinkling
- 1/4 tsp Onion Powder (optional, but recommended)
- 115g Unsalted Butter, cold and cut into 1cm cubes
- 2-3 tbsp Ice-Cold Water
Elena’s Tip: Pop your cubed butter in the freezer for 10 minutes before you start. Keeping the butter as cold as possible is the secret to achieving a wonderfully flaky, almost laminated texture in the final cracker.
How to Make Homemade Cheez Its
The process for these cheese crackers is quite similar to making a savoury pastry. A food processor makes it very straightforward, but you can absolutely make it by hand if you don’t have one. Just be sure to work quickly to keep the ingredients cold.
- Combine Dry Ingredients: In the bowl of a food processor, add the plain flour, grated cheddar, smoked paprika, 1/2 tsp of salt, and the onion powder (if using). Pulse 4-5 times to combine everything evenly.
- Add the Cold Butter: Scatter the cold, cubed butter over the flour mixture. Pulse in short bursts, about 10-12 times, until the mixture resembles coarse breadcrumbs with some pea-sized pieces of butter still visible. This is crucial for flakiness.
- Form the Dough: With the processor running on low, add the ice-cold water one tablespoon at a time. Stop as soon as the dough starts to clump together and form a ball. You might not need all the water. Be careful not to over-mix.
- Chill the Dough: Turn the dough out onto a clean surface, gather it into a ball, and flatten it into a 1-inch thick disc. Wrap it tightly in cling film and place it in the refrigerator to chill for at least 30 minutes. This step is essential for resting the gluten and firming up the butter.
- Preheat and Prepare: Towards the end of the chilling time, preheat your oven to 180°C (160°C Fan) and line two large baking trays with baking parchment.
- Roll and Cut: Unwrap the chilled dough and place it on a lightly floured surface. Roll it out as thinly as you can, aiming for about 2-3mm thick. What works best for me is rolling the dough between two sheets of baking parchment; it prevents sticking and means no extra flour is needed. Use a pizza wheel or a sharp knife to cut the dough into small squares, roughly 2.5cm x 2.5cm.
- Final Touches: Use a skewer or a chopstick to poke a small hole in the centre of each square – this helps them bake evenly and gives them that classic look. Carefully transfer the squares to your prepared baking trays, leaving a little space between them.
- Bake to Perfection: Lightly sprinkle the crackers with a little extra fine sea salt. Bake for 15-18 minutes, rotating the trays halfway through, until the crackers are golden brown at the edges and feel firm to the touch. Keep a close eye on them in the last few minutes as they can brown very quickly.
- Cool Completely: Let the crackers cool on the baking trays for 5 minutes before transferring them to a wire rack to cool completely. They will become much crisper as they cool.
Tips From My Kitchen
- Temperature Control is Key: The foundation of a great cracker is cold fat. Cold butter creates steam pockets as it bakes, which results in a light, flaky texture. Don’t skip chilling the dough, and if your kitchen is warm, you can even chill the cut crackers on the tray for 10 minutes before baking.
- The Secret to Uniform Baking: I learned that rolling the dough to a consistent, thin-as-possible thickness is the most important step for getting that signature snap. If some parts are thicker, they will remain soft while the thinner parts burn. A good rolling pin with thickness guides can be a great help.
- Make-Ahead Magic: You can make the dough up to 3 days in advance and keep it well-wrapped in the fridge. You can also freeze the wrapped dough disc for up to 3 months. Just thaw it in the fridge overnight before rolling and baking.
- Storage for Lasting Crunch: Store the completely cooled homemade crackers in an airtight container at room temperature. They will stay perfectly crisp for up to a week, though I guarantee they won’t last that long!
Equipment You’ll Need
- Food Processor (or a large mixing bowl and pastry blender)
- Rolling Pin
- Baking Trays
- Baking Parchment
- Pizza Wheel or Sharp Knife
- Wire Cooling Rack
Common Mistakes to Avoid
- Using Warm Ingredients: If your butter or water is not ice-cold, the butter will melt into the flour rather than staying in distinct pieces. This results in a greasy, dense cracker instead of a light and flaky one.
- Rolling the Dough Too Thickly: This is the most common reason for soft, bendy crackers. You must roll the dough very thinly (2-3mm) to ensure it bakes through and becomes wonderfully crisp. Don’t be afraid to really press down with that rolling pin.
- Skipping the Chill Time: Chilling the dough is non-negotiable. It allows the butter to re-solidify after being handled and lets the gluten in the flour relax, which makes the dough easier to roll out and prevents the crackers from shrinking in the oven.
What to Serve With Homemade Cheez Its
While these are exceptional on their own, they are a versatile part of many meals and snack spreads. They are a great snack to have on hand while you’re preparing a weeknight dinner like my Savory Beef And Broccoli Stir Fry Recipe.
- With Soup: Serve alongside a creamy tomato and basil soup instead of bread. Their cheesy, salty flavour is the perfect complement to the sweet acidity of the tomatoes.
- On a Snack Board: Arrange them on a board with cured meats, olives, and some sharp apple slices. They are sturdy enough for dipping into hummus or a whipped feta dip. They would be a great addition to a party spread with some Smoky Grilled Chicken Skewers Recipe.
- Elevated Lunch: Tuck them alongside a delicious Cheesy Tuna Melt Sandwich Recipe for an extra bit of crunch and cheesy goodness.
- Drink Pairing: A crisp, cold lager or a glass of Sauvignon Blanc cuts through the richness of the cheese beautifully. For a non-alcoholic option, a sharp, cloudy apple juice works wonderfully.
Frequently Asked Questions
Homemade Cheez Its
Ingredients
Method
- Combine Dry Ingredients: In the bowl of a food processor, add the plain flour, grated cheddar, smoked paprika, 1/2 tsp of salt, and the onion powder (if using). Pulse 4-5 times to combine everything evenly.
- Add the Cold Butter: Scatter the cold, cubed butter over the flour mixture. Pulse in short bursts, about 10-12 times, until the mixture resembles coarse breadcrumbs with some pea-sized pieces of butter still visible. This is crucial for flakiness.
- Form the Dough: With the processor running on low, add the ice-cold water one tablespoon at a time. Stop as soon as the dough starts to clump together and form a ball. You might not need all the water. Be careful not to over-mix.
- Chill the Dough: Turn the dough out onto a clean surface, gather it into a ball, and flatten it into a 1-inch thick disc. Wrap it tightly in cling film and place it in the refrigerator to chill for at least 30 minutes. This step is essential for resting the gluten and firming up the butter.
- Preheat and Prepare: Towards the end of the chilling time, preheat your oven to 180°C (160°C Fan) and line two large baking trays with baking parchment.
- Roll and Cut: Unwrap the chilled dough and place it on a lightly floured surface. Roll it out as thinly as you can, aiming for about 2-3mm thick. What works best for me is rolling the dough between two sheets of baking parchment; it prevents sticking and means no extra flour is needed. Use a pizza wheel or a sharp knife to cut the dough into small squares, roughly 2.5cm x 2.5cm.
- Final Touches: Use a skewer or a chopstick to poke a small hole in the centre of each square – this helps them bake evenly and gives them that classic look. Carefully transfer the squares to your prepared baking trays, leaving a little space between them.
- Bake to Perfection: Lightly sprinkle the crackers with a little extra fine sea salt. Bake for 15-18 minutes, rotating the trays halfway through, until the crackers are golden brown at the edges and feel firm to the touch. Keep a close eye on them in the last few minutes as they can brown very quickly.
- Cool Completely: Let the crackers cool on the baking trays for 5 minutes before transferring them to a wire rack to cool completely. They will become much crisper as they cool.
Notes
I really hope you give this homemade Cheez Its recipe a try. There’s something so rewarding about turning a few simple ingredients into a snack that brings so much joy. The buttery, cheesy crunch is truly hard to beat, and I know they’ll become a staple baking idea in your home, just as they have in mine. Let me know how you get on in the comments below – I’d love to hear about it! Happy baking, Elena.