Copycat Italian Herb Cheese Bread
There are few things more satisfying than the aroma of freshly baked bread wafting through the house. It’s a scent that promises comfort, warmth, and something truly delicious to come. This Italian Herb Cheese Bread is the recipe I turn to when I want to fill my kitchen with that exact feeling. It’s a soft, chewy loaf, generously studded with melted cheese and fragrant with the classic herbs of an Italian countryside. This is my go-to recipe when I need something that feels special but is built on simple, honest ingredients. It transforms a simple weeknight pasta dish into a memorable meal, and it’s a brilliant centrepiece for a weekend lunch with friends.
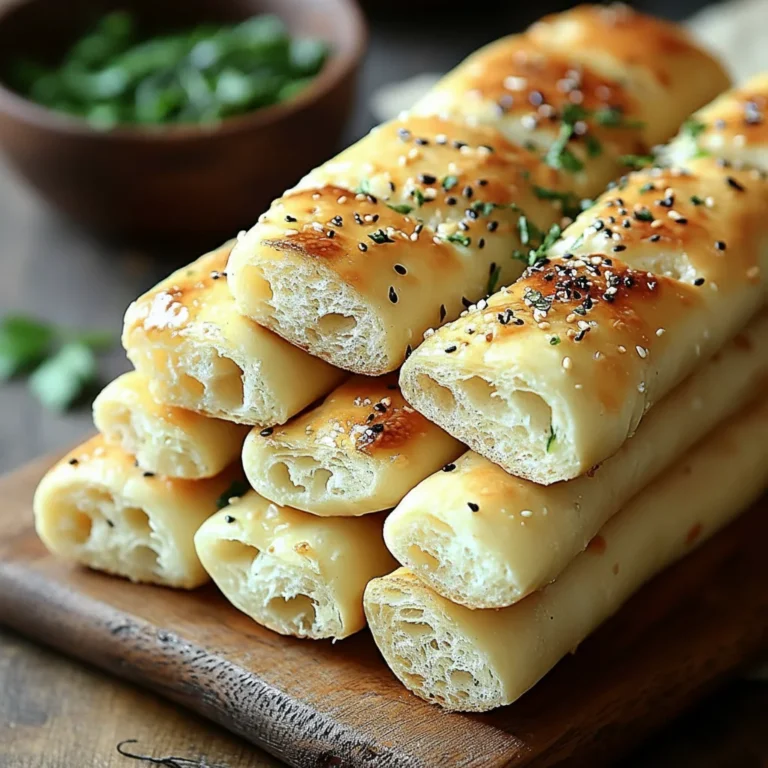
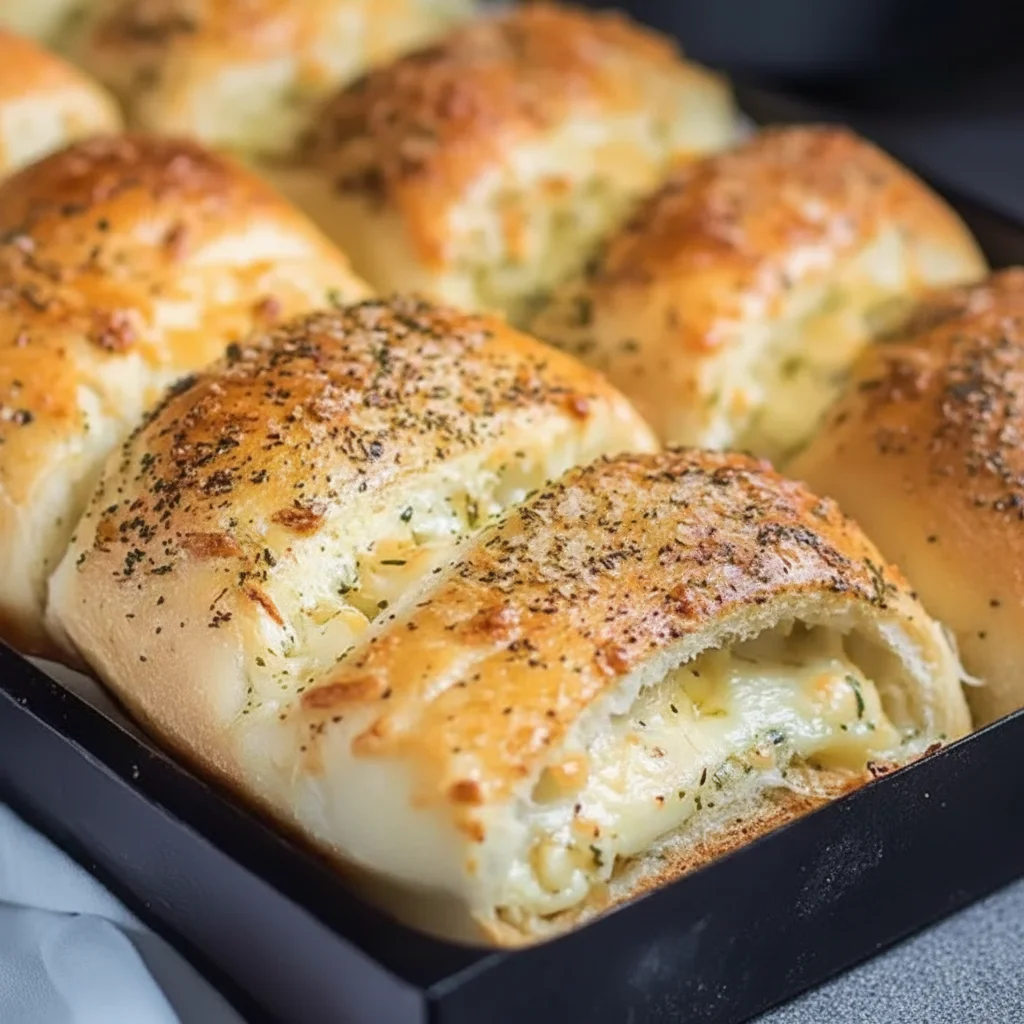
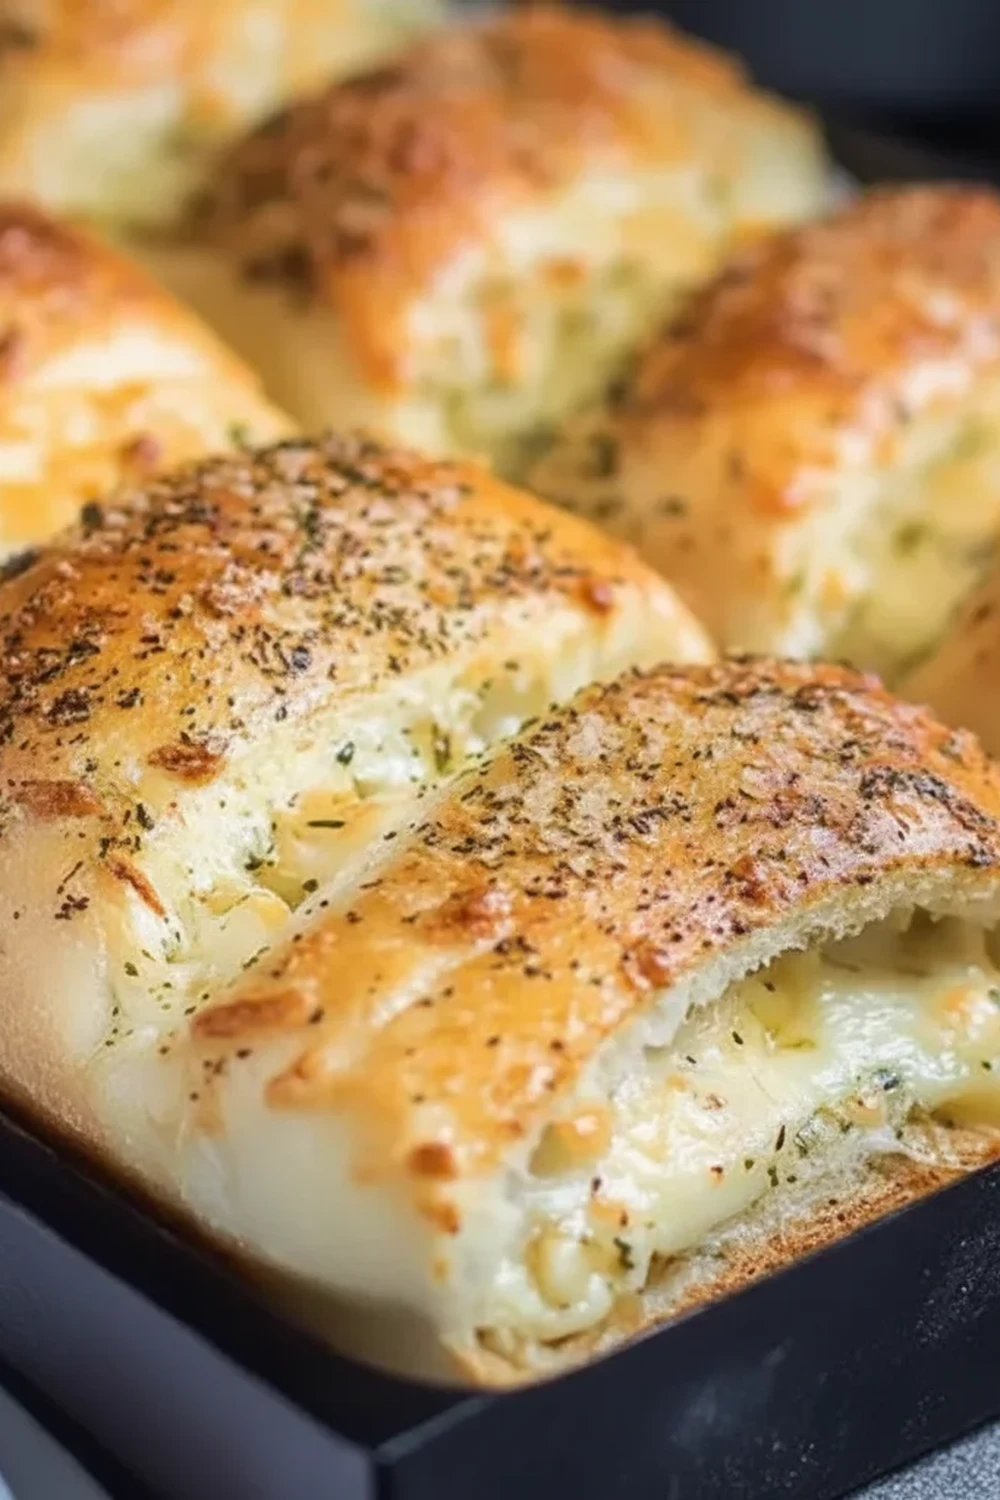
What sets this homemade bread apart is the texture and the flavour woven into every single slice. We’re not just sprinkling cheese on top; we’re kneading a generous amount right into the dough. As it bakes, the cheese melts into glorious, gooey pockets, while the herbs – a simple but effective trio of oregano, basil, and garlic – release their savoury perfume. The result is a loaf with a beautifully golden, slightly crisp crust that gives way to a tender, flavourful crumb. It’s the kind of savoury bread that’s just as good on its own, still warm from the oven, as it is dipped into a hearty soup or served alongside a fresh salad.
This copycat recipe is designed to give you that artisan bakery experience at home. It’s a wonderful project for a lazy afternoon, and the process of watching the dough rise and transform is immensely rewarding. Whether you’re an experienced baker or just starting your journey with yeast, this recipe will guide you to a loaf you’ll be incredibly proud of. It’s a recipe that always gets compliments and disappears far quicker than you’d expect.
Recipe Overview
This recipe creates one large, rustic loaf of Italian Herb Cheese Bread. The dough is soft and easy to handle, enriched with olive oil for a tender crumb and infused with a classic blend of Italian herbs. The magic happens when we fold in two types of cheese, ensuring a savoury, gooey bite every time. I’ve found that using a mix of mozzarella for its meltiness and Parmesan for its sharp, salty flavour gives the absolute best result. The final loaf is aromatic, incredibly moreish, and has a satisfyingly chewy texture.
- Prep Time: 20 minutes
- Proving Time: 1 hour 30 minutes
- Cook Time: 25-30 minutes
- Total Time: 2 hours 25 minutes
- Servings: 1 loaf (serves 8-10)
- Difficulty: Medium
Why You’ll Love This Italian Herb Cheese Bread
- Genuine Flavour: The combination of dried oregano, basil, and a hint of garlic powder provides a deep, aromatic base. This is beautifully complemented by the creamy, melted mozzarella and the sharp, nutty notes of Parmesan cheese in every slice.
- Straightforward Process: While working with yeast takes time, the actual hands-on work is minimal. The steps are clear and logical, making it a great recipe for building your bread-making confidence.
- A Flexible Recipe: You can easily adapt the herbs and cheeses to what you have. Try adding a pinch of chilli flakes for warmth, some finely chopped sun-dried tomatoes for sweetness, or swap the mozzarella for a mature cheddar.
- Ideal for Sharing: This loaf works beautifully for family dinners, served alongside a big bowl of pasta or a hearty stew. It’s also fantastic for slicing up and serving with a cheeseboard when you have guests. We love it with a rich lasagna or my Classic Shrimp Scampi Recipe In Minutes.
- Family Tested: My kids absolutely devour this every time I make it. They love pulling apart the warm, cheesy slices. It’s one of those bakes that brings everyone to the kitchen as soon as it comes out of the oven.
Ingredients You’ll Need
For the best results, I recommend using strong white bread flour, as its higher protein content is what creates that signature chewy texture we’re after. When it comes to cheese, grating your own from a block is always better than pre-shredded, as it melts more smoothly without any anti-caking agents.
- 500g strong white bread flour, plus extra for dusting
- 7g fast-action dried yeast (1 sachet)
- 1 tsp caster sugar
- 1 ½ tsp fine sea salt
- 300ml lukewarm water
- 2 tbsp extra virgin olive oil, plus extra for greasing
- 1 tsp dried oregano
- 1 tsp dried basil
- ½ tsp garlic powder
- 150g mozzarella cheese, grated
- 50g Parmesan cheese, finely grated
- A little milk or one beaten egg, for glazing (optional)
Elena’s Tip: Don’t be tempted to add all the water at once. Different flours absorb liquid differently. Hold back a tablespoon or two and add it only if the dough feels too dry. The ideal dough should be soft and slightly sticky, but not wet.
How to Make Italian Herb Cheese Bread
The process involves a few stages, but each one is simple. The key is to be patient with the proving times – this is where the flavour and texture truly develop. Let the yeast do its work, and you’ll be rewarded with a spectacular loaf.
- Activate the Yeast: In a small bowl or jug, whisk together the 300ml of lukewarm water, the sachet of yeast, and the caster sugar. Set it aside for 5-10 minutes until it becomes frothy and bubbly on top. This shows your yeast is active.
- Combine Dry Ingredients: In the large bowl of a stand mixer fitted with a dough hook (or just a large mixing bowl), combine the 500g of bread flour, salt, dried oregano, basil, and garlic powder. Give it a quick mix to distribute everything evenly.
- Form the Dough: Pour the activated yeast mixture and the 2 tbsp of olive oil into the flour mixture. Mix on a low speed until a shaggy dough comes together. If mixing by hand, use a wooden spoon or spatula.
- Knead the Dough: Increase the mixer speed to medium-low and knead for 8-10 minutes, or until the dough is smooth, elastic, and pulls away from the sides of the bowl. If kneading by hand, tip the dough onto a lightly floured surface and knead for a solid 10-12 minutes. What works best for me is setting a timer to ensure I knead for long enough.
- First Prove: Lightly oil a clean, large bowl. Shape the dough into a ball, place it in the bowl, and turn it over to coat lightly in oil. Cover the bowl with a clean tea towel or cling film and leave it in a warm, draught-free place for about 1 hour, or until doubled in size.
- Incorporate Cheese: Once risen, tip the dough onto a lightly floured surface and gently press it down to knock out the air. Scatter over about three-quarters of the grated mozzarella and Parmesan. Gently knead for a minute or two, just enough to distribute the cheese throughout the dough.
- Shape and Second Prove: Shape the dough into your desired loaf shape – a round boule or an oval batard both work well. Place it on a baking tray lined with parchment paper. Cover loosely with oiled cling film and leave to prove again for 30-45 minutes, until it has visibly puffed up. Meanwhile, preheat your oven to 200°C (180°C fan).
- Bake the Loaf: Just before baking, brush the top of the loaf with a little milk or beaten egg (if using) and sprinkle over the remaining cheese. Bake for 25-30 minutes, until the loaf is a deep golden brown and sounds hollow when you tap the bottom.
- Cool Down: Transfer the finished loaf to a wire rack to cool completely before slicing. This is a crucial step as it allows the crumb to set properly.
Tips From My Kitchen
- Water Temperature is Key: Yeast is a living organism. The water you use to activate it should feel like a warm bath, around 38°C. If it’s too hot, it will kill the yeast; too cold and it won’t wake up properly.
- The Windowpane Test: I learned that the best way to check if your dough is kneaded enough is the “windowpane test”. Take a small piece of dough and gently stretch it between your fingers. If it stretches thin enough to see light through it without tearing, the gluten is well-developed. If it tears, knead for another couple of minutes.
- Make-Ahead Dough: You can perform the first prove in the refrigerator overnight. After kneading, place the dough in the oiled bowl, cover, and chill for up to 24 hours. This slow fermentation actually develops a deeper flavour. Just let it sit at room temperature for an hour before shaping.
- Proper Storage: Once completely cool, store the bread in a paper bag or a bread bin at room temperature. It will keep well for 2-3 days. Avoid storing it in the fridge, which can make it go stale faster. It also freezes brilliantly – just slice it first for convenience.
Equipment You’ll Need
- Stand mixer with dough hook (optional, but helpful)
- Large baking tray
- Parchment paper
- Large mixing bowl
- Wire cooling rack
Common Mistakes to Avoid
- Not Kneading Enough: This is the most common pitfall. Under-kneaded dough lacks the gluten structure needed to trap air, resulting in a dense, heavy loaf. Be patient and knead until the dough is smooth, supple, and passes the windowpane test.
- An Inaccurate Oven: Ovens can vary wildly. An oven that runs too hot can burn the crust before the inside is cooked through. An oven thermometer is a small investment that can make a huge difference to your baking.
- Skipping the Second Prove: The second prove (after shaping) is just as important as the first. It gives the yeast time to recover and create the final airy texture of the loaf. Rushing this stage will lead to a less impressive rise in the oven.
Delicious Variations to Try
Once you’ve mastered the basic recipe, it’s fun to experiment. This dough is a wonderful canvas for other flavours.
- Spicy Kick: Add 1/2 teaspoon of dried chilli flakes or a teaspoon of smoked paprika along with the other dry ingredients for a gentle, smoky heat.
- Olive and Rosemary: Swap the cheese for 100g of chopped Kalamata olives and 1 tablespoon of fresh, finely chopped rosemary for a more Mediterranean-style loaf.
- Pesto Swirl: After the first prove, roll the dough out into a rectangle. Spread a thin layer of pesto over the surface before rolling it up tightly and shaping it. This creates a beautiful green swirl when sliced.
What to Serve With Italian Herb Cheese Bread
This savory bread is wonderfully versatile and pairs well with so many dishes, making it a valuable addition to your recipe collection.
- It’s the ideal companion for any Italian-inspired meal. Use it to mop up the sauce from a hearty soup or serve it alongside a creamy pasta dish like my Cheesy Tuna Melt Sandwich Recipe‘s tomato soup counterpart.
- Slice it thickly, toast it, and top with fresh tomatoes, basil, and a drizzle of balsamic for a quick and delicious bruschetta.
- A crisp, dry white wine like a Pinot Grigio or Sauvignon Blanc cuts through the richness of the cheese, while a light-bodied red like a Valpolicella also works beautifully.
Frequently Asked Questions
Italian Herb Cheese Bread
Ingredients
Method
- Activate the Yeast: In a small bowl or jug, whisk together the 300ml of lukewarm water, the sachet of yeast, and the caster sugar. Set it aside for 5-10 minutes until it becomes frothy and bubbly on top. This shows your yeast is active.
- Combine Dry Ingredients: In the large bowl of a stand mixer fitted with a dough hook (or just a large mixing bowl), combine the 500g of bread flour, salt, dried oregano, basil, and garlic powder. Give it a quick mix to distribute everything evenly.
- Form the Dough: Pour the activated yeast mixture and the 2 tbsp of olive oil into the flour mixture. Mix on a low speed until a shaggy dough comes together. If mixing by hand, use a wooden spoon or spatula.
- Knead the Dough: Increase the mixer speed to medium-low and knead for 8-10 minutes, or until the dough is smooth, elastic, and pulls away from the sides of the bowl. If kneading by hand, tip the dough onto a lightly floured surface and knead for a solid 10-12 minutes. What works best for me is setting a timer to ensure I knead for long enough.
- First Prove: Lightly oil a clean, large bowl. Shape the dough into a ball, place it in the bowl, and turn it over to coat lightly in oil. Cover the bowl with a clean tea towel or cling film and leave it in a warm, draught-free place for about 1 hour, or until doubled in size.
- Incorporate Cheese: Once risen, tip the dough onto a lightly floured surface and gently press it down to knock out the air. Scatter over about three-quarters of the grated mozzarella and Parmesan. Gently knead for a minute or two, just enough to distribute the cheese throughout the dough.
- Shape and Second Prove: Shape the dough into your desired loaf shape – a round boule or an oval batard both work well. Place it on a baking tray lined with parchment paper. Cover loosely with oiled cling film and leave to prove again for 30-45 minutes, until it has visibly puffed up. Meanwhile, preheat your oven to 200°C (180°C fan).
- Bake the Loaf: Just before baking, brush the top of the loaf with a little milk or beaten egg (if using) and sprinkle over the remaining cheese. Bake for 25-30 minutes, until the loaf is a deep golden brown and sounds hollow when you tap the bottom.
- Cool Down: Transfer the finished loaf to a wire rack to cool completely before slicing. This is a crucial step as it allows the crumb to set properly.
Notes
I really hope you give this Italian Herb Cheese Bread a try. There’s a special kind of pride that comes from pulling a beautiful, golden loaf of your own creation from the oven. It makes the whole house smell incredible and brings everyone together. Let me know how you get on in the comments below – I’d love to hear about it! Happy baking!
– Elena