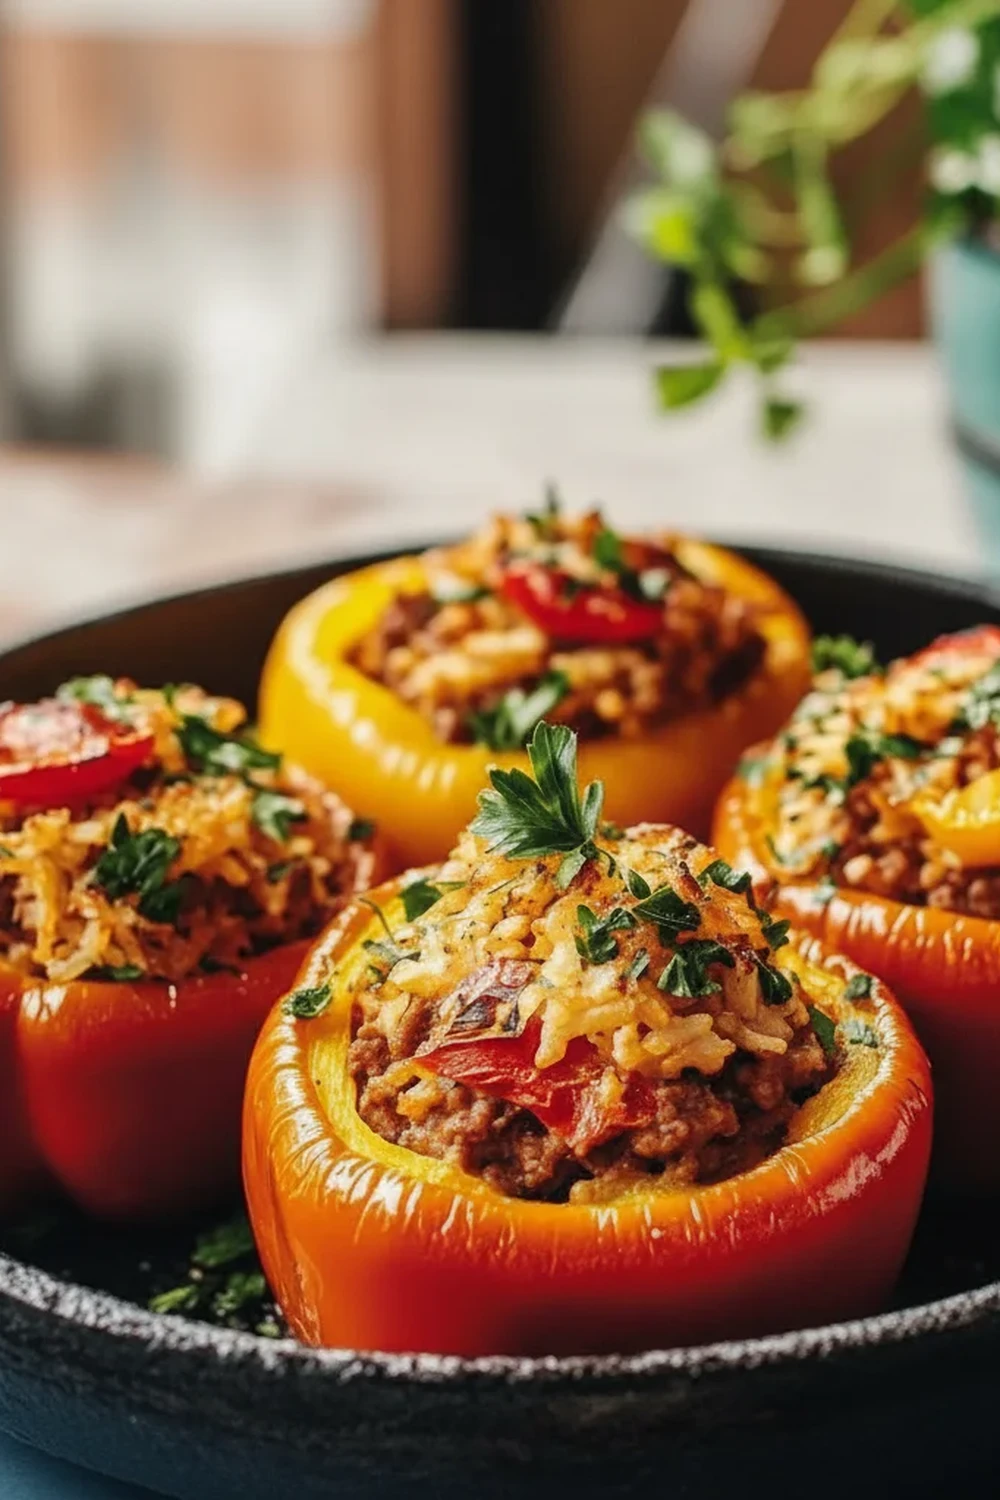
Baked Stuffed Bell Peppers Recipe
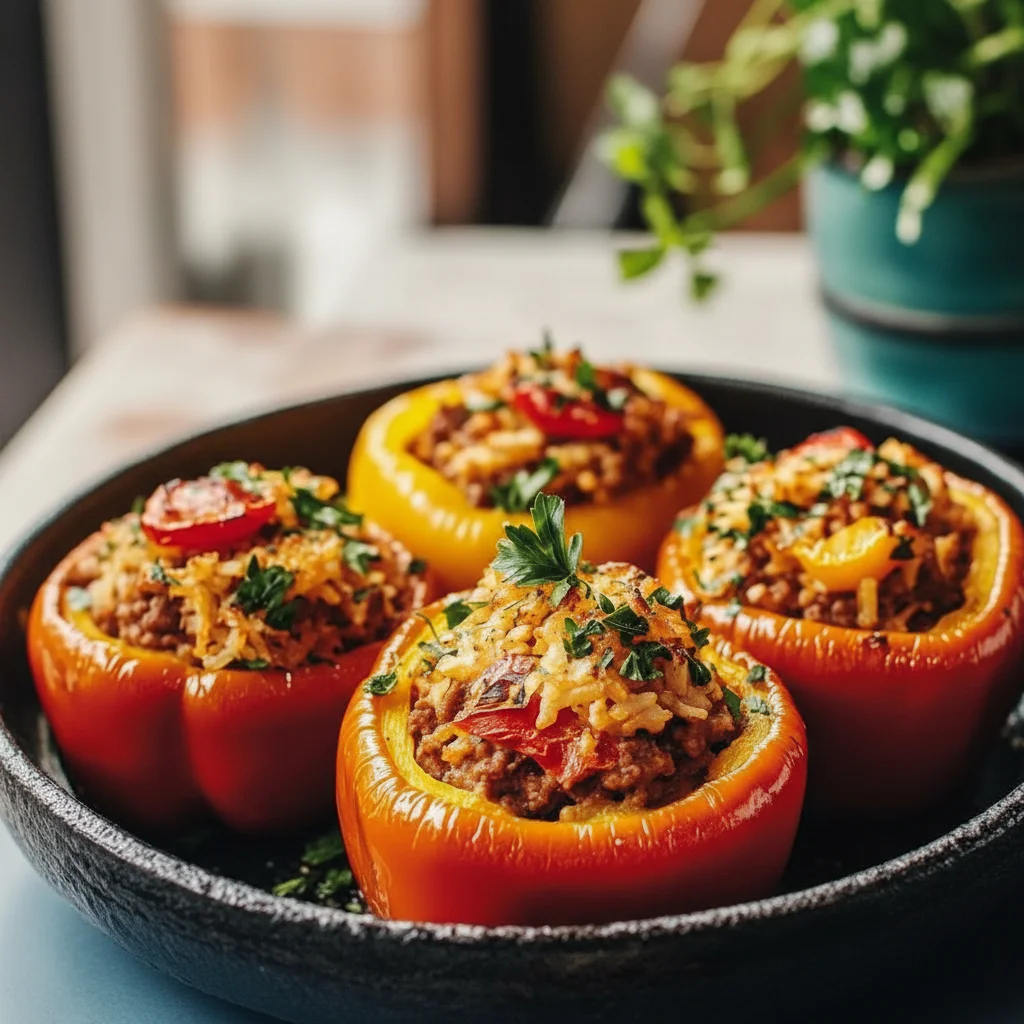
There’s something wonderfully complete about a meal you can hold in your hand. This Stuffed Bell Peppers Recipe is just that – a vibrant, self-contained dish where sweet, tender peppers act as edible bowls for a rich and savoury filling. It’s a meal that feels both wholesome and a little bit special. This particular version was inspired by a dish I had at a little restaurant in Spain, where they served peppers filled with the most incredible combination of spiced meat and rice. I’ve spent years refining my own take on it, and I’m so happy to share the version that always gets rave reviews in my home.
What I adore about these stuffed peppers is the harmony between the ingredients. The bell peppers, when baked, become sweet and soft, their gentle flavour a beautiful counterpoint to the robust, tomato-infused beef and rice filling. Topped with a layer of cheddar that melts into a golden, bubbly blanket, each bite is deeply satisfying. This isn’t a complex recipe, but the results feel thoughtfully put together.
It’s a fantastic choice for a nourishing weeknight dinner, as it covers all your bases – vegetables, protein, and carbohydrates in one neat package. It’s the kind of food that brings a smile to my family’s faces, and it works beautifully when you want to prepare something wholesome without spending all evening in the kitchen.
Recipe Overview
This stuffed bell peppers recipe delivers tender, sweet peppers filled with a savoury mixture of lean beef mince, fluffy rice, and a rich tomato sauce seasoned with smoked paprika and oregano. The final touch is a generous layer of melted cheddar cheese. I used to struggle with this dish until I discovered the technique of pre-baking the peppers; it’s a small step that makes a huge difference, preventing any sogginess and concentrating their flavour.
- Prep Time: 20 minutes
- Cook Time: 40 minutes
- Total Time: 1 hour
- Servings: 4 people (8 pepper halves)
- Difficulty: Easy
Why You’ll Love This Stuffed Bell Peppers Recipe
- Genuine Flavour: The sweetness of the roasted peppers melds beautifully with the savoury, slightly smoky beef filling. The garlic, onion, and oregano create a classic, aromatic base, while the melted cheddar on top adds a comforting, tangy finish.
- Ready in an Hour: From chopping the onion to pulling the golden-topped peppers from the oven, the whole process comes together in about 60 minutes, making it very achievable for a weeknight.
- Flexible Recipe: This recipe is wonderfully adaptable. You can swap the beef mince for turkey or pork, add finely diced courgette or mushrooms to the filling, or use a different grain like quinoa instead of rice.
- Great for Family Dinners: This dish is ideal for a satisfying family meal. It’s visually appealing and hearty enough to please everyone at the table. If you’re looking for other family-friendly ideas, our Savory Beef And Broccoli Stir Fry Recipe is another one that always gets compliments.
- Family Tested: My children love getting to choose their favourite colour of pepper, and it’s a great way to get them excited about eating their vegetables. It’s a meal that feels fun and satisfying for all ages.
Ingredients You’ll Need
For the best results, try to use peppers that are similar in size so they cook evenly. I often use a mix of red, yellow, and orange peppers for a more colourful presentation. When it comes to tinned tomatoes, I find that a good quality brand like Mutti or Cirio gives the sauce a richer, less acidic taste.
- 4 large bell peppers (any colour)
- 1 tbsp olive oil
- 1 large onion, finely chopped
- 2 cloves garlic, minced
- 500g lean beef mince (5% fat)
- 1 tsp smoked paprika
- 1 tsp dried oregano
- 400g tin of chopped tomatoes
- 1 tbsp tomato purée
- 150g long-grain white rice, cooked and cooled
- 50g frozen peas (optional)
- 1 beef stock cube, crumbled
- Sea salt and freshly ground black pepper, to taste
- 100g mature cheddar cheese, grated
- Fresh parsley, chopped, for garnish
Elena’s Tip: Look for bell peppers that have a flat base. They will sit upright in the baking dish much more easily and won’t topple over when you’re filling them or moving them in and out of the oven.
How to Make Stuffed Bell Peppers Recipe
The process is quite straightforward. We start by preparing and pre-baking the peppers to soften them and draw out moisture. While they’re in the oven, we make the rich, savoury filling on the hob before combining everything for the final bake.
- Prepare the Peppers: Preheat your oven to 200°C (180°C fan). Slice the bell peppers in half lengthways, from stem to base. Remove the seeds and white membranes. Place them cut-side up in a large baking dish, drizzle lightly with a little olive oil, and season with a pinch of salt and pepper.
- Pre-Bake the Peppers: Bake the empty pepper halves for 15 minutes. This crucial step softens them and prevents the final dish from being watery. Remove from the oven and set aside.
- Sauté the Aromatics: While the peppers are baking, heat 1 tbsp of olive oil in a large frying pan or skillet over a medium heat. Add the chopped onion and cook for 5-7 minutes until soft and translucent. Add the minced garlic and cook for another minute until fragrant.
- Cook the Mince: Add the beef mince to the pan. Break it up with a wooden spoon and cook until it’s browned all over. Drain off any excess fat.
- Build the Sauce: Stir in the smoked paprika and dried oregano. Add the tinned tomatoes, tomato purée, and crumbled beef stock cube. Season with salt and pepper. Bring to a simmer and let it cook for 10 minutes, stirring occasionally, until the sauce has thickened slightly.
- Combine the Filling: Remove the pan from the heat. Stir in the cooked rice and the frozen peas (if using) until everything is well combined. I find that letting the filling cool for just a couple of minutes makes it easier to handle.
- Stuff the Peppers: Carefully spoon the beef and rice mixture into the pre-baked pepper halves, packing it in gently. Don’t be afraid to mound it up a little on top.
- Add Cheese and Bake: Sprinkle the grated cheddar cheese evenly over the top of each stuffed pepper. Pour about 100ml of water into the bottom of the baking dish (this creates steam and keeps the peppers moist).
- Final Bake: Return the dish to the oven and bake for a further 20-25 minutes, or until the filling is piping hot and the cheese is golden brown and bubbling.
- Rest and Serve: Let the stuffed peppers rest in the dish for 5 minutes before serving. This allows the filling to set slightly. Garnish with fresh chopped parsley before bringing to the table.
Tips From My Kitchen
- Temperature Control: Cooking at 200°C (180°C fan) is ideal. It’s hot enough to melt the cheese and heat the filling through without burning the tops of the peppers before they are fully tender.
- The Secret Step: Don’t skip pre-baking the peppers. I learned that this simple 15-minute step draws out a significant amount of water, which concentrates the pepper’s sweet flavour and ensures your filling isn’t diluted and soggy.
- Make-Ahead: You can prepare the entire beef and rice filling up to two days in advance and store it in an airtight container in the fridge. You can also stuff the peppers, cover, and refrigerate them for up to 24 hours before baking. Just add an extra 5-10 minutes to the baking time.
- Storage: Leftover stuffed peppers can be stored in an airtight container in the fridge for up to 3 days. They reheat beautifully in the microwave or in the oven at 160°C for about 15 minutes.
Common Mistakes to Avoid
- Overcrowding the pan: Ensure there is a little space between each pepper half in the baking dish. This allows hot air to circulate properly, helping the peppers to roast rather than steam. A crowded pan can result in softer, less flavourful peppers.
- Wrong temperature: If the oven is too hot, the cheese and the tops of the filling can burn before the pepper itself is fully cooked and tender. If it’s too cool, the peppers can become overly soft and mushy by the time the filling is hot. Stick to the recommended 200°C/180°C fan.
- Skipping the rest time: It’s tempting to serve them straight from the oven, but letting the stuffed peppers rest for 5 minutes is important. It allows the filling to settle and firm up, so they hold their shape better when you serve them.
Delicious Variations to Try
One of the best things about this stuffed peppers recipe is how easily you can adapt it to your taste or what you have in the cupboard. For another adaptable meal, check out our Simple Egg Fried Rice For Dinner.
- Spicy Version: For a bit of a kick, add 1/2 teaspoon of chilli flakes or one finely chopped red chilli to the pan along with the garlic.
- Vegetarian/Vegan Option: Replace the beef mince with 400g of cooked green or brown lentils, or a mixture of finely chopped mushrooms and cooked quinoa. Use a vegetable stock cube and top with a vegan-friendly cheese alternative.
- Different Protein: This recipe works wonderfully with other types of mince. Try using lean turkey, pork, or even crumbled Italian-style sausage (casings removed) for a different flavour profile.
What to Serve With Stuffed Bell Peppers Recipe
These peppers are quite a complete meal on their own, but if you want to round them out, here are a few ideas that work beautifully.
- A Simple Green Salad: A crisp salad of rocket and lettuce with a sharp lemon vinaigrette provides a fresh contrast that cuts through the richness of the filling.
- Crusty Bread: A slice of warm, crusty sourdough or a French baguette is perfect for mopping up any delicious sauce at the bottom of the dish.
- Wine Pairing: A medium-bodied red wine like a Spanish Rioja or an Italian Chianti complements the savoury tomato and beef filling perfectly. For a non-alcoholic option, a sparkling water with a slice of lemon works well.
Frequently Asked Questions
Stuffed Bell Peppers Recipe
Ingredients
Method
- Prepare the Peppers: Preheat your oven to 200°C (180°C fan). Slice the bell peppers in half lengthways, from stem to base. Remove the seeds and white membranes. Place them cut-side up in a large baking dish, drizzle lightly with a little olive oil, and season with a pinch of salt and pepper.
- Pre-Bake the Peppers: Bake the empty pepper halves for 15 minutes. This crucial step softens them and prevents the final dish from being watery. Remove from the oven and set aside.
- Sauté the Aromatics: While the peppers are baking, heat 1 tbsp of olive oil in a large frying pan or skillet over a medium heat. Add the chopped onion and cook for 5-7 minutes until soft and translucent. Add the minced garlic and cook for another minute until fragrant.
- Cook the Mince: Add the beef mince to the pan. Break it up with a wooden spoon and cook until it's browned all over. Drain off any excess fat.
- Build the Sauce: Stir in the smoked paprika and dried oregano. Add the tinned tomatoes, tomato purée, and crumbled beef stock cube. Season with salt and pepper. Bring to a simmer and let it cook for 10 minutes, stirring occasionally, until the sauce has thickened slightly.
- Combine the Filling: Remove the pan from the heat. Stir in the cooked rice and the frozen peas (if using) until everything is well combined. I find that letting the filling cool for just a couple of minutes makes it easier to handle.
- Stuff the Peppers: Carefully spoon the beef and rice mixture into the pre-baked pepper halves, packing it in gently. Don't be afraid to mound it up a little on top.
- Add Cheese and Bake: Sprinkle the grated cheddar cheese evenly over the top of each stuffed pepper. Pour about 100ml of water into the bottom of the baking dish (this creates steam and keeps the peppers moist).
- Final Bake: Return the dish to the oven and bake for a further 20-25 minutes, or until the filling is piping hot and the cheese is golden brown and bubbling.
- Rest and Serve: Let the stuffed peppers rest in the dish for 5 minutes before serving. This allows the filling to set slightly. Garnish with fresh chopped parsley before bringing to the table.
Notes
I truly hope you enjoy making this Stuffed Bell Peppers Recipe as much as I do. It’s a reliable, flavourful, and satisfying meal that has earned a permanent spot in my cooking repertoire. If you give it a try, please let me know how it turned out in the comments below – I love hearing from you! Happy cooking. – Elena