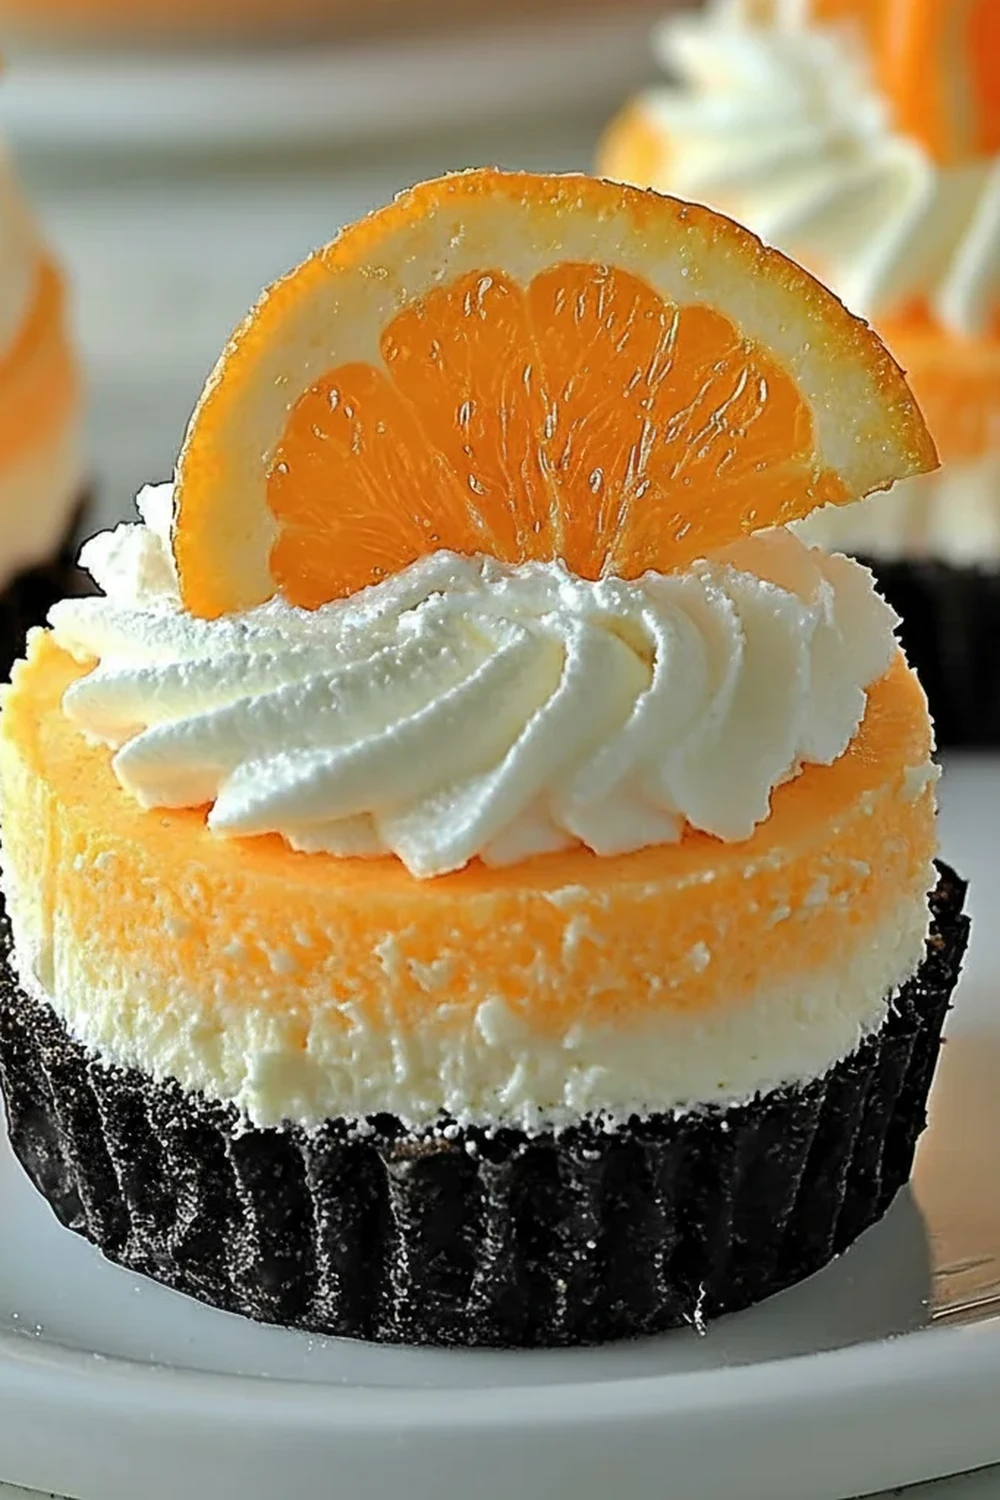
Orange Creamsicle Cheesecakes
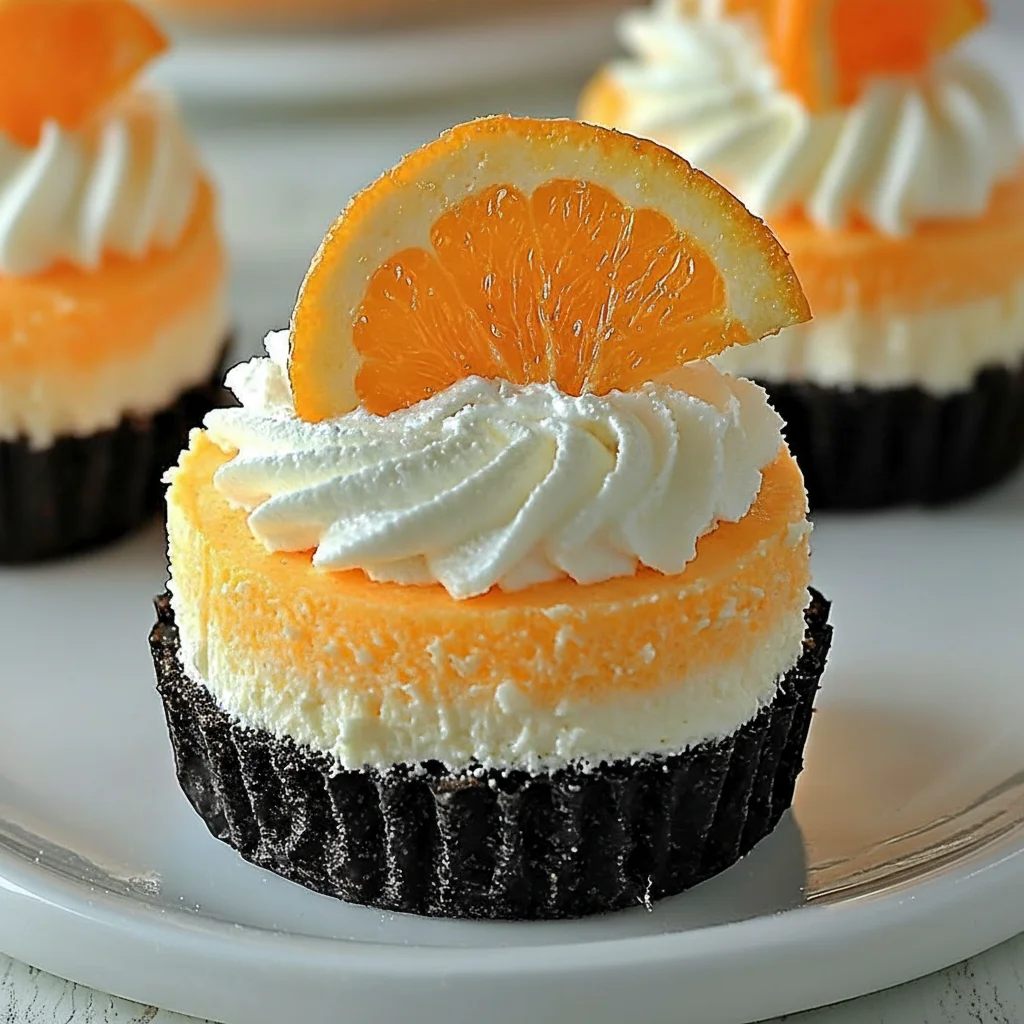
There’s a certain magic to the combination of zesty orange and creamy vanilla that instantly transports me back to childhood summers. That nostalgic flavour is exactly what we’ve captured in these individual Orange Creamsicle Cheesecakes. Forget turning on the oven; this is a glorious no bake cheesecake recipe that relies on chilling time to set into a silky, luscious dessert. This is my go-to recipe when I need something that looks and tastes incredibly special but comes together with minimal fuss. The vibrant, sunny flavour is a welcome treat at any time of year, but it truly shines on a warm afternoon.
What makes these mini cheesecakes so delightful is the balance. The buttery biscuit base provides a satisfying crunch, followed by a velvety smooth cheesecake filling that’s infused with fresh orange zest and a hint of vanilla. The result is a light, refreshing citrus dessert that isn’t overly sweet. We’re not just using orange juice; we’re using the zest to get that bright, aromatic oil, which makes all the difference. They are wonderful for dinner parties because they are already portioned, making serving an absolute breeze. They also look stunning on a dessert table, each one a perfect little treat.
This creamsicle dessert is ideal for anyone who adores citrus flavours but wants something a little more indulgent than a sorbet. We’ll walk through every step, ensuring your cheesecakes set perfectly every time. After making these for a family gathering, my nephew, who claims not to like cheesecake, asked for a second one – that’s when I knew this recipe was a true keeper, just like Spicy Cajun Sausage & Rice Soup (Turkey Sausage) wins over even the pickiest eaters, and Sichuan Kung Pao Chicken (Mouth-Numbing) wins over adventurous palates.cuisinespicy.com/sichuan-kung-pao-chicken-mouth-numbing/”>Sichuan Kung Pao Chicken (Mouth-Numbing) wins over adventurous palates.cuisinespicy.com/hot-honey-crispy-chicken-tenders/”>Hot Honey Crispy Chicken Tenders wins over even the pickiest eaters.cuisinespicy.com/nashville-hot-chicken-mac-and-cheese/”>Nashville Hot Chicken Mac And Cheese wins over even the pickiest eaters. So, let’s get our aprons on and create something wonderful together.
Recipe Overview
This recipe creates individual no-bake orange cheesecakes with a classic digestive biscuit base and a smooth, creamy filling reminiscent of a creamsicle. The flavour is bright and zesty from fresh oranges, balanced by rich cream cheese and vanilla. When I was first testing this, I tried using only orange juice for flavour, but the filling didn’t have that vibrant punch I was looking for. Adding a generous amount of fresh zest was the key to unlocking that authentic orange aroma.
- Prep Time: 25 minutes
- Chill Time: 4 hours (or overnight)
- Total Time: 4 hours 25 minutes
- Servings: 6 individual cheesecakes
- Difficulty: Easy
Why You’ll Love These Orange Creamsicle Cheesecakes
- Genuine Creamsicle Flavour: We use both fresh orange zest and vanilla extract to perfectly replicate that classic sweet, zesty, and creamy taste. The orange isn’t just a hint; it’s a bright, clear note that sings through the rich filling.
- Ready in Under 30 Minutes of Prep: The active preparation time is remarkably short. You can have these assembled and in the fridge to chill in less than half an hour, leaving you free to focus on other things.
- A Versatile Citrus Dessert: You can easily swap the digestives for ginger nut biscuits for a spicy kick or use lemons or limes for a different citrus twist. The recipe is a fantastic base for experimentation.
- Works Beautifully for Entertaining: These individual mini cheesecakes are ideal when you have guests. There’s no slicing involved, and they look elegant served on their own or with a few fresh berries. They’re a lovely, light finish after a flavourful main like my Savory Garlic Butter Shrimp.
- Family Tested and Approved: My entire family adores this creamsicle dessert. Even the little ones love the sweet orange flavour, and the individual portions make them feel extra special. It always gets compliments at our table.
Ingredients You’ll Need
For the best results, it’s crucial to use full-fat ingredients. The fat content in the cream cheese and double cream is what helps this no bake cheesecake set to a firm, sliceable texture. I always use Philadelphia Original cream cheese for its consistent, rich flavour and texture, but any good quality full-fat block cream cheese will work well.
- For the Biscuit Base:
- 150g digestive biscuits
- 75g unsalted butter, melted
- 1 tbsp demerara sugar (optional, for extra crunch)
- For the Cheesecake Filling:
- 400g full-fat cream cheese, at room temperature
- 100g icing sugar, sifted
- 1 tsp vanilla bean paste or pure vanilla extract
- Zest of 2 large oranges
- 60ml fresh orange juice (from one of the zested oranges)
- 250ml double cream, cold
- For the Garnish (Optional):
- Fresh orange segments or twists
- A dusting of icing sugar
- White chocolate shavings
Elena’s Tip: Make sure your cream cheese is truly at room temperature. Cold cream cheese is the number one cause of lumpy cheesecake filling. I take mine out of the fridge at least an hour before I start.
How to Make Orange Creamsicle Cheesecakes
The process for this no bake cheesecake is straightforward. We’ll create the base first, then whip up the creamy filling, and finally let the fridge do all the hard work. Using a stand mixer or electric hand mixer makes the filling exceptionally smooth and light.
- Prepare Your Moulds: Lightly grease a 6-hole loose-bottomed mini sandwich tin or 6 individual dessert rings (around 8cm diameter). If using rings, place them on a baking tray lined with parchment paper.
- Make the Biscuit Base: Place the digestive biscuits in a food processor and blitz until they form fine crumbs. Alternatively, put them in a sealed bag and crush them with a rolling pin. Pour the crumbs into a bowl, add the demerara sugar (if using), and pour over the melted butter. Mix with a fork until the mixture resembles wet sand.
- Press the Base: Divide the crumb mixture evenly between your 6 moulds. Use the back of a spoon or the bottom of a small glass to press the crumbs down firmly and evenly. This firm pressure is key to a base that doesn’t fall apart. Place the tray in the fridge to chill for at least 30 minutes while you make the filling.
- Start the Filling: In a large bowl, beat the room-temperature cream cheese with an electric mixer until it’s completely smooth and free of lumps. Sift in the icing sugar and beat again until well combined.
- Add the Flavour: Add the vanilla paste, orange zest, and fresh orange juice to the cream cheese mixture. Beat on a low speed until everything is just incorporated. Don’t overmix at this stage. I find that using a spatula to scrape down the sides of the bowl ensures all the zest is evenly distributed.
- Whip the Cream: In a separate, clean bowl, whip the cold double cream until it holds stiff peaks. You’re looking for a texture that is firm enough to stand up on its own without drooping. For a detailed guide on whipping cream, Serious Eats has a fantastic tutorial.
- Fold Everything Together: Gently fold about a third of the whipped cream into the orange cream cheese mixture using a spatula to lighten it. Then, add the remaining whipped cream and fold carefully until just combined and no streaks remain. The goal is to keep as much air in the mixture as possible for a light texture.
- Assemble and Chill: Spoon or pipe the cheesecake filling evenly over the chilled biscuit bases, smoothing the tops with a small offset spatula or the back of a spoon.
- The Final Chill: Cover the tray loosely with cling film and place it in the fridge to set for at least 4 hours, though overnight is even better for the firmest set. Once set, carefully remove the mini cheesecakes from their moulds and transfer them to a serving plate. Garnish just before serving.
Tips From My Kitchen
- Room Temperature is Key: For the smoothest possible orange cheesecake filling, your cream cheese absolutely must be at room temperature. Cold cream cheese will result in a lumpy texture that no amount of mixing can fix.
- The Secret to a Sturdy Base: I learned that really compacting the biscuit base is crucial. Don’t just gently pat it down; use some pressure with the bottom of a glass to create a solid, even layer. This prevents it from crumbling when you serve it.
- Make-Ahead Magic: This creamsicle dessert is ideal for making in advance. You can prepare it completely the day before you plan to serve it. Just keep it covered in the fridge and add any garnishes right before bringing it to the table.
- Storage: Leftover mini cheesecakes will keep well in an airtight container in the fridge for up to 3 days. The biscuit base may soften slightly over time, but the flavour will still be wonderful.
Equipment You’ll Need
- Food processor or a rolling pin and sealed bag
- Stand mixer or electric hand mixer
- 6-hole loose-bottomed mini sandwich tin or 6 individual dessert rings (8cm)
- A large baking tray
- Mixing bowls and a spatula
- Parchment paper
Common Mistakes to Avoid
- Lumpy Filling: This is almost always caused by using cream cheese that is too cold. Let it sit on the counter for at least an hour before you begin. If you’re short on time, you can cut it into small cubes to help it soften faster.
- Runny Cheesecake: Don’t be tempted to use low-fat cream cheese or single cream. The high-fat content of full-fat cream cheese and double cream is essential for a no bake cheesecake to set properly. Also, ensure you whip the cream to stiff peaks.
- Skipping the Chill Time: Patience is a virtue with a no bake cheesecake. The 4-hour minimum chilling time is non-negotiable. This allows the fats in the cream and cheese to solidify, giving the dessert its firm, luscious structure.
Delicious Variations to Try
Once you’ve mastered this recipe, it’s fun to play around with the flavours. This recipe is a brilliant canvas for other citrus desserts or different textures.
- Zingy Lemon & Lime: Swap the orange zest and juice for an equal amount of lemon or lime zest and juice. A lime creamsicle cheesecake is particularly refreshing.
- Ginger Nut Base: For a warming, spicy contrast to the cool citrus filling, substitute the digestive biscuits with ginger nut biscuits. The combination is absolutely divine.
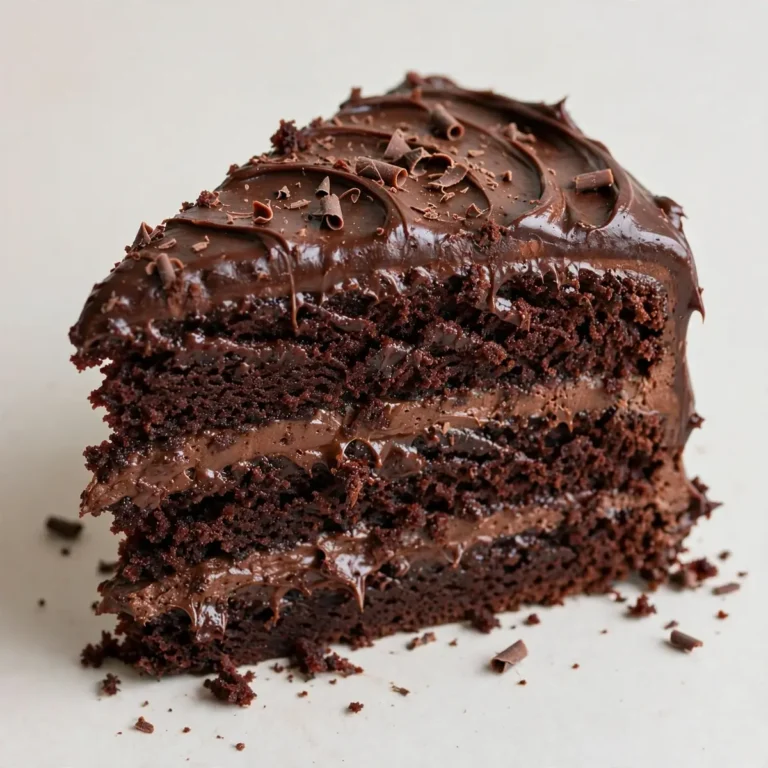
- Chocolate Orange Cheesecake: Add 2 tablespoons of sifted cocoa powder to the biscuit base and garnish the finished cheesecakes with dark chocolate shavings for a classic flavour pairing.
What to Serve With Orange Creamsicle Cheesecakes
These mini cheesecakes are a complete dessert on their own, but a few simple additions can elevate them further. It’s a great dessert to follow a lighter meal, such as my Sticky Sweet Teriyaki Chicken Bowls.
- Fresh Berries: A small handful of fresh raspberries or blueberries provides a lovely colour contrast and a tartness that cuts through the richness of the cheesecake.
- A Drizzle of Melted White Chocolate: The sweetness of white chocolate complements the orange flavour beautifully. Simply melt a little and drizzle over the top just before serving.
- Coffee or Tea: A freshly brewed espresso or a cup of Earl Grey tea is the perfect beverage pairing. The slight bitterness of the coffee or the bergamot in the tea balances the creamy dessert.
Frequently Asked Questions
Orange Creamsicle Cheesecakes
Ingredients
Method
- Prepare Your Moulds: Lightly grease a 6-hole loose-bottomed mini sandwich tin or 6 individual dessert rings (around 8cm diameter). If using rings, place them on a baking tray lined with parchment paper.
- Make the Biscuit Base: Place the digestive biscuits in a food processor and blitz until they form fine crumbs. Alternatively, put them in a sealed bag and crush them with a rolling pin. Pour the crumbs into a bowl, add the demerara sugar (if using), and pour over the melted butter. Mix with a fork until the mixture resembles wet sand.
- Press the Base: Divide the crumb mixture evenly between your 6 moulds. Use the back of a spoon or the bottom of a small glass to press the crumbs down firmly and evenly. This firm pressure is key to a base that doesn’t fall apart. Place the tray in the fridge to chill for at least 30 minutes while you make the filling.
- Start the Filling: In a large bowl, beat the room-temperature cream cheese with an electric mixer until it’s completely smooth and free of lumps. Sift in the icing sugar and beat again until well combined.
- Add the Flavour: Add the vanilla paste, orange zest, and fresh orange juice to the cream cheese mixture. Beat on a low speed until everything is just incorporated. Don’t overmix at this stage. I find that using a spatula to scrape down the sides of the bowl ensures all the zest is evenly distributed.
- Whip the Cream: In a separate, clean bowl, whip the cold double cream until it holds stiff peaks. You’re looking for a texture that is firm enough to stand up on its own without drooping. For a detailed guide on whipping cream, Serious Eats has a fantastic tutorial.
- Fold Everything Together: Gently fold about a third of the whipped cream into the orange cream cheese mixture using a spatula to lighten it. Then, add the remaining whipped cream and fold carefully until just combined and no streaks remain. The goal is to keep as much air in the mixture as possible for a light texture.
- Assemble and Chill: Spoon or pipe the cheesecake filling evenly over the chilled biscuit bases, smoothing the tops with a small offset spatula or the back of a spoon.
- The Final Chill: Cover the tray loosely with cling film and place it in the fridge to set for at least 4 hours, though overnight is even better for the firmest set. Once set, carefully remove the mini cheesecakes from their moulds and transfer them to a serving plate. Garnish just before serving.
Notes
I really hope you enjoy making and eating these delightful Orange Creamsicle Cheesecakes. They bring such a bright and cheerful note to the end of any meal and always remind me of sunny days. If you give this recipe a try, I’d be thrilled to hear how it turned out. Please leave a comment below and let me know your thoughts! Happy baking! – Elena