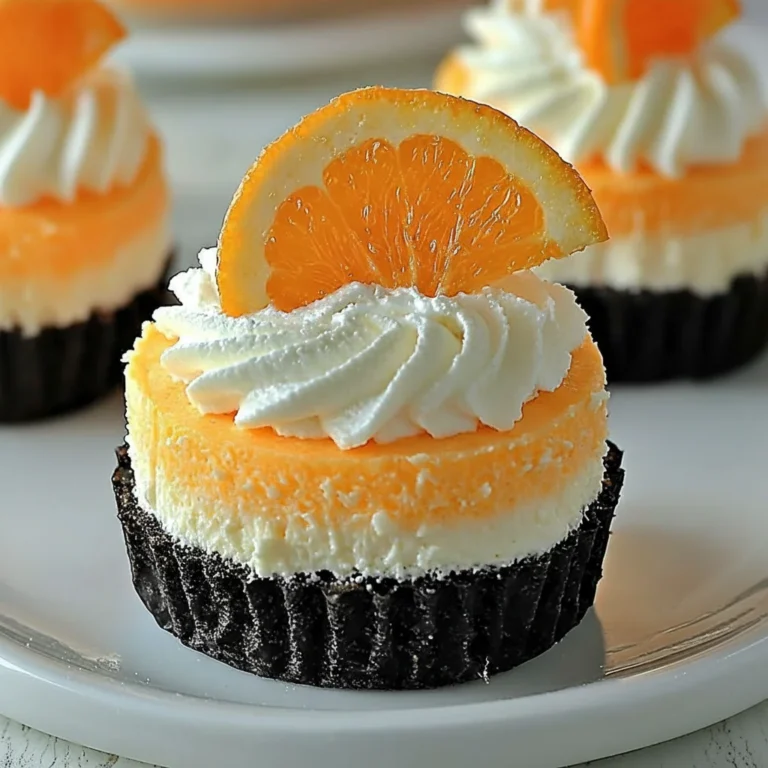
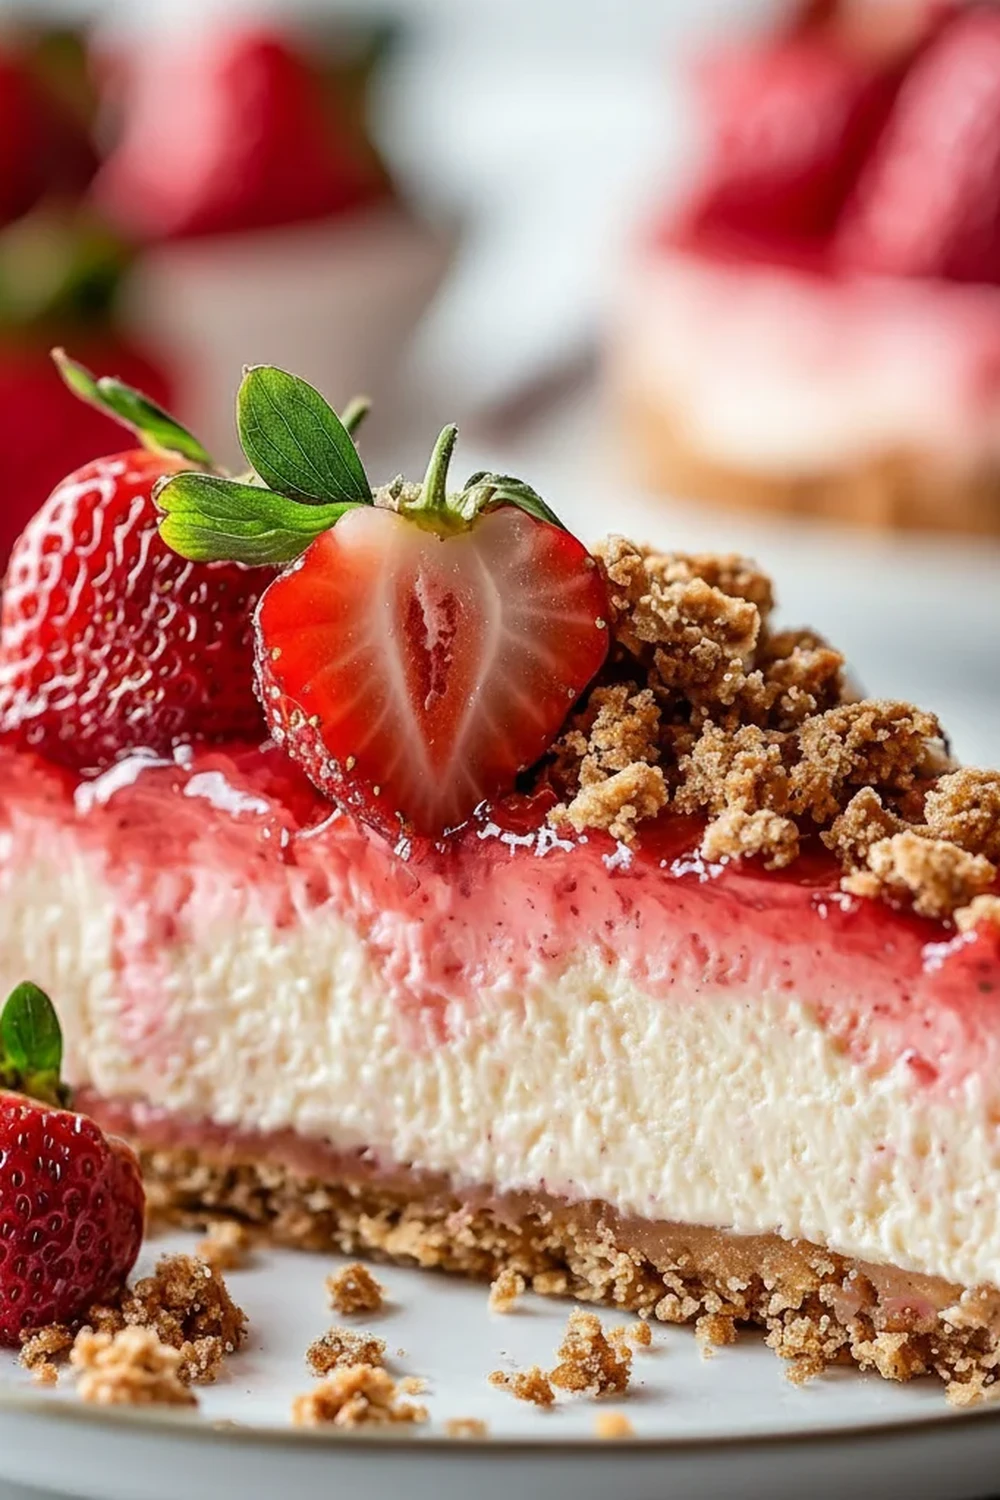
Strawberry Crunch Cheesecake Dessert
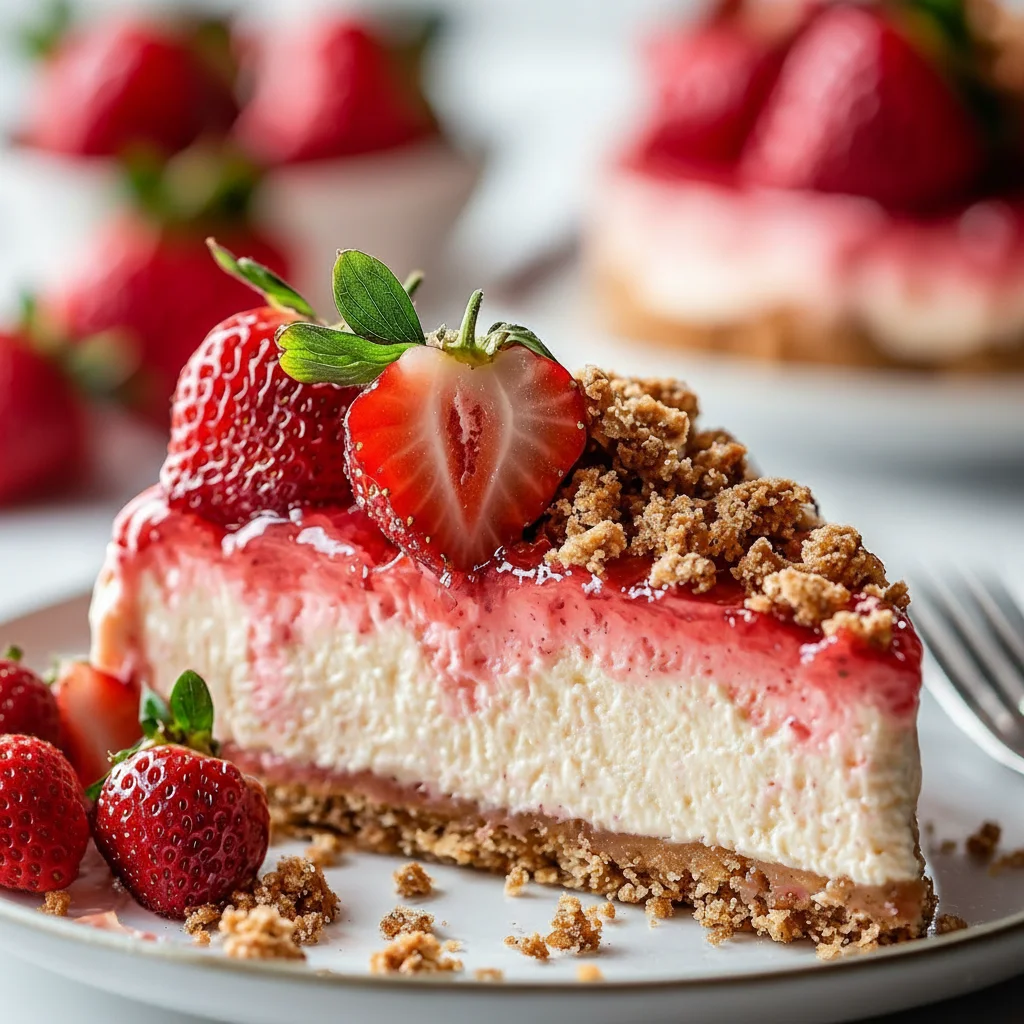
There’s something truly special about a dessert that combines creamy, crunchy, and fruity textures all in one bite. This Strawberry Crunch Cheesecake Dessert is exactly that. It’s become a signature sweet treat in my house, a glorious layered creation that looks impressive but is delightfully straightforward to assemble. The first time I made it, I watched as the buttery, golden crunch topping disappeared first, followed swiftly by the creamy cheesecake and the vibrant strawberry layer. It’s a no-bake dessert, which makes it an absolute winner for warmer days or when you simply don’t want to turn the oven on for a full bake.
This recipe is the result of many happy afternoons spent in my kitchen, tweaking the ratios to get the perfect balance. We start with a classic digestive biscuit base, press it down firm, then layer on a ridiculously smooth and tangy cream cheese filling. Next comes a simple, homemade strawberry coulis that sings with fresh flavour, a world away from shop-bought sauces. But the real magic, the part that gives this dessert its name, is the incredible strawberry crunch topping. It’s a buttery, crumbly, toasted element that provides the most satisfying contrast. My kids absolutely devour this every time I make it, often trying to sneak bits of the crunch topping before it even makes it onto the cheesecake.
It works beautifully for a weekend family treat, a garden party, or when you need a standout dessert for a special occasion. Because it needs to chill, it’s a brilliant make-ahead option, leaving you free to focus on other things. It’s a dessert that always gets compliments, with its distinct layers and beautiful blend of flavours and textures.
Recipe Overview
This Strawberry Crunch Cheesecake Dessert is a layered no-bake treat that delivers on flavour and texture. Expect a firm, buttery biscuit base, a rich and tangy cream cheese filling, a bright and fruity strawberry sauce, and a delightfully crisp crumble topping with an intense strawberry kick from freeze-dried berries. After testing this recipe five times, I finally got it just right—the key is giving it ample time to chill and set properly.
- Prep Time: 35 minutes
- Cook Time: 12 minutes (for the crunch topping)
- Chill Time: 4 hours (minimum)
- Total Time: 4 hours 47 minutes
- Servings: 8-10 people
- Difficulty: Easy
Why You’ll Love This Strawberry Crunch Cheesecake Dessert
- Wonderful Textural Contrast: The combination is sublime. You get the crisp biscuit base, the velvety smooth cheesecake filling, the soft fruit layer, and that addictive, buttery crunch on top. Each spoonful is a new experience.
- Active Prep in Under 40 Minutes: The hands-on time for this recipe is minimal. Once you’ve made the components and assembled them, the refrigerator takes over, making it a low-stress dessert.
- A Versatile Recipe: You can easily adapt this. Swap the digestive biscuits for shortbread or ginger nuts for a different flavour profile. Raspberries or cherries would also work wonderfully in place of strawberries.
- Great for Summer Gatherings: Since it’s a chilled, no-bake dessert, it’s ideal for BBQs, picnics, or any warm-weather event. It’s the perfect finish after a light summer meal like my Smoky Grilled Chicken Skewers Recipe.
- Family Tested and Approved: This recipe has been given a big thumbs-up by everyone in my family, from the little ones to the grown-ups. It’s one of those desserts that disappears in minutes.
Ingredients You’ll Need
For the best results, I recommend using full-fat ingredients for the cheesecake filling; it’s essential for achieving that rich, creamy texture and ensuring it sets properly. I always use Philadelphia Original for its consistent quality and flavour.
- For the Strawberry Crunch Topping:
- 100g plain flour
- 75g cold unsalted butter, cubed
- 75g granulated sugar
- 25g freeze-dried strawberries, lightly crushed
- For the Biscuit Base:
- 250g digestive biscuits
- 125g unsalted butter, melted
- For the Cheesecake Filling:
- 500g full-fat cream cheese, at room temperature
- 100g icing sugar, sifted
- 1 tsp vanilla extract
- 1 tbsp lemon juice
- 300ml double cream, cold
- For the Strawberry Layer:
- 250g fresh strawberries, hulled and quartered
- 50g caster sugar
- 1 tbsp lemon juice
Elena’s Tip: Don’t skip the freeze-dried strawberries in the crunch topping! They are the secret to an intense, authentic strawberry flavour that you just can’t get from fresh fruit in a baked crumble. You can find them in the baking or snacking aisle of most large supermarkets.
How to Make Strawberry Crunch Cheesecake Dessert
We’ll create this dessert in four main stages: making the crunch, the base, the filling, and the strawberry sauce before assembling it all. The process is straightforward, just follow the steps for a perfect result.
- Make the Crunch Topping: Preheat your oven to 180°C (160°C fan). In a medium bowl, rub the cold, cubed butter into the plain flour with your fingertips until it resembles breadcrumbs. Stir in the granulated sugar and the crushed freeze-dried strawberries.
- Bake the Crunch: Spread the mixture evenly on a baking tray lined with parchment paper. Bake for 10-12 minutes, until it’s crisp and a light golden colour. Remove from the oven and let it cool completely on the tray. Once cooled, break it up into small, crunchy pieces.
- Prepare the Base: While the crunch cools, make the base. Blitz the digestive biscuits in a food processor until they form fine crumbs. Alternatively, place them in a bag and crush them with a rolling pin. Pour in the melted butter and mix until it resembles wet sand.
- Form the Base: Tip the buttery crumbs into a 20cm (8-inch) springform tin. Press the mixture down firmly and evenly using the back of a spoon or a flat-bottomed glass. I find a glass gives a really compact, even finish. Place the tin in the fridge to chill while you make the filling.
- Create the Cheesecake Filling: In a large bowl, beat the room-temperature cream cheese with the sifted icing sugar, vanilla extract, and lemon juice until smooth and free of lumps. It’s important the cream cheese isn’t cold, or you might get a lumpy texture.
- Whip the Cream: In a separate bowl, whip the cold double cream until it holds soft peaks. For a detailed guide on this crucial step, BBC Good Food has an excellent tutorial. Gently fold the whipped cream into the cream cheese mixture in two stages, being careful not to knock out the air.
- Assemble Part One: Spoon the cheesecake filling onto the chilled biscuit base. Use an offset spatula or the back of a spoon to spread it into an even layer. Return the tin to the fridge to set for at least 1 hour before adding the next layer.
- Make the Strawberry Layer: Place the quartered strawberries, caster sugar, and lemon juice in a small saucepan. Cook over a medium-low heat for 8-10 minutes, stirring occasionally, until the strawberries have broken down and the sauce has thickened slightly. Let it cool completely.
- Final Assembly and Chilling: Once the strawberry sauce is cool, gently spoon it over the set cheesecake layer. Sprinkle the cooled strawberry crunch topping generously over the sauce. Cover the tin loosely with cling film and chill in the fridge for at least 4 hours, or preferably overnight, to allow it to set completely.
Tips From My Kitchen
- Room Temperature is Key: For the smoothest cheesecake filling, your cream cheese must be at room temperature. Cold cream cheese is the number one cause of lumpy cheesecake. I take mine out of the fridge about an hour before I start.
- The Secret to a Firm Set: I learned that using full-fat cream cheese and double cream is non-negotiable for a no-bake cheesecake. Low-fat versions don’t have the stability to set firmly, leading to a disappointingly soft dessert.
- Make-Ahead Magic: This dessert is ideal for making a day in advance. In fact, an overnight chill gives it the best texture. You can make the crunch topping up to 3 days ahead and store it in an airtight container at room temperature.
- Storage: Leftovers can be stored in the fridge, covered, for up to 3 days. Be aware that the crunch topping will gradually soften as it absorbs moisture from the strawberry layer, but it will still be delicious.
Common Mistakes to Avoid
- A Lumpy Filling: This usually happens when cold cream cheese is beaten with sugar. The cold dairy doesn’t incorporate smoothly. To fix it, ensure your cream cheese is softened to room temperature before you begin. If you’re short on time, you can submerge the foil-wrapped blocks in warm water for 10 minutes.
- A Runny Cheesecake: If your filling doesn’t set, it’s likely due to under-whipping the double cream or using low-fat ingredients. The whipped cream provides the structure. Whip it until it forms distinct soft or medium peaks that hold their shape.
- Skipping the Full Chill Time: Patience is a virtue with no-bake cheesecakes! It needs at least 4 hours to firm up properly. If you try to slice it too early, you’ll have a soft mess. Chilling overnight is always my preferred method for a guaranteed firm set.
Delicious Variations to Try
Once you’ve mastered the basic recipe, it’s fun to play around with the flavours. Here are a few ideas that have worked well for me:
- Raspberry and White Chocolate: Swap the strawberries for fresh raspberries in the sauce. For extra decadence, gently fold 100g of melted and cooled white chocolate into the cheesecake filling before adding the whipped cream.
- Ginger and Mango: Use ginger nut biscuits for the base and top the cheesecake with a simple mango coulis instead of strawberry. The warmth of the ginger is a wonderful pairing with tropical mango.
- Black Forest Crunch: Use chocolate digestive biscuits for the base. Make a cherry coulis instead of strawberry, and add a tablespoon of cocoa powder to the crunch topping mixture before baking.
What to Serve With Strawberry Crunch Cheesecake Dessert
This dessert is a star all on its own, but a few simple accompaniments can elevate it further. It’s a wonderful way to round off a meal, especially after something savoury and satisfying like my Savory Beef And Broccoli Stir Fry Recipe.
- Extra Fresh Berries: A small bowl of fresh strawberries or a mix of summer berries on the side adds a lovely, fresh counterpoint.
- A Dollop of Cream: For those who love extra creaminess, a spoonful of lightly whipped double cream or even clotted cream works beautifully.
- A Crisp Drink: A glass of chilled Prosecco or a sparkling rosé cuts through the richness of the cheesecake perfectly. For a non-alcoholic option, a tart homemade lemonade or elderflower pressé is fantastic.
Frequently Asked Questions
Strawberry Crunch Cheesecake Dessert
Ingredients
Method
- Make the Crunch Topping: Preheat your oven to 180°C (160°C fan). In a medium bowl, rub the cold, cubed butter into the plain flour with your fingertips until it resembles breadcrumbs. Stir in the granulated sugar and the crushed freeze-dried strawberries.
- Bake the Crunch: Spread the mixture evenly on a baking tray lined with parchment paper. Bake for 10-12 minutes, until it's crisp and a light golden colour. Remove from the oven and let it cool completely on the tray. Once cooled, break it up into small, crunchy pieces.
- Prepare the Base: While the crunch cools, make the base. Blitz the digestive biscuits in a food processor until they form fine crumbs. Alternatively, place them in a bag and crush them with a rolling pin. Pour in the melted butter and mix until it resembles wet sand.
- Form the Base: Tip the buttery crumbs into a 20cm (8-inch) springform tin. Press the mixture down firmly and evenly using the back of a spoon or a flat-bottomed glass. I find a glass gives a really compact, even finish. Place the tin in the fridge to chill while you make the filling.
- Create the Cheesecake Filling: In a large bowl, beat the room-temperature cream cheese with the sifted icing sugar, vanilla extract, and lemon juice until smooth and free of lumps. It’s important the cream cheese isn't cold, or you might get a lumpy texture.
- Whip the Cream: In a separate bowl, whip the cold double cream until it holds soft peaks. For a detailed guide on this crucial step, BBC Good Food has an excellent tutorial. Gently fold the whipped cream into the cream cheese mixture in two stages, being careful not to knock out the air.
- Assemble Part One: Spoon the cheesecake filling onto the chilled biscuit base. Use an offset spatula or the back of a spoon to spread it into an even layer. Return the tin to the fridge to set for at least 1 hour before adding the next layer.
- Make the Strawberry Layer: Place the quartered strawberries, caster sugar, and lemon juice in a small saucepan. Cook over a medium-low heat for 8-10 minutes, stirring occasionally, until the strawberries have broken down and the sauce has thickened slightly. Let it cool completely.
- Final Assembly and Chilling: Once the strawberry sauce is cool, gently spoon it over the set cheesecake layer. Sprinkle the cooled strawberry crunch topping generously over the sauce. Cover the tin loosely with cling film and chill in the fridge for at least 4 hours, or preferably overnight, to allow it to set completely.
Notes
I truly hope you enjoy making and eating this Strawberry Crunch Cheesecake Dessert. It’s a real labour of love that has become a staple in our home for celebrations big and small. The combination of textures is just so satisfying, and it’s a wonderful way to celebrate fresh strawberries. If you give it a try, please let me know how it turned out in the comments below—I love hearing from you!
Happy dessert making,
Elena