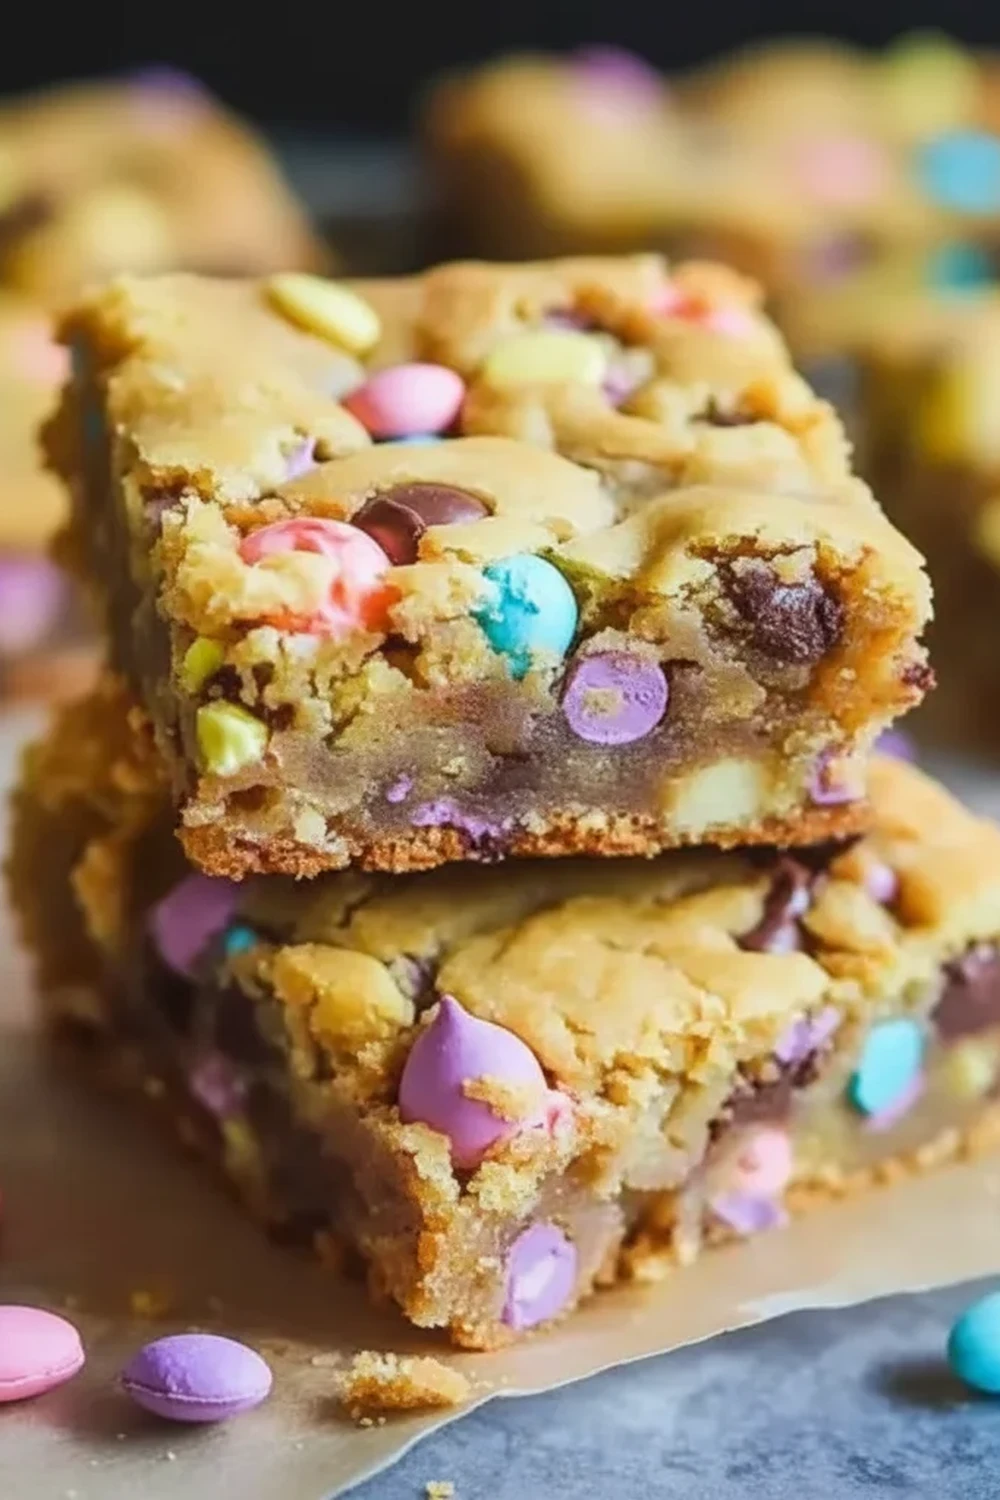
Easter Cake Mix Cookie Bars
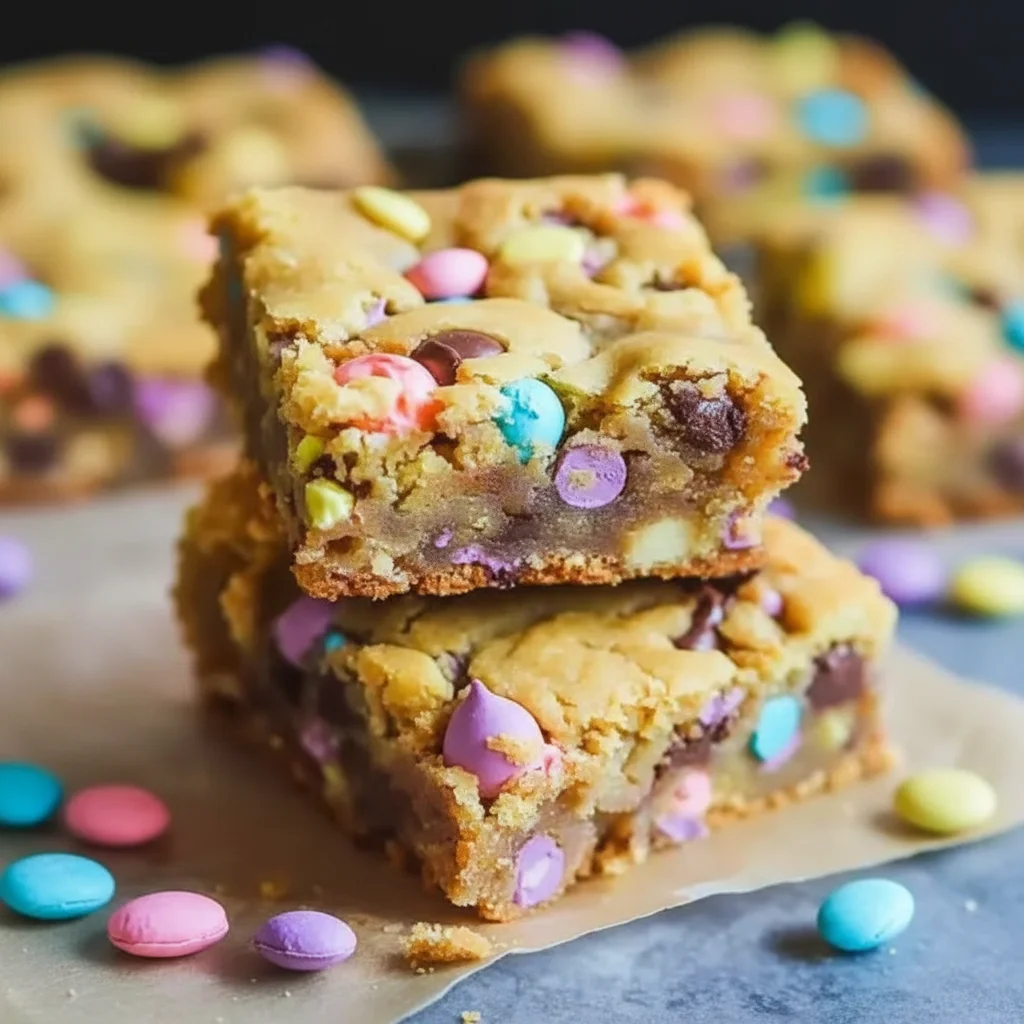
When the first signs of spring appear, my kitchen instincts immediately turn to festive baking. There’s something so hopeful about filling the house with the scent of vanilla and chocolate as the days get longer. These Easter Cake Mix Cookie Bars are a testament to that feeling. They aren’t just a treat; they’re a colourful, cheerful signal that Easter is just around the corner. Using a simple cake mix as a base is a fantastic shortcut that delivers a consistently soft, chewy texture that is simply divine. My kids absolutely devour these every time I make them, partly because they love helping to press the colourful chocolate eggs on top.
What we’ve created here is the ultimate low-effort, high-reward Easter dessert. The base is a dense, buttery blondie-like bar, rich with vanilla and studded with creamy white chocolate chips that melt into little pockets of sweetness. The real magic, though, comes from the generous helping of crushed and whole mini eggs. They provide a delightful, sugary crunch and speckle the bars with beautiful pastel colours. It’s a texture and flavour combination that always gets compliments.
This recipe is ideal when you need a fantastic baking idea for an Easter gathering, a school event, or just a fun activity to do with the family over the long weekend. They are incredibly forgiving and come together in about 35 minutes, leaving you more time to enjoy the festivities. Whether you’re a seasoned baker or just starting out, these festive bars are a guaranteed way to bring a little extra joy to your Easter celebrations.
Recipe Overview
These Easter Cake Mix Cookie Bars are wonderfully straightforward to make, producing a tray of thick, chewy cookie bars with soft centres and slightly crisp edges. The flavour profile is sweet and vanilla-forward, with creamy bursts from white chocolate chips and the distinctive candy-shell crunch of mini eggs. During testing, I found that slightly underbaking them by a minute or two is the key to achieving that perfect fudgy texture in the centre once they’ve cooled.
- Prep Time: 10 minutes
- Cook Time: 22-25 minutes
- Total Time: 35 minutes (plus cooling)
- Servings: 16 bars
- Difficulty: Easy
Why You’ll Love These Easter Cake Mix Cookie Bars
- Sublime Texture and Flavour: The cake mix provides a uniquely soft and chewy base that’s hard to achieve from scratch. It’s dense, buttery, and packed with vanilla, while the white chocolate adds creaminess and the mini eggs give a satisfying crunch.
- Ready in Under 40 Minutes: From gathering your ingredients to pulling the tin from the oven, this Easter dessert comes together so efficiently. It’s a brilliant recipe when you’re short on time but still want a homemade treat.
- Wonderfully Adaptable: You can easily customise these cookie bars. Swap the white chocolate for milk or dark chocolate chips, or use different types of crushed Easter eggs. A handful of festive sprinkles in the dough also adds a lovely touch.
- Ideal for Easter Festivities: These festive bars work beautifully for any spring occasion. Pack them for a picnic, serve them as part of an Easter Sunday dessert spread, or simply enjoy them with a cup of tea.
- Family-Approved: This is one of those cake mix recipes that my whole family gets excited about. The vibrant colours make them irresistible to children, and adults appreciate the nostalgic, comforting flavours. They disappear from the tin in record time!
Ingredients You’ll Need
The beauty of cake mix recipes is the short and simple ingredient list. The box mix does most of the heavy lifting for you. For the base, I find that a classic vanilla or white cake mix from a reliable brand like Betty Crocker gives the most consistent and delicious results. It provides a neutral, buttery canvas for the Easter additions.
- 430g plain vanilla or white cake mix powder (one standard box)
- 115ml vegetable oil
- 2 large free-range eggs
- 1 tsp pure vanilla extract
- ¼ tsp salt
- 180g white chocolate chips
- 200g mini chocolate eggs (like Cadbury Mini Eggs)
Elena’s Tip: For the best visual appeal, reserve about a third of your mini eggs. Leave them whole and press them gently onto the surface of the dough right before baking. The rest can be roughly crushed to be mixed into the dough, creating lovely flecks of colour throughout the bars.
How to Make Easter Cake Mix Cookie Bars
This process is wonderfully simple and involves just one bowl. The dough will be quite thick and stiff, which is exactly what you want – don’t be tempted to add extra liquid. This density is what creates that perfect chewy, fudgy cookie bar texture.
- Preheat and Prepare: First, preheat your oven to 180°C (160°C for fan-assisted ovens). Grease a 20cm x 20cm (8×8 inch) square baking tin and line it with baking parchment, leaving a little overhang on two sides. This will act as a sling, making it much easier to lift the bars out later.
- Crush the Eggs: Place about two-thirds of your mini eggs into a sealed plastic bag and gently crush them with a rolling pin or the bottom of a heavy glass. You’re looking for a mix of coarse chunks and smaller pieces, not a fine powder. Set aside the remaining whole eggs.
- Combine Wet Ingredients: In a large mixing bowl, whisk together the vegetable oil, eggs, and vanilla extract until they are well combined.
- Add the Dry Ingredients: Tip the entire packet of cake mix powder and the salt into the bowl with the wet ingredients.
- Mix the Dough: Using a sturdy wooden spoon or a spatula, mix everything together until a thick, uniform dough forms. It will be quite stiff, almost like a traditional cookie dough. What works best for me is to switch from stirring to more of a folding and pressing motion towards the end.
- Fold in the Add-ins: Gently fold the white chocolate chips and the crushed mini eggs into the dough until they are evenly distributed. Be careful not to over-mix at this stage.
- Press into the Tin: Transfer the dough to your prepared tin. Use the back of the spoon or your fingertips to press it down into an even layer, making sure it reaches all the corners. If the dough is sticky, slightly dampening your fingers can help.
- Add Topping and Bake: Press the reserved whole mini eggs gently onto the surface of the dough. Bake on the middle shelf of your preheated oven for 22-25 minutes.
- Check for Doneness: The bars are ready when the edges are a light golden brown and the centre is just set to the touch. It might look slightly underdone, but it will continue to cook and set in the hot tin. This is the secret to a chewy centre.
- Cool Completely: Remove the tin from the oven and place it on a wire rack to cool completely. This is the most important step! Do not attempt to slice them while they are still warm, as they will be too soft and will fall apart. Once fully cooled (at least 2 hours), use the parchment paper sling to lift the block out and slice it into 16 squares.
Tips From My Kitchen
- Don’t Overbake: The biggest risk with cookie bars is turning them into dry, cakey squares. To keep them chewy, pull them from the oven when the centre still looks a fraction soft. The residual heat from the tin will finish the job perfectly as it cools.
- The Parchment Sling: I learned this the hard way years ago! Always leave an overhang of baking parchment on two sides of the tin. It makes lifting the entire cooled block out for slicing effortless and ensures you get clean, neat edges without damaging the first bar.
- Room Temperature Eggs: For a smoother, more cohesive dough, use eggs that are at room temperature. If you forget to take them out of the fridge, you can pop them in a bowl of warm (not hot) water for 5-10 minutes.
- Storage: These bars keep brilliantly. Store them in an airtight container at room temperature for up to 5 days. They actually become a little chewier and fudgier on the second day, in my opinion! I don’t recommend refrigerating them, as it can make them hard.
Common Mistakes to Avoid
- Slicing While Warm: I know it’s tempting to dive in when the smell is so wonderful, but patience is key. Slicing warm cookie bars will lead to a crumbly mess. The structure needs to set completely as it cools down to room temperature to achieve that dense, fudgy texture and allow for clean cuts.
- Using the Wrong Tin Size: The baking time provided is for a 20x20cm (8×8 inch) tin. Using a larger tin will result in thinner bars that cook much faster, while a smaller tin will require a longer baking time. If you need to change the tin, keep a close eye on the bake and adjust accordingly. For help, this baking tin conversion guide from BBC Good Food is a great resource.
- Over-mixing the Dough: Once the cake mix is just incorporated, stop mixing. Over-working the dough develops the gluten, which can lead to tough, dry bars rather than the soft and chewy texture we are aiming for.
Delicious Variations to Try
While this Easter version is a seasonal favourite, the base recipe is a fantastic starting point for other delicious cookie bars. Feel free to get creative with your mix-ins!
- Double Chocolate Dream: Use a chocolate fudge cake mix as your base and swap the white chocolate chips for milk or dark chocolate chunks. It’s an intensely rich and decadent option.
- Caramel Swirl: After pressing the dough into the tin, dollop a few spoonfuls of thick caramel sauce (like Carnation Caramel) over the top and use a skewer to gently swirl it through before baking.
- Birthday Funfetti Bars: Stick with the vanilla cake mix but swap the mini eggs for 100g of colourful rainbow sprinkles. Mix half into the dough and scatter the rest on top for a wonderfully festive look. These are great for birthday parties.
What to Serve With Easter Cake Mix Cookie Bars
These bars are a complete treat all on their own, but they also fit beautifully into a larger spread. Here are a few ideas:
- A Simple Cuppa: The sweetness of the bars is perfectly balanced by a hot cup of English breakfast tea or a freshly brewed coffee.
- With Ice Cream: For a truly indulgent Easter dessert, gently warm a bar in the microwave for 10-15 seconds and serve it with a generous scoop of vanilla bean ice cream. The contrast between the warm, chewy bar and the cold, creamy ice cream is heavenly.
- On a Dessert Platter: Arrange these colourful bars on a platter with fresh berries, other small cakes, and perhaps some chocolate truffles for a beautiful dessert board that works wonderfully for family gatherings. It’s a lovely, light finish after a main course like our Sticky Sweet Teriyaki Chicken Bowls.
Frequently Asked Questions
Easter Cake Mix Cookie Bars
Ingredients
Method
- Preheat and Prepare: First, preheat your oven to 180°C (160°C for fan-assisted ovens). Grease a 20cm x 20cm (8x8 inch) square baking tin and line it with baking parchment, leaving a little overhang on two sides. This will act as a sling, making it much easier to lift the bars out later.
- Crush the Eggs: Place about two-thirds of your mini eggs into a sealed plastic bag and gently crush them with a rolling pin or the bottom of a heavy glass. You're looking for a mix of coarse chunks and smaller pieces, not a fine powder. Set aside the remaining whole eggs.
- Combine Wet Ingredients: In a large mixing bowl, whisk together the vegetable oil, eggs, and vanilla extract until they are well combined.
- Add the Dry Ingredients: Tip the entire packet of cake mix powder and the salt into the bowl with the wet ingredients.
- Mix the Dough: Using a sturdy wooden spoon or a spatula, mix everything together until a thick, uniform dough forms. It will be quite stiff, almost like a traditional cookie dough. What works best for me is to switch from stirring to more of a folding and pressing motion towards the end.
- Fold in the Add-ins: Gently fold the white chocolate chips and the crushed mini eggs into the dough until they are evenly distributed. Be careful not to over-mix at this stage.
- Press into the Tin: Transfer the dough to your prepared tin. Use the back of the spoon or your fingertips to press it down into an even layer, making sure it reaches all the corners. If the dough is sticky, slightly dampening your fingers can help.
- Add Topping and Bake: Press the reserved whole mini eggs gently onto the surface of the dough. Bake on the middle shelf of your preheated oven for 22-25 minutes.
- Check for Doneness: The bars are ready when the edges are a light golden brown and the centre is just set to the touch. It might look slightly underdone, but it will continue to cook and set in the hot tin. This is the secret to a chewy centre.
- Cool Completely: Remove the tin from the oven and place it on a wire rack to cool completely. This is the most important step! Do not attempt to slice them while they are still warm, as they will be too soft and will fall apart. Once fully cooled (at least 2 hours), use the parchment paper sling to lift the block out and slice it into 16 squares.
Notes
I do hope you give these wonderfully cheerful Easter Cake Mix Cookie Bars a try. They are such a simple way to create a memorable and delicious treat for your spring celebrations. The combination of soft cookie, creamy chocolate, and crunchy candy is just so satisfying. If you’re looking for another simple meal idea for the weekend, our Cheesy Tuna Melt Sandwich Recipe is always a winner. I’d love to hear how your festive bars turn out – please leave a comment below to share your experience!
Happy Baking,
Elena