Juicy Grilled Hamburger Recipe
There is something fundamentally satisfying about a truly great hamburger. It’s more than just meat in a bun; it’s the sound of the patty sizzling on the grill, the aroma that fills the garden on a summer evening, and the glorious, messy first bite. This isn’t just any hamburger recipe; it’s the result of countless trials in my own kitchen. After testing this recipe five times, I finally got it just right – a perfectly juicy, flavourful patty that forms the heart of an unforgettable burger. This is the recipe we turn to for weekend family lunches, casual get-togethers with friends, and those evenings when only a proper, homemade burger will do.
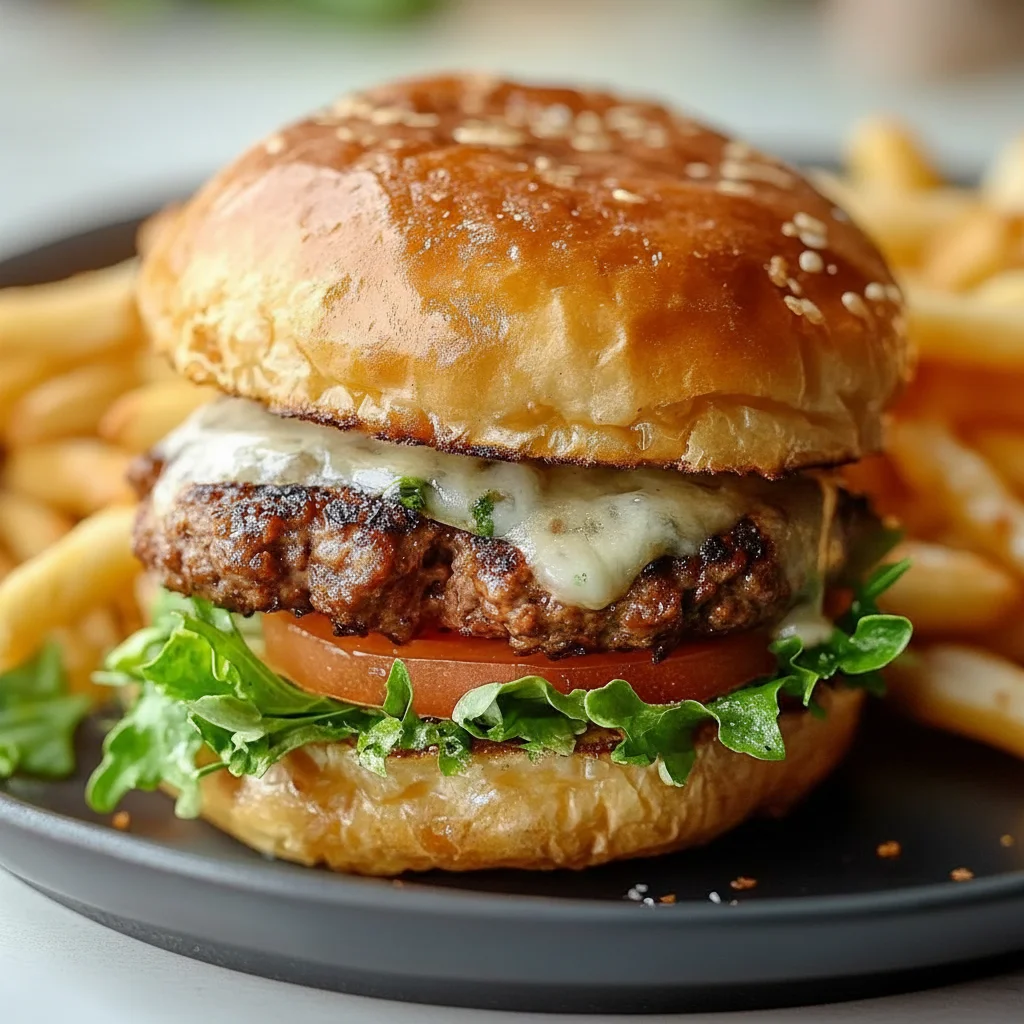
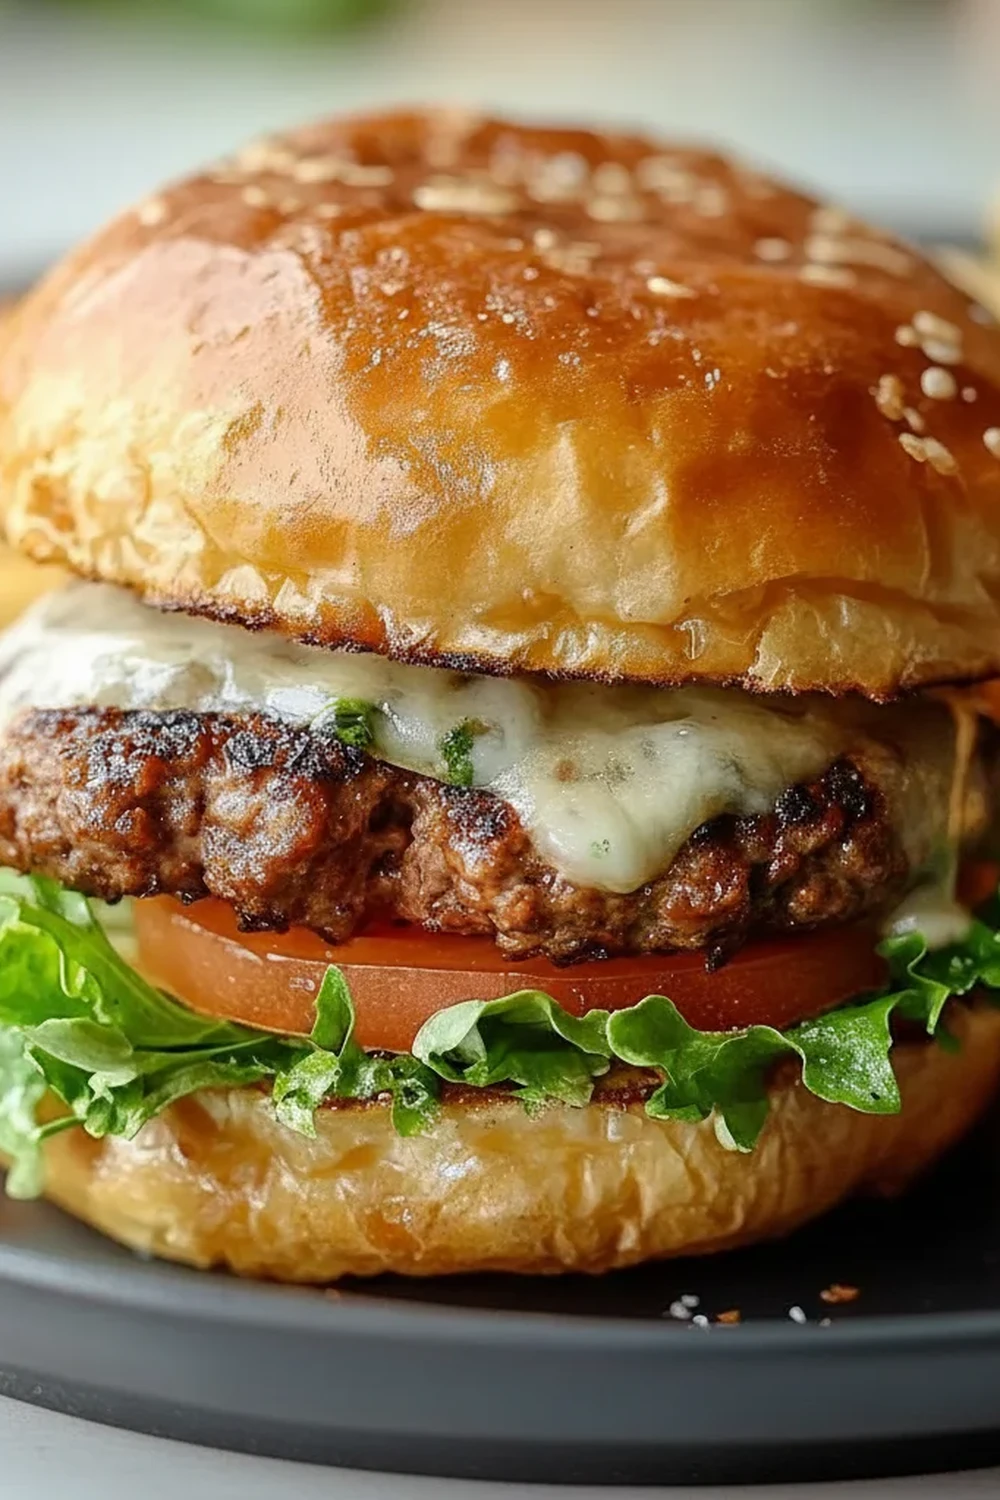
What makes this burger recipe stand out is its focus on the essentials. We’re not hiding the flavour of the beef behind a dozen other ingredients. Instead, we are enhancing it. We use high-quality beef mince, a touch of seasoning, and a secret ingredient that guarantees a juicy result every single time. The patty is seared to create a beautiful, savoury crust while the inside remains tender and moist. Paired with a soft brioche bun, a slice of sharp cheddar that gets gloriously melty, and your favourite classic toppings, it’s a masterclass in simplicity and taste.
This grilled hamburger is ideal for anyone who appreciates a no-fuss meal that delivers on flavour. It’s for the home cook who wants to master a classic, for the family looking for a meal that everyone will enjoy, and for those sunny afternoons that call for firing up the barbecue. It’s a recipe built on technique rather than complexity, proving that the best meals are often the ones made with care and good ingredients.
Recipe Overview
This recipe guides you through creating succulent, deeply savoury hamburger patties from scratch. The flavour profile is rich and beefy, with a subtle hint of onion and garlic that complements, rather than overpowers, the meat. After some experimenting, I discovered that adding a little grated cold butter into the mince is the key to preventing a dry burger. Expect a tender, juicy patty with a fantastic caramelised crust.
- Prep Time: 15 minutes
- Cook Time: 10-12 minutes
- Total Time: 27 minutes
- Servings: 4 people
- Difficulty: Easy
Why You’ll Love This Hamburger Recipe
- Genuine Beefy Flavour: We use an 80/20 beef mince (chuck is best) which provides the ideal fat-to-meat ratio. This results in a patty that is deeply beefy and self-basting as it cooks, keeping it incredibly moist.
- Ready in Under 30 Minutes: From mixing the patties to serving them hot off the grill, the whole process comes together in about 27 minutes, making it a brilliant option for a satisfying weeknight dinner.
- Flexible Recipe: This burger recipe is a fantastic base. You can add a pinch of smoked paprika for smokiness, mix in some finely chopped jalapeños for heat, or even stuff the centre with a small cube of cheese before cooking.
- Great for Summer Barbecues: This is my go-to for any outdoor gathering. It’s straightforward to scale up the recipe, and cooking on a grill gives the patties an extra layer of smoky flavour that you just can’t replicate indoors.
- Family Tested: This recipe always gets rave reviews. My kids absolutely devour this every time I make it, often asking for seconds before they’ve even finished the first!
Ingredients You’ll Need
For the best results, start with cold ingredients. This is especially important for the beef mince and butter, as it helps the patties hold their shape and stay tender. I always use a good quality 20% fat beef mince from my local butcher; the flavour is just unparalleled.
- 800g beef mince (ideally chuck steak with 20% fat)
- 1 small onion, very finely diced
- 1 clove garlic, minced
- 1 tbsp Worcestershire sauce
- 1 tsp Dijon mustard
- 30g cold, unsalted butter, grated
- 1 tsp sea salt
- 1/2 tsp freshly ground black pepper
- 1 tbsp vegetable oil, for grilling
- 4 good-quality brioche burger buns
- 4 slices mature cheddar cheese (or your favourite)
- For the Toppings (optional suggestions):
- Lettuce leaves (like iceberg or baby gem)
- Sliced beef tomatoes
- Sliced red onion
- Gherkins
- Your favourite ketchup and mustard
Elena’s Tip: Don’t be tempted to use leaner mince. The fat content is crucial for a juicy, flavourful burger. It renders during cooking, basting the meat from the inside and preventing it from becoming dry and tough.
How to Make This Hamburger Recipe
The key to a perfect hamburger is gentle handling. We want to combine the ingredients, not knead them. Overworking the mince will result in a dense, tough patty. We’re aiming for a tender texture that melts in your mouth.
- Prepare the Patty Mixture: In a large mixing bowl, place the cold beef mince, finely diced onion, minced garlic, Worcestershire sauce, and Dijon mustard. Sprinkle over the salt and black pepper.
- Add the Secret Ingredient: Grate the cold butter directly into the bowl with the mince. Using your hands, gently mix all the ingredients together until they are just combined. Be careful not to overmix.
- Shape the Patties: Divide the mixture into four equal portions (about 200g each). Gently roll each portion into a ball and then flatten into a patty that is about 2cm thick and slightly wider than your burger buns, as they will shrink during cooking.
- The Dimple Trick: Press a small, shallow indent into the centre of each patty with your thumb. I learned that this simple step stops the burgers from puffing up into a dome shape as they cook, ensuring they stay flat for even cooking and easy topping.
- Chill the Patties: Place the shaped patties on a plate, cover, and refrigerate for at least 10 minutes (or up to a few hours). This helps them firm up and hold their shape on the grill.
- Preheat and Cook: Preheat your barbecue or a griddle pan over a medium-high heat. Lightly brush the grill or pan with vegetable oil. Place the chilled patties on the hot surface.
- Grill to Perfection: Cook for 4-6 minutes on the first side, until a deep brown crust has formed. Do not press down on the burgers with a spatula, as this squeezes out the precious juices. Flip them carefully once.
- Add the Cheese: Cook for another 4-6 minutes on the second side for a medium burger. During the last minute of cooking, place a slice of cheddar on top of each patty to allow it to get beautifully melted and gooey. For food safety, ensure the burgers are cooked through. You can check the UK Food Standards Agency guidance for more details.
- Toast the Buns: While the cheese is melting, split your brioche buns and place them cut-side down on the cooler part of the grill for about 30 seconds, just until they are lightly toasted and warm.
- Assemble and Serve: Let the patties rest for a minute or two before assembling. Place the juicy patty on the bottom bun, then layer with your favourite toppings. Serve immediately.
Tips From My Kitchen
- Temperature Control: Ensure your grill or pan is properly hot before you add the patties. A high heat is essential for creating that delicious, caramelised Maillard reaction crust on the outside of the burger quickly, which helps to lock in the juices.
- The Secret Step: Don’t skip chilling the patties. I learned that this step is vital. A cold patty hitting a hot grill contracts less and retains more of its fat and moisture, leading to a much juicier end result.
- Make-Ahead: You can prepare and shape the patties up to 24 hours in advance. Just keep them well-covered in the refrigerator. Take them out about 10 minutes before you plan to cook them.
- Storage: Leftover cooked patties can be stored in an airtight container in the fridge for up to 3 days. Reheat them gently in a pan or in the oven to avoid drying them out.
Equipment You’ll Need
You don’t need any fancy gadgets for this burger recipe, just a few kitchen basics.
- Barbecue or a large, heavy-based frying pan (cast iron is excellent)
- Large mixing bowl
- Spatula or tongs
- Box grater (for the butter)
- Plate or tray
Common Mistakes to Avoid
- Overworking the Mince: Mixing the beef too much develops the proteins, which can make the final burger tough and dense. Combine the ingredients gently and only until they come together.
- Pressing the Patties: It might be tempting to press down on the burgers with your spatula as they cook, but resist! This does not speed up cooking; it simply squeezes out all the flavourful juices, leaving you with a dry burger.
- Skipping the Rest Time: Just like a good steak, a burger benefits from a short rest. Letting it sit for a minute or two after cooking allows the juices to redistribute throughout the patty, ensuring every bite is moist and flavourful.
Delicious Variations to Try
While this classic hamburger recipe is wonderful as it is, it’s also a great starting point for customisation. Here are a few ideas:
- Spicy Hamburgers: Add 1 finely chopped red chilli or 1/2 teaspoon of cayenne pepper to the beef mixture for a gentle, warming heat. A slice of pepper jack cheese works wonderfully here too.
- Blue Cheese and Bacon Burger: Omit the cheddar and top the burger with crumbled Stilton or another blue cheese during the last minute of cooking. Add a couple of rashers of crispy cooked bacon for a rich, savoury treat.
- Lamb Burgers: Swap the beef mince for lamb mince. Add a teaspoon of ground cumin and some finely chopped fresh mint to the mixture for a Mediterranean twist. Serve in a pitta with a dollop of tzatziki.
What to Serve With This Hamburger Recipe
A great burger deserves equally great sides. We love pairing these with simple, classic accompaniments that complement the rich flavours.
- Proper Chips: Thick-cut, fluffy on the inside and crispy on the outside. A light dusting of sea salt is all they need.
- Coleslaw: A creamy, crunchy homemade coleslaw provides a lovely fresh contrast to the rich burger patty.
- A Crisp Lager: A cold, crisp lager or a pale ale cuts through the richness of the beef and cheese beautifully, making it a classic drink pairing. For another great barbecue option, try these Smoky Grilled Chicken Skewers.
Frequently Asked Questions
Classic Homemade Hamburger
Ingredients
Method
- Prepare the Patty Mixture: In a large mixing bowl, place the cold beef mince, finely diced onion, minced garlic, Worcestershire sauce, and Dijon mustard. Sprinkle over the salt and black pepper.
- Add the Secret Ingredient: Grate the cold butter directly into the bowl with the mince. Using your hands, gently mix all the ingredients together until they are just combined. Be careful not to overmix.
- Shape the Patties: Divide the mixture into four equal portions (about 200g each). Gently roll each portion into a ball and then flatten into a patty that is about 2cm thick and slightly wider than your burger buns, as they will shrink during cooking.
- The Dimple Trick: Press a small, shallow indent into the centre of each patty with your thumb. I learned that this simple step stops the burgers from puffing up into a dome shape as they cook, ensuring they stay flat for even cooking and easy topping.
- Chill the Patties: Place the shaped patties on a plate, cover, and refrigerate for at least 10 minutes (or up to a few hours). This helps them firm up and hold their shape on the grill.
- Preheat and Cook: Preheat your barbecue or a griddle pan over a medium-high heat. Lightly brush the grill or pan with vegetable oil. Place the chilled patties on the hot surface.
- Grill to Perfection: Cook for 4-6 minutes on the first side, until a deep brown crust has formed. Do not press down on the burgers with a spatula, as this squeezes out the precious juices. Flip them carefully once.
- Add the Cheese: Cook for another 4-6 minutes on the second side for a medium burger. During the last minute of cooking, place a slice of cheddar on top of each patty to allow it to get beautifully melted and gooey. For food safety, ensure the burgers are cooked through. You can check the UK Food Standards Agency guidance for more details.
- Toast the Buns: While the cheese is melting, split your brioche buns and place them cut-side down on the cooler part of the grill for about 30 seconds, just until they are lightly toasted and warm.
- Assemble and Serve: Let the patties rest for a minute or two before assembling. Place the juicy patty on the bottom bun, then layer with your favourite toppings. Serve immediately.
Notes
I truly hope you enjoy making this hamburger recipe. It’s a staple in our home for a reason, and I love seeing the smiles it brings. There’s a special kind of joy in crafting something so satisfying with your own hands. Give it a go, and please let me know how it turns out for you in the comments below. I love hearing about your kitchen adventures!
Happy cooking,
Elena