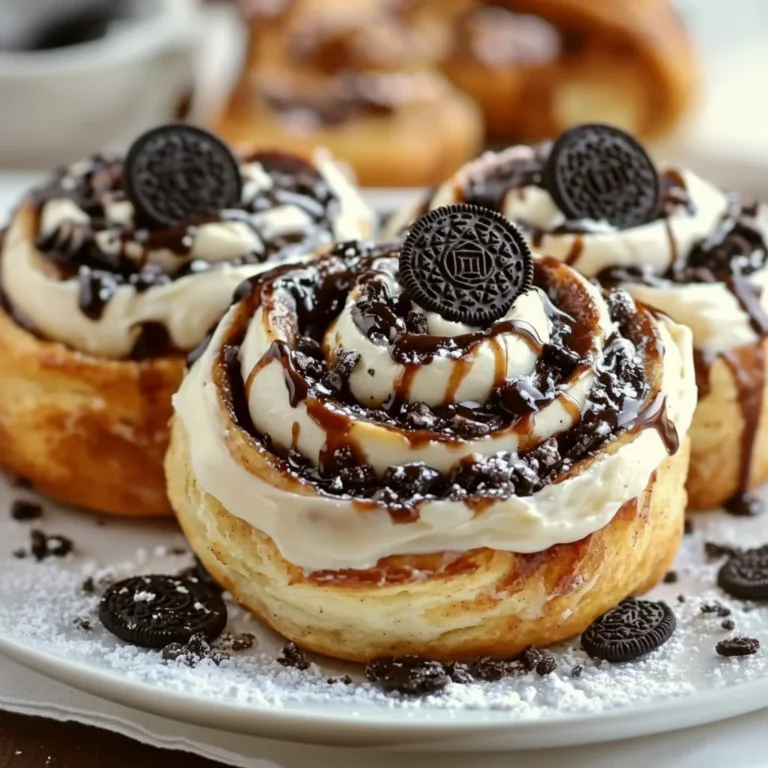
Glazed Chocolate Covered Donuts Recipe
There’s something truly special about the moment you bite into a freshly made donut. It’s not just the sweetness, but the texture and the pure, simple joy it brings. For me, the ultimate version of this treat has always been these homemade Chocolate Covered Donuts. We’re not talking about deep-frying here; these are soft, cake-like donuts, baked until perfectly tender, with a hint of nutmeg and vanilla. They are then dipped into a luscious, dark chocolate glaze that sets with a beautiful shine and a satisfyingly gentle crackle.
This recipe has become a weekend staple in our house. My husband, who’s usually picky about desserts, asked for seconds the very first time I made them! It’s that combination of the fluffy, spiced donut and the rich, smooth chocolate that makes them completely irresistible. The process of making them is a peaceful kitchen ritual – whisking the batter, piping it into the pan, and the best part, dipping each warm donut into the glossy chocolate. They are a wonderful treat for a lazy Sunday morning with a cup of coffee or as a special afternoon snack.
Making these Chocolate Donuts from scratch allows you to control the quality of the ingredients, and the flavour is worlds apart from anything you can buy. The chocolate glaze, in particular, is something to savour. It’s rich, not overly sweet, and clings to the donut in a perfect, even layer. These Covered Donuts are a testament to how a few simple ingredients can create something truly memorable.
Recipe Overview
This recipe guides you through creating wonderfully light and fluffy baked donuts from a simple cake-style batter. The flavour profile is classic and comforting: a warm vanilla and nutmeg base provides the perfect canvas for a rich, semi-sweet chocolate glaze. I tested the glaze several times to get the consistency just right; it’s thick enough to coat beautifully without being cloying and sets to a perfect glossy finish. Expect a tender crumb and a decadent chocolate topping in every bite.
- Prep Time: 20 minutes
- Cook Time: 12 minutes
- Total Time: 32 minutes (plus cooling time)
- Servings: 12 donuts
- Difficulty: Easy
Why You’ll Love This Chocolate Covered Donuts Recipe
- Genuine Flavour: The donut base is scented with real vanilla extract and a warming pinch of nutmeg, which beautifully complements the deep, slightly bitter notes of the 70% dark chocolate glaze. It’s a balanced and sophisticated taste.
- Ready in Under an Hour: From gathering your ingredients to pulling the baked donuts from the oven, the active process comes together in about 30 minutes. After a short cooling period, they’re ready for their chocolate bath.
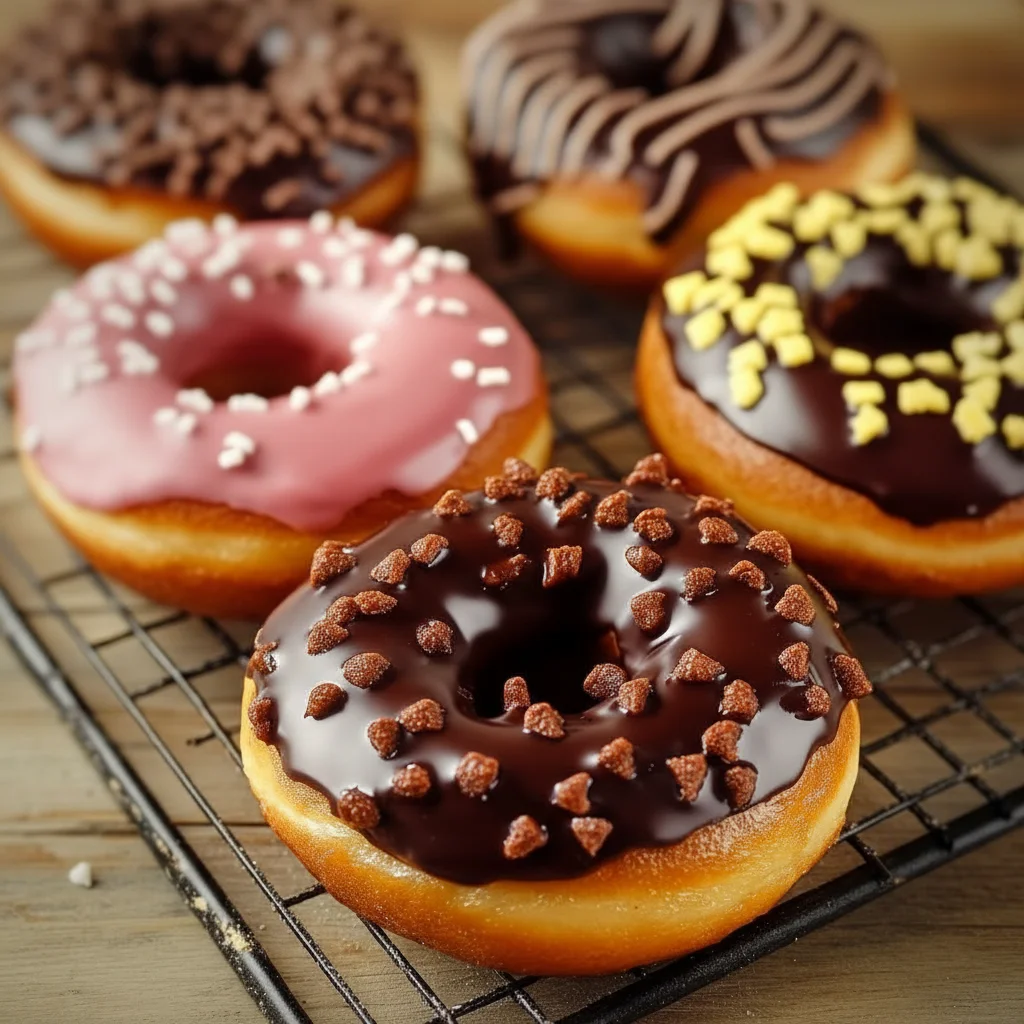
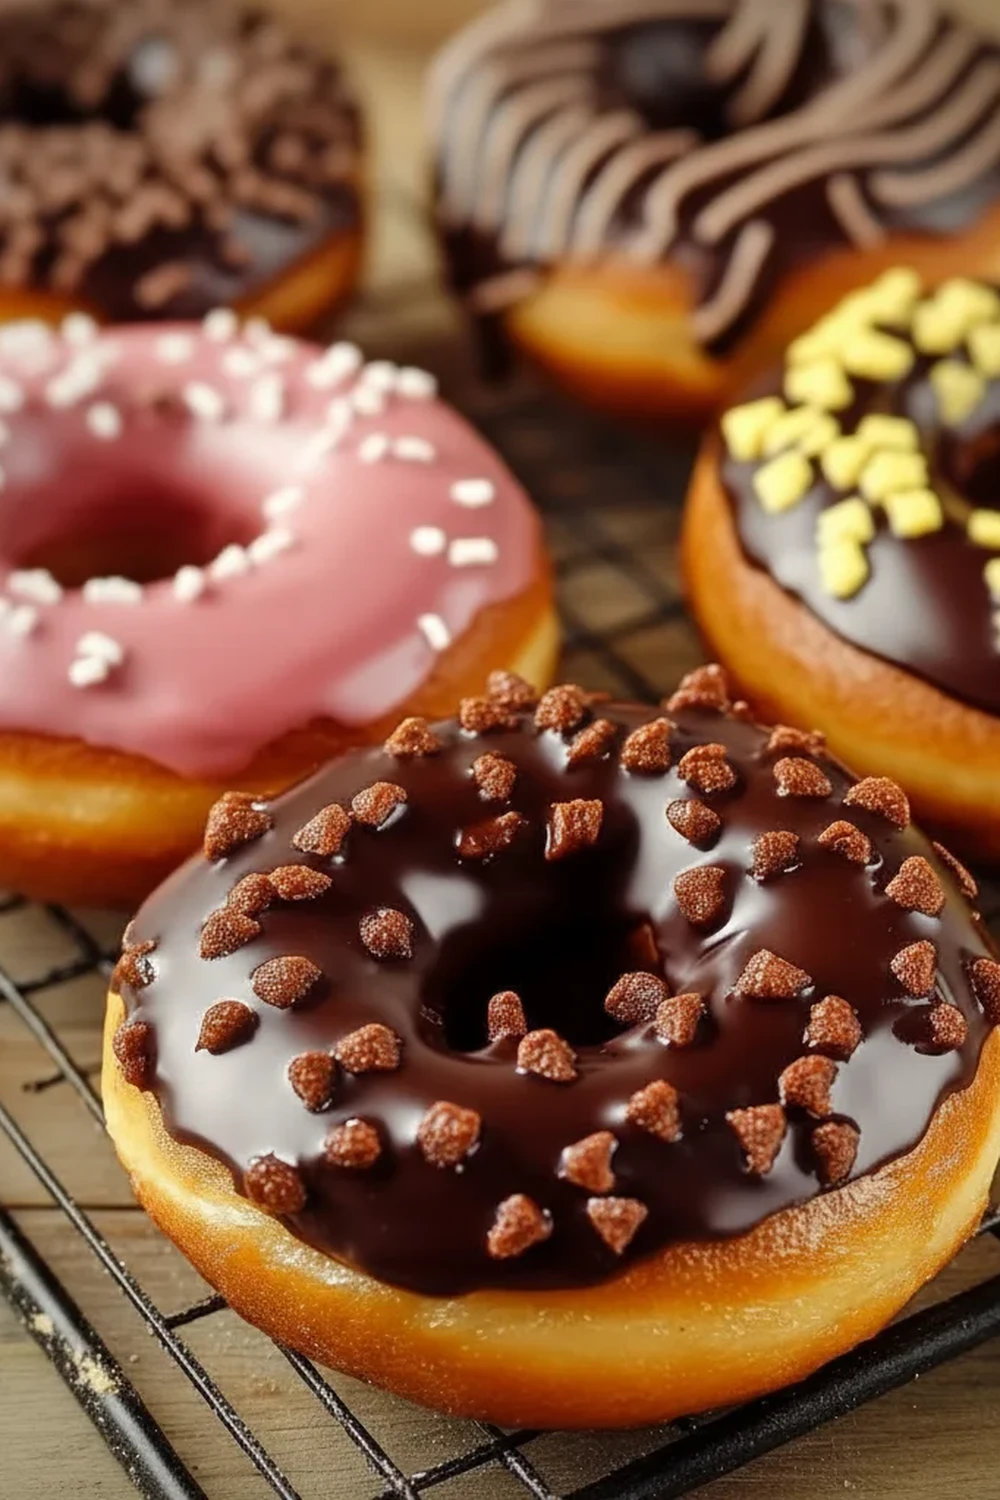
- Flexible Recipe: Feel free to experiment with the toppings! A sprinkle of flaky sea salt on the wet glaze is divine, as are chopped nuts, toasted coconut, or colourful sprinkles for a bit of fun.
- Great for Weekend Baking: This recipe works beautifully for a special breakfast or a relaxed baking session with family. They make the whole house smell incredible.
- Family Tested: My children adore getting involved with the decorating part of these covered donuts. It’s a lovely way to spend an afternoon, and everyone seems to love the final result.
Ingredients You’ll Need
For the best Chocolate Covered Donuts, quality ingredients make all the difference, especially the chocolate. I recommend using a good quality dark chocolate with around 70% cocoa solids, like Green & Black’s or Callebaut, as its flavour is the star of the show. It melts beautifully and provides a rich, intense taste that balances the sweetness of the donut.
- For the Donuts:
- 200g plain flour
- 150g caster sugar
- 1 ½ tsp baking powder
- ½ tsp salt
- ¼ tsp ground nutmeg
- 1 large free-range egg, at room temperature
- 120ml whole milk, at room temperature
- 60g unsalted butter, melted and cooled slightly
- 1 tsp vanilla extract
- For the Chocolate Glaze:
- 150g good quality dark chocolate (70% cocoa), finely chopped
- 45g unsalted butter
- 1 tbsp golden syrup
- 2-3 tbsp whole milk
Elena’s Tip: Ensure your milk and egg are at room temperature. This helps the ingredients combine into a smooth, uniform batter, resulting in a lighter and more tender crumb for your baked donuts.
How to Make Chocolate Covered Donuts
This is a straightforward method that relies on a few key techniques to get right. We’ll make a simple batter, bake the donuts until they are light and golden, and then dip them in a gloriously glossy chocolate glaze. The whole process is very rewarding.
- Prepare the Oven and Pan: Preheat your oven to 180°C (160°C fan). Lightly grease a 12-hole donut pan with a little butter or a neutral oil spray.
- Mix the Dry Ingredients: In a large mixing bowl, whisk together the plain flour, caster sugar, baking powder, salt, and ground nutmeg until they are well combined. This ensures the leavening agents are evenly distributed.
- Mix the Wet Ingredients: In a separate medium bowl or jug, whisk the egg, milk, melted butter, and vanilla extract until smooth.
- Combine Wet and Dry: Pour the wet ingredients into the bowl with the dry ingredients. Gently fold them together with a spatula until just combined. Be careful not to overmix; a few small lumps are perfectly fine. Overmixing can lead to tough donuts.
- Fill the Donut Pan: What works best for me is transferring the batter to a piping bag (or a large zip-top bag with the corner snipped off). Pipe the batter evenly into each cavity of the prepared donut pan, filling them about two-thirds full.
- Bake the Donuts: Place the pan in the preheated oven and bake for 10-12 minutes. The donuts are ready when they are lightly golden and a skewer inserted into the centre comes out clean.
- Cool the Donuts: Let the donuts cool in the pan for 5 minutes before carefully turning them out onto a wire rack to cool completely. It’s crucial they are fully cool before glazing.
- Make the Chocolate Glaze: While the donuts cool, prepare the glaze. Place the finely chopped dark chocolate, butter, and golden syrup in a heatproof bowl. Set it over a saucepan of gently simmering water (a bain-marie), ensuring the bottom of the bowl doesn’t touch the water. Stir occasionally until everything is melted and smooth. Alternatively, melt in the microwave in 20-second bursts, stirring in between.
- Finish the Glaze: Remove the bowl from the heat and whisk in 2 tablespoons of milk. If the glaze is too thick, add the remaining tablespoon of milk until you have a smooth, pourable consistency.
- Glaze the Donuts: Once the donuts are completely cool, dip the top of each one into the warm chocolate glaze. Allow any excess to drip off before placing it back on the wire rack, glaze-side up. Let the glaze set for at least 30 minutes before serving.
Tips From My Kitchen
- Temperature Control: When melting your chocolate for the glaze, do it slowly and gently. If chocolate gets too hot, it can ‘seize’ and become grainy. Using a bain-marie gives you the most control.
- The Secret Step: I learned that adding a tablespoon of golden syrup (or corn syrup) to the chocolate glaze is what gives it that professional, glossy shine and helps it set with a soft, not brittle, finish.
- Make-Ahead: The plain, un-glazed donuts can be baked a day in advance. Store them in an airtight container at room temperature. Prepare the glaze and dip them on the day you plan to serve them for the best texture and appearance.
- Storage: Once glazed, these Chocolate Covered Donuts are best enjoyed the same day. However, they will keep in a single layer in an airtight container at room temperature for up to 2 days.
Equipment You’ll Need
- Donut baking pan (12-hole)
- Large and medium mixing bowls
- Whisk and spatula
- Piping bag or large zip-top bag
- Wire cooling rack
- Small saucepan and heatproof bowl (for the glaze)
Common Mistakes to Avoid
- Overfilling the Donut Cavities: It’s tempting to fill the donut pan to the top, but this will cause the batter to spill over, and you’ll lose the classic donut shape and the all-important hole. Fill them no more than two-thirds full.
- Overbaking the Donuts: Baked donuts can go from tender to dry very quickly. Start checking them at the 10-minute mark. They are done as soon as a skewer comes out clean. A pale golden colour is what you’re looking for.
- Glazing Warm Donuts: You must wait until the donuts are completely cool before dipping them. If they are even slightly warm, the chocolate glaze will melt and slide right off instead of clinging to the surface. Patience is key here!
Delicious Variations to Try
While the classic chocolate donut is wonderful on its own, it’s also a great base for creativity. After a delicious main course, like my Savory Beef And Broccoli Stir Fry Recipe, a custom donut is a fantastic dessert.
- Mexican Hot Chocolate Donuts: Add ½ teaspoon of ground cinnamon and a tiny pinch of cayenne pepper to the dry ingredients. The subtle warmth is a fantastic partner for the dark chocolate.
- Vegan Chocolate Covered Donuts: This recipe adapts well. Use a flax egg (1 tbsp ground flaxseed mixed with 3 tbsp water), a plant-based milk like oat or almond milk, and a vegan butter alternative. Ensure your dark chocolate is dairy-free.
- Different Glazes: Swap the dark chocolate for white chocolate and top with freeze-dried raspberries. Or, create a peanut butter glaze by melting smooth peanut butter with a little icing sugar and milk. A simple vanilla icing also works beautifully.
What to Serve With Chocolate Covered Donuts
These donuts are a treat in their own right, but they pair wonderfully with a few simple accompaniments.
- A Hot Drink: A strong black coffee or a frothy cappuccino cuts through the richness of the chocolate perfectly. For kids (and adults!), a cold glass of milk is a classic choice.
- Fresh Fruit: A side of fresh raspberries, strawberries, or orange segments provides a bright, sharp contrast to the decadent donut.
- Ice Cream: For a truly indulgent dessert, serve a slightly warmed chocolate donut alongside a scoop of high-quality vanilla bean ice cream.
Frequently Asked Questions
Chocolate Covered Donuts
Ingredients
Method
- Prepare the Oven and Pan: Preheat your oven to 180°C (160°C fan). Lightly grease a 12-hole donut pan with a little butter or a neutral oil spray.
- Mix the Dry Ingredients: In a large mixing bowl, whisk together the plain flour, caster sugar, baking powder, salt, and ground nutmeg until they are well combined. This ensures the leavening agents are evenly distributed.
- Mix the Wet Ingredients: In a separate medium bowl or jug, whisk the egg, milk, melted butter, and vanilla extract until smooth.
- Combine Wet and Dry: Pour the wet ingredients into the bowl with the dry ingredients. Gently fold them together with a spatula until just combined. Be careful not to overmix; a few small lumps are perfectly fine. Overmixing can lead to tough donuts.
- Fill the Donut Pan: What works best for me is transferring the batter to a piping bag (or a large zip-top bag with the corner snipped off). Pipe the batter evenly into each cavity of the prepared donut pan, filling them about two-thirds full.
- Bake the Donuts: Place the pan in the preheated oven and bake for 10-12 minutes. The donuts are ready when they are lightly golden and a skewer inserted into the centre comes out clean.
- Cool the Donuts: Let the donuts cool in the pan for 5 minutes before carefully turning them out onto a wire rack to cool completely. It's crucial they are fully cool before glazing.
- Make the Chocolate Glaze: While the donuts cool, prepare the glaze. Place the finely chopped dark chocolate, butter, and golden syrup in a heatproof bowl. Set it over a saucepan of gently simmering water (a bain-marie), ensuring the bottom of the bowl doesn’t touch the water. Stir occasionally until everything is melted and smooth. Alternatively, melt in the microwave in 20-second bursts, stirring in between.
- Finish the Glaze: Remove the bowl from the heat and whisk in 2 tablespoons of milk. If the glaze is too thick, add the remaining tablespoon of milk until you have a smooth, pourable consistency.
- Glaze the Donuts: Once the donuts are completely cool, dip the top of each one into the warm chocolate glaze. Allow any excess to drip off before placing it back on the wire rack, glaze-side up. Let the glaze set for at least 30 minutes before serving.
Notes
I truly hope you enjoy making and eating these Chocolate Covered Donuts as much as my family and I do. They are a simple pleasure that brings so much warmth and happiness to the kitchen table. After you’ve tried them, I would love to hear how they turned out for you. Please leave a comment and a rating below – it always makes my day! Happy baking, Elena.