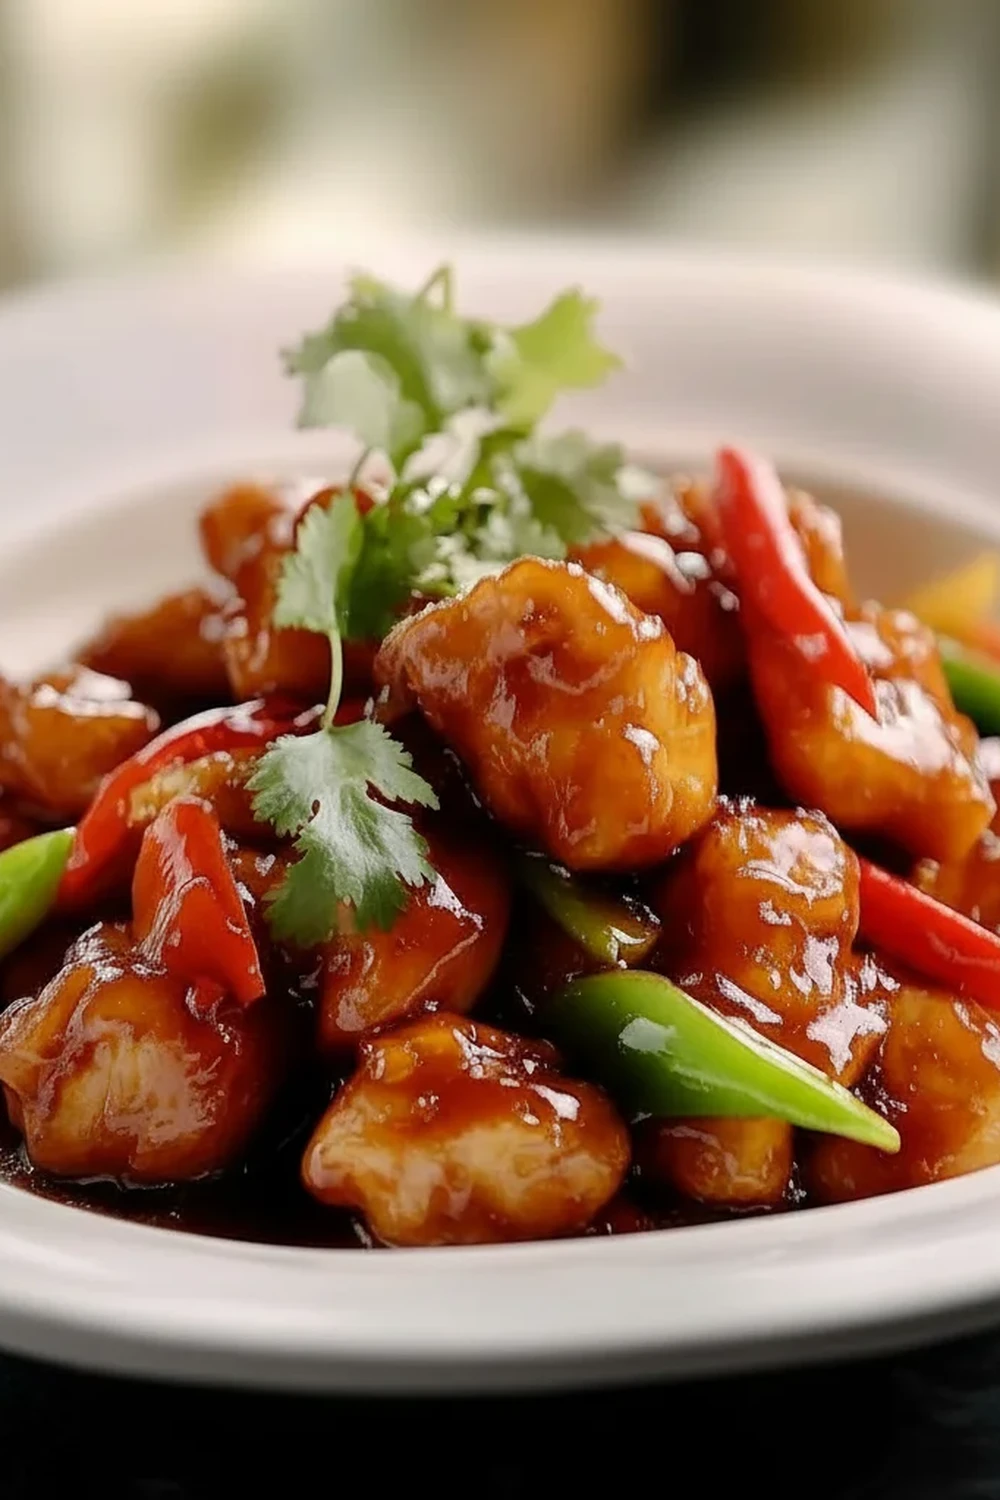
Tangy Sweet And Sour Chicken Recipe
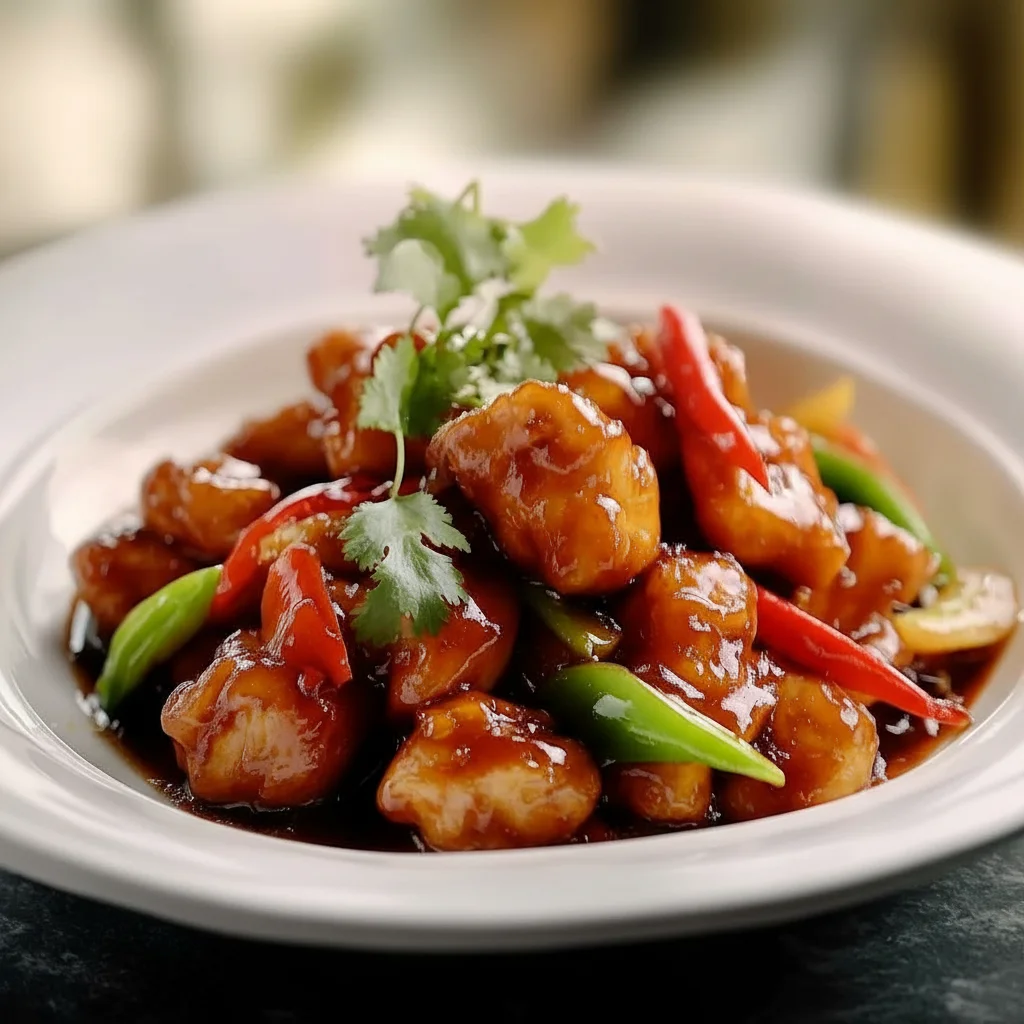
There’s something wonderfully satisfying about recreating a takeaway favourite at home. For me, the ultimate challenge has always been the perfect Sweet and Sour Chicken. It’s that delicate balance of a tangy, glossy sauce clinging to nuggets of impossibly crispy chicken, studded with vibrant peppers and sweet pineapple. For years, my attempts were either too cloying, too sharp, or the chicken would lose its crunch the second it met the sauce. But I’m a persistent cook. After testing this recipe five times, I finally got it just right, and now it’s a staple in our home.
This isn’t just another sweet and sour chicken recipe; it’s the one that delivers on its promises. We’re talking about chicken with a light, shatteringly crisp coating that stays crunchy, even after being generously coated in a sauce that hits all the right notes—tangy, sweet, and deeply savoury. It’s the kind of meal that silences the dinner table, in the best possible way. My husband, who’s usually quite picky, asked for seconds the first time I made this version!
Making this dish from scratch is not only rewarding but it also allows you to control the quality of the ingredients, sidestepping the excess sugar and additives often found in shop-bought sauces. It works beautifully for a weekend treat when you’re craving something special but don’t want to leave the house. It’s also a fantastic way to impress guests with your kitchen skills. Let’s get the wok out and make a truly memorable Sweet Sour Chicken together.
Recipe Overview
This Sweet and Sour Chicken recipe focuses on two key elements: achieving a genuinely crispy chicken coating and creating a perfectly balanced sauce from scratch. We’ll be shallow-frying the chicken for that authentic texture and simmering a simple but flavourful sauce. I found that a little bit of pineapple juice in the sauce is the key to getting that authentic takeaway taste without it being overly sweet.
- Prep Time: 20 minutes
- Cook Time: 15 minutes
- Total Time: 35 minutes
- Servings: 4 people
- Difficulty: Medium
Why You’ll Love This Sweet And Sour Chicken Recipe
- Genuine Flavour: The sauce is the star. It has a bright tang from rice vinegar, a mellow sweetness from a touch of brown sugar and pineapple juice, and a savoury depth from light soy sauce. It coats every piece of chicken beautifully without being gloopy.
- Comes Together in 35 Minutes: From chopping the veg to serving up, this entire meal is on the table in about half an hour, making it ideal for a busy weeknight.
- Flexible Recipe: Don’t have a red pepper? Use a yellow one. Not a fan of pineapple? Swap it for chunks of water chestnut for a lovely crunch. This recipe is wonderfully adaptable to what you have in the fridge.
- Ideal for a “Fakeaway” Night: When you’re craving a takeaway, this dish satisfies completely. It’s fresher, tastier, and you get the pride of having made it yourself. It’s a great companion to our Simple Egg Fried Rice.
- Family Tested: This recipe always gets compliments in my house. It’s one of those dishes that everyone seems to love, from young children to grown-ups.
Ingredients You’ll Need
For this recipe, we use simple, accessible ingredients. The key to the crispy coating is cornflour, which creates a light, protective layer. When it comes to the sauce, I always recommend using a good quality rice vinegar—I find Kikkoman’s version has a really clean, mellow flavour that works perfectly here.
- For the Chicken:
- 500g skinless, boneless chicken breasts, cut into 2.5cm (1-inch) cubes
- 1 large egg, lightly beaten
- 100g cornflour
- 50g plain flour
- ½ tsp salt
- ¼ tsp white pepper
- Vegetable or sunflower oil, for frying (about 250ml)
- For the Sauce & Vegetables:
- 1 tbsp vegetable oil
- 1 red onion, cut into chunks
- 1 red bell pepper, deseeded and cut into chunks
- 1 green bell pepper, deseeded and cut into chunks
- 150g pineapple chunks (from a tin in juice, not syrup), drained, reserving the juice
- 3 tbsp light soy sauce
- 4 tbsp rice vinegar
- 3 tbsp soft brown sugar
- 2 tbsp tomato ketchup
- 100ml pineapple juice (reserved from the tin)
- 1 tbsp cornflour mixed with 2 tbsp cold water (cornflour slurry)
- Spring onions and sesame seeds, to garnish
Elena’s Tip: Don’t be tempted to use chicken thighs. For this recipe, breast meat holds its shape better and provides that classic tender bite inside the crispy coating that we’re aiming for.
How to Make Sweet And Sour Chicken
The process is straightforward. We’ll prepare and fry the chicken first, set it aside to keep it crispy, then whip up the sauce and vegetables in the same pan before bringing it all together at the last minute.
- Prepare the Chicken Coating: In a shallow bowl, mix the cornflour, plain flour, salt, and white pepper. In another bowl, have your lightly beaten egg ready. This two-stage coating station makes the process much tidier.
- Coat the Chicken: Dip each piece of chicken first into the beaten egg, letting any excess drip off, then dredge it thoroughly in the flour mixture. Make sure every piece is well-coated. Set the coated chicken pieces on a plate or wire rack for 5 minutes. This little rest helps the coating adhere properly during frying.
- Fry the Chicken: Pour enough vegetable oil into a large wok or deep frying pan to come about 2.5cm (1 inch) up the sides. Heat over a medium-high heat to around 175°C. To test if it’s ready without a thermometer, drop a small piece of batter in; it should sizzle immediately and turn golden in about 30 seconds. Carefully add half the chicken pieces to the hot oil. Frying in batches is crucial to avoid overcrowding the pan, which would lower the oil temperature and result in soggy chicken. Fry for 4-5 minutes, turning occasionally, until golden brown and cooked through. Remove with a slotted spoon and drain on a wire rack. Repeat with the remaining chicken.
- Start the Sauce: Carefully pour out most of the oil from the wok, leaving about 1 tablespoon behind. Return the wok to a medium heat and add the onion and peppers. Stir-fry for 3-4 minutes until they just begin to soften but still have a bit of a crunch.
- Simmer the Sauce: In a jug, whisk together the reserved pineapple juice, soy sauce, rice vinegar, brown sugar, and tomato ketchup. Pour this mixture into the wok with the vegetables. Bring it to a gentle simmer.
- Thicken the Sauce: Once simmering, give your cornflour slurry a quick re-stir and pour it into the sauce, stirring continuously. Let it bubble for 1-2 minutes until the sauce thickens to a glossy consistency that can coat the back of a spoon. What works best for me is to watch it closely; it thickens quite suddenly!
- Combine and Serve: Add the pineapple chunks and the crispy fried chicken to the wok. Gently toss everything together for about 30 seconds until every piece of chicken is coated in the glorious sweet and sour sauce. Serve immediately, garnished with sliced spring onions and a sprinkle of sesame seeds, alongside fluffy rice.
Tips From My Kitchen
- Temperature Control: The key to non-greasy, crispy chicken is hot oil. If the oil isn’t hot enough, the coating will absorb it. If it’s too hot, it will burn before the chicken is cooked. Using a kitchen thermometer is the most accurate method, but the batter test works well too. For a comprehensive guide, the BBC offers great advice on how to deep-fry safely.
- The Secret to Crispiness: I learned that for an even crispier coating, you can double-fry the chicken. Fry it for 3 minutes the first time, remove and drain, then increase the oil heat slightly and fry again for 1-2 minutes until deeply golden. This is a bit more effort, but the texture is phenomenal.
- Make-Ahead: The sauce can be prepared up to 2 days in advance and stored in an airtight container in the fridge. You can also chop all your vegetables ahead of time. This turns the recipe into a very quick assembly job on the day.
- Storage: Leftovers can be stored in an airtight container in the refrigerator for up to 3 days. The chicken will soften upon reheating, but the flavour is still fantastic. Reheat in a pan over a medium heat or in the oven to try and revive some of the crispness.
Common Mistakes to Avoid
- Overcrowding the pan: Tipping all the chicken in at once will cause the oil temperature to plummet. This steams the chicken instead of frying it, leading to a pale, greasy coating. Always fry in at least two batches, ensuring there’s space around each piece.
- Getting the Sauce Consistency Wrong: Adding the cornflour slurry to a sauce that isn’t simmering won’t activate its thickening properties. Make sure the sauce is bubbling gently before you stir in the slurry for a perfect, glossy finish.
- Combining Too Early: Don’t add the crispy chicken to the sauce until the very last moment before serving. The longer it sits, the more the crispy coating will soften. The goal is to toss and serve immediately.
Delicious Variations to Try
Once you’ve mastered the base recipe, it’s fun to experiment. The sweet and sour flavour profile is very versatile and pairs well with many ingredients.
- Spicy Sweet and Sour Chicken: Add 1 tsp of chilli flakes or a dash of sriracha to the sauce along with the other liquid ingredients for a pleasant kick of heat.
- Vegetarian/Vegan Option: This recipe works brilliantly with firm tofu. Press the tofu well to remove excess water, cube it, and coat and fry it exactly as you would the chicken. Ensure your ketchup is vegan-friendly.
- Different Protein: Try this with pork tenderloin cut into cubes or even large, juicy prawns. Adjust the cooking time accordingly—prawns will only need a couple of minutes to cook. For another great stir-fry idea, check out this Savory Beef and Broccoli Stir Fry Recipe.
What to Serve With Sweet And Sour Chicken
This dish is a fantastic centerpiece. Here are a few of my favourite pairings to round out the meal:
- Steamed Jasmine Rice: Its fluffy texture and subtle floral aroma are the perfect canvas for soaking up that incredible sauce.
- Stir-Fried Pak Choi with Garlic: A simple side of greens provides a fresh, slightly bitter contrast that cuts through the richness of the main dish.
- A Crisp Lager or Off-Dry Riesling: A light beer cleanses the palate, while the slight sweetness of an off-dry Riesling complements the sauce’s flavour profile beautifully.
Frequently Asked Questions
Sweet And Sour Chicken Recipe
Ingredients
Method
- Prepare the Chicken Coating: In a shallow bowl, mix the cornflour, plain flour, salt, and white pepper. In another bowl, have your lightly beaten egg ready. This two-stage coating station makes the process much tidier.
- Coat the Chicken: Dip each piece of chicken first into the beaten egg, letting any excess drip off, then dredge it thoroughly in the flour mixture. Make sure every piece is well-coated. Set the coated chicken pieces on a plate or wire rack for 5 minutes. This little rest helps the coating adhere properly during frying.
- Fry the Chicken: Pour enough vegetable oil into a large wok or deep frying pan to come about 2.5cm (1 inch) up the sides. Heat over a medium-high heat to around 175°C. To test if it’s ready without a thermometer, drop a small piece of batter in; it should sizzle immediately and turn golden in about 30 seconds. Carefully add half the chicken pieces to the hot oil. Frying in batches is crucial to avoid overcrowding the pan, which would lower the oil temperature and result in soggy chicken. Fry for 4-5 minutes, turning occasionally, until golden brown and cooked through. Remove with a slotted spoon and drain on a wire rack. Repeat with the remaining chicken.
- Start the Sauce: Carefully pour out most of the oil from the wok, leaving about 1 tablespoon behind. Return the wok to a medium heat and add the onion and peppers. Stir-fry for 3-4 minutes until they just begin to soften but still have a bit of a crunch.
- Simmer the Sauce: In a jug, whisk together the reserved pineapple juice, soy sauce, rice vinegar, brown sugar, and tomato ketchup. Pour this mixture into the wok with the vegetables. Bring it to a gentle simmer.
- Thicken the Sauce: Once simmering, give your cornflour slurry a quick re-stir and pour it into the sauce, stirring continuously. Let it bubble for 1-2 minutes until the sauce thickens to a glossy consistency that can coat the back of a spoon. What works best for me is to watch it closely; it thickens quite suddenly!
- Combine and Serve: Add the pineapple chunks and the crispy fried chicken to the wok. Gently toss everything together for about 30 seconds until every piece of chicken is coated in the glorious sweet and sour sauce. Serve immediately, garnished with sliced spring onions and a sprinkle of sesame seeds, alongside fluffy rice.
Notes
I really hope you enjoy making this Sweet and Sour Chicken recipe as much as my family and I enjoy eating it. It’s a truly satisfying dish that brings the best of Chinese takeaway flavours right into your own kitchen. If you love this, you might also want to try our Sticky Sweet Teriyaki Chicken Bowls. I’d love to hear how you get on, so please leave a comment below and let me know! Happy cooking, Elena.