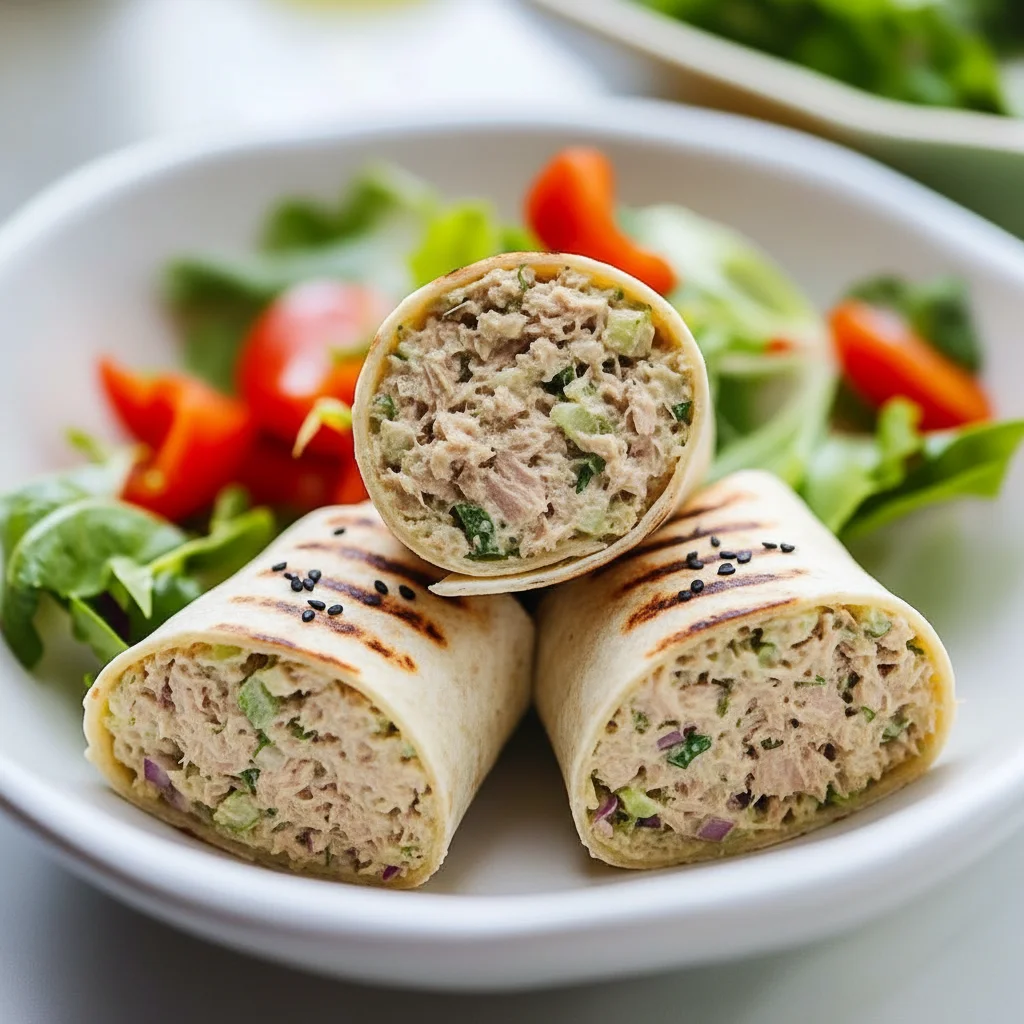
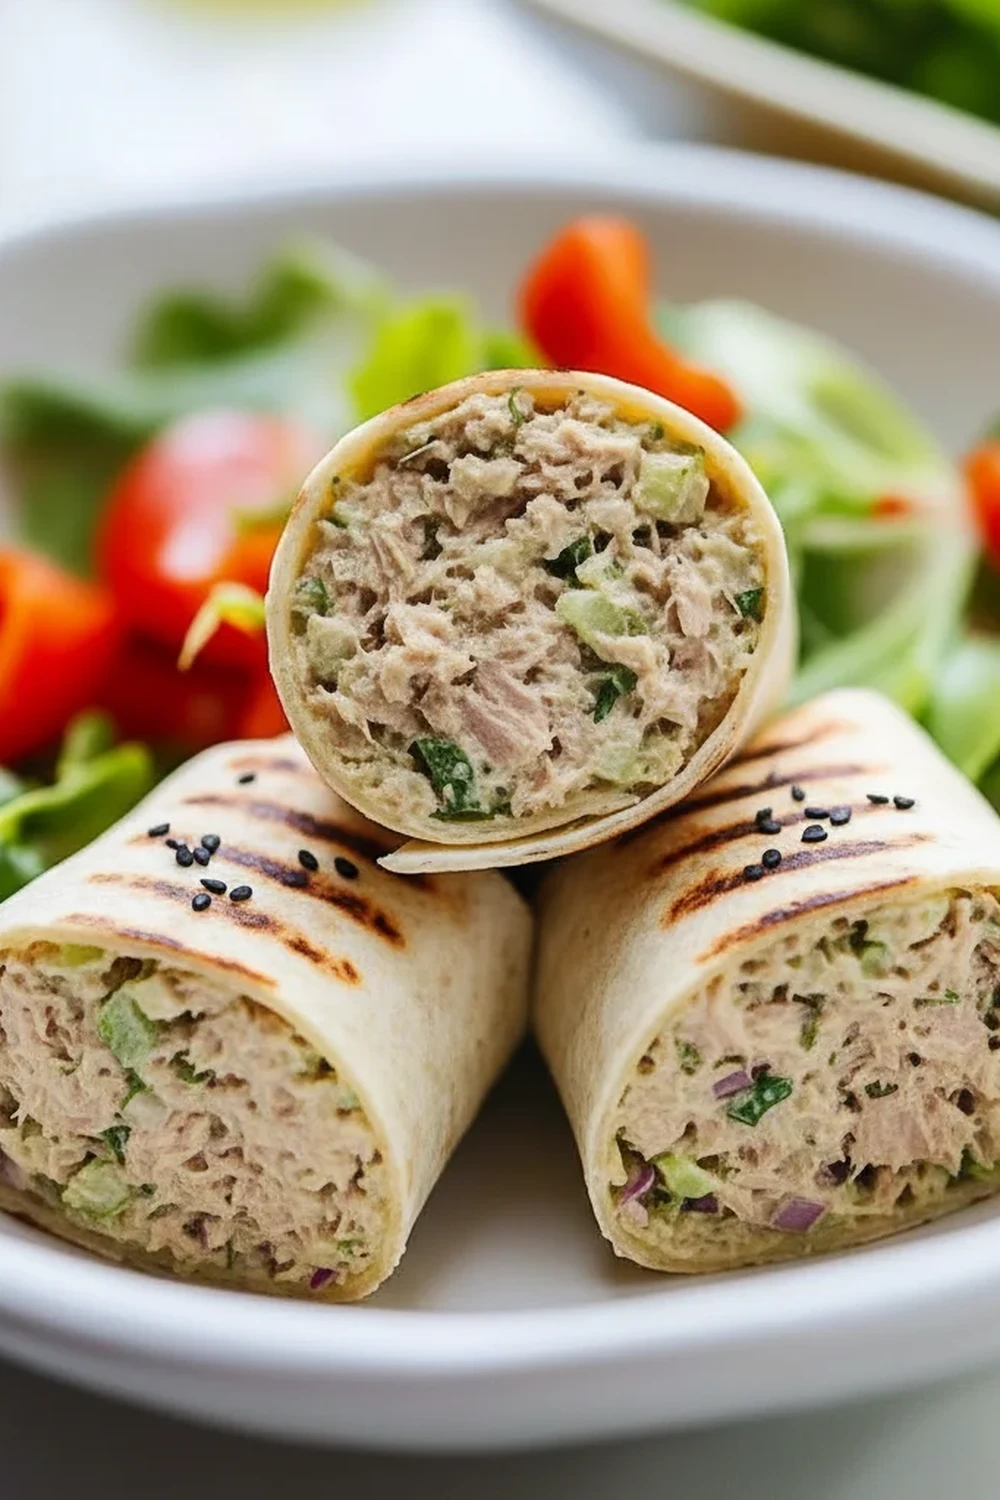
Light Tuna Salad Wrap Olive Oil
There are some lunches that just hit the spot every single time, and a good tuna salad is one of them. But for years, I found myself making the same old version, heavy with mayonnaise and lacking a certain spark. It wasn’t until a trip through the sun-drenched Italian countryside that I realised what I was missing. This recipe for a Tuna Salad Wrap with a vibrant Olive Oil Dressing was inspired by a dish I had at a little restaurant in Italy, where they dressed everything with the most glorious, fruity olive oil instead of a thick, creamy sauce. The difference was a revelation.
This isn’t your average tuna salad. We’re swapping out the heavy mayo for a light, zesty dressing made with high-quality extra virgin olive oil, fresh lemon juice, and a hint of Dijon mustard. The result is a tuna salad that’s incredibly fresh, packed with flavour, and feels both satisfying and light. We toss it with crisp celery, sharp red onion, briny capers, and fresh parsley for texture and layers of taste. Piled into a soft tortilla wrap with crunchy lettuce, it’s a lunch that I come back to week after week. It’s sophisticated enough for a weekend lunch in the garden, yet straightforward enough for a weekday meal at your desk.
It’s the kind of recipe that works beautifully for meal prepping at the start of the week. The tuna salad mixture holds up wonderfully in the fridge, so you can assemble a fresh wrap in minutes. It’s a fantastic option for anyone looking to elevate a classic, and it’s one that always gets compliments when I share it. If you’re a fan of Mediterranean flavours, you are going to adore this refreshing take on a tuna wrap.
Recipe Overview
This Tuna Salad Wrap with Olive Oil Dressing is a fresh, vibrant, and satisfying meal that comes together in about 15 minutes. The flavour profile is bright and zesty, with the peppery notes of a good quality olive oil balanced by the acidity of lemon and the saltiness of capers. Unlike traditional tuna salads, this one is light, not heavy, allowing the taste of the tuna and fresh vegetables to shine through. From my testing, I’ve found that using a really robust, fruity extra virgin olive oil makes all the difference; it’s not just for coating, it’s a key flavour component.
- Prep Time: 15 minutes
- Cook Time: 0 minutes
- Total Time: 15 minutes
- Servings: 2 wraps
- Difficulty: Easy
Why You’ll Love This Tuna Salad Wrap Olive Oil Dressing
- Genuine Flavour: The taste is wonderfully clean and satisfying. You get the savoury depth of the tuna, a crisp bite from the celery, a little zing from the red onion, and salty bursts from the capers, all brought together by a dressing that’s fruity, peppery, and bright with lemon.
- Ready in 15 Minutes: From start to finish, you can have a delicious and wholesome lunch on the table. It’s ideal for those busy days when you need something nourishing without spending ages in the kitchen.
- Flexible Recipe: This recipe is a fantastic base. You can add a handful of chickpeas for extra protein and fibre, toss in some chopped sun-dried tomatoes for sweetness, or add a pinch of chilli flakes for a little heat.
- Great for Packed Lunches: The tuna salad filling can be made ahead and stored in the fridge. This makes it a brilliant choice for office lunches or picnics – just assemble the wrap when you’re ready to eat to keep it from getting soggy. For a different but equally portable idea, you might like this Crispy Chicken Caesar Wrap Lunch.
- Family Tested: This is a real winner in my house. My kids absolutely devour this every time I make it, often asking for a second helping. They love it because it’s not ‘saucy’ like the shop-bought versions.
Ingredients You’ll Need
For this recipe, the quality of your ingredients really matters, especially the tuna and the olive oil. I always opt for tuna packed in olive oil or spring water, not brine, as it has a much better texture and flavour. I personally love using the Ortiz brand tuna fillets; they are so meaty and delicious.
- For the Olive Oil Dressing:
- 60ml extra virgin olive oil, a good fruity one
- Juice of 1 medium lemon (about 2 tbsp)
- 1 tsp Dijon mustard
- 1/4 tsp sea salt
- 1/4 tsp freshly ground black pepper
- For the Tuna Salad:
- 2 x 160g tins of tuna in spring water or olive oil, drained well
- 1 celery stick, very finely diced
- 1/4 red onion, very finely diced
- 2 tbsp capers, rinsed and roughly chopped
- 3 tbsp fresh flat-leaf parsley, finely chopped
- For Assembly:
- 2 large tortilla wraps (wholemeal or white)
- A large handful of crisp lettuce leaves (like Romaine or Little Gem), washed and dried
Elena’s Tip: Don’t be tempted to use a light olive oil here. A robust, peppery extra virgin olive oil is what gives the dressing its character and body. It’s the star of the show!
How to Make Tuna Salad Wrap Olive Oil Dressing
The process for this recipe is very straightforward. The key is to prepare all your chopped ingredients first and to drain the tuna very thoroughly to avoid a watery salad.
- Make the Dressing: In a small jar with a tight-fitting lid, combine the extra virgin olive oil, lemon juice, Dijon mustard, sea salt, and black pepper. Screw the lid on tightly and shake vigorously for about 30 seconds until the dressing is emulsified and looks slightly creamy. Set aside.
- Prepare the Vegetables: Finely dice the celery and red onion. Taking the time to get a small, neat dice means you get a little bit of everything in each bite. Chop the parsley and capers. Place all your prepared vegetables into a medium-sized mixing bowl.
- Flake the Tuna: Open and thoroughly drain the tins of tuna. I find that pressing the lid down firmly against the tuna before you fully remove it is the best way to squeeze out excess water. Add the drained tuna to the mixing bowl with the vegetables.
- Break Up the Tuna: Using a fork, gently flake the tuna and break it into smaller pieces. Be careful not to mash it into a paste; you want to maintain some of its texture.
- Combine the Salad: Give the dressing another quick shake, then pour about three-quarters of it over the tuna and vegetable mixture. Gently toss everything together with the fork until just combined. Have a taste and add more dressing, salt, or pepper if you think it needs it. I find that letting it sit for 5 minutes allows the flavours to meld beautifully.
- Warm the Wraps (Optional): For extra soft and pliable wraps, you can warm them for 10-15 seconds per side in a dry frying pan over a medium heat, or for 10 seconds in the microwave.
- Assemble the Wraps: Lay a warmed wrap on a clean surface. Arrange a layer of crisp lettuce leaves down the centre, leaving a border around the edges. Spoon half of the tuna salad mixture on top of the lettuce.
- Fold and Serve: Fold in the bottom edge of the wrap, then fold in the two sides tightly to enclose the filling. You can slice it in half on the diagonal or serve it whole. Repeat with the second wrap and serve immediately.
Tips From My Kitchen
- Chill the Ingredients: For the most refreshing wrap, I like to ensure my tuna and chopped vegetables are cold from the fridge. It makes for a lovely contrast if you decide to warm the tortilla.
- The Secret Step: I learned that adding the finely diced red onion to the dressing in the jar and letting it sit for 5-10 minutes while you prepare everything else slightly mellows its sharp bite. It’s a small step that makes a big difference.
- Make-Ahead: The tuna salad filling (without the lettuce) can be made up to 2 days in advance. Store it in an airtight container in the fridge. This makes assembling lunch incredibly fast.
- Storage: Once assembled, the wraps are best eaten within a few hours. If you need to pack them for later, wrap them tightly in beeswax wraps or foil and keep them chilled. The filling on its own will last for 2-3 days in the fridge.
Equipment You’ll Need
- Medium mixing bowl
- Sharp knife and cutting board
- Fork or spoon for mixing
- Small jar or bowl for the dressing
Common Mistakes to Avoid
- Making the Filling Too Wet: The number one enemy of a good wrap is a soggy filling. The most common cause is not draining the tuna properly. Squeeze out as much liquid as you possibly can before adding it to the bowl. Also, go easy on the dressing at first – you can always add more, but you can’t take it away.
- Over-mixing the Tuna: It’s tempting to stir everything vigorously, but this can turn your tuna into a mushy paste. Use a fork to gently flake the tuna and fold the ingredients together until they are just combined. You want to see distinct flakes of fish.
- Using Low-Quality Olive Oil: Since the dressing is so central to this recipe, the quality of your olive oil is paramount. A bland, poor-quality oil will result in a flat-tasting dressing. Choose a flavourful, fresh extra virgin olive oil that you would be happy to dip bread into. For more on choosing oils, this BBC Good Food guide is very helpful.
Delicious Variations to Try
One of the best things about this recipe is how easily you can adapt it. Here are a few of our favourite ways to change things up:
- Spicy Tuna Wrap: Add 1/4 teaspoon of chilli flakes or a finely chopped fresh red chilli to the dressing for a gentle, warming heat. A dash of your favourite hot sauce also works well.
- Vegetarian ‘Tuna’ Wrap: For a brilliant plant-based version, substitute the tinned tuna with one 400g tin of chickpeas. Drain, rinse, and mash them lightly with a fork before mixing with the other salad ingredients.
- Use Different Fish: This recipe is also wonderful with tinned salmon or smoked mackerel. Just flake the fish and follow the recipe as written for a different flavour profile. It’s a nice change from a classic Cheesy Tuna Melt Sandwich.
What to Serve With Your Tuna Salad Wrap
This wrap is a complete meal on its own, but if you want to make it part of a larger spread, here are a few ideas that work beautifully:
- A Simple Green Salad: A handful of rocket or mixed leaves dressed with a little of the leftover olive oil and a squeeze of lemon complements the wrap perfectly.
- Crisps: A small bowl of good quality sea salt crisps (or potato chips) adds a satisfying crunch.
- Drink Pairing: A chilled glass of Sauvignon Blanc or a crisp lager is a lovely match. For a non-alcoholic option, sparkling water with a slice of lemon is wonderfully refreshing.
–Vegetable Sticks: Sliced cucumber, carrots, and bell peppers with a hummus dip are a great, healthy side.
Frequently Asked Questions
Tuna Salad Wrap Olive Oil Dressing
Ingredients
Method
- Make the Dressing: In a small jar with a tight-fitting lid, combine the extra virgin olive oil, lemon juice, Dijon mustard, sea salt, and black pepper. Screw the lid on tightly and shake vigorously for about 30 seconds until the dressing is emulsified and looks slightly creamy. Set aside.
- Prepare the Vegetables: Finely dice the celery and red onion. Taking the time to get a small, neat dice means you get a little bit of everything in each bite. Chop the parsley and capers. Place all your prepared vegetables into a medium-sized mixing bowl.
- Flake the Tuna: Open and thoroughly drain the tins of tuna. I find that pressing the lid down firmly against the tuna before you fully remove it is the best way to squeeze out excess water. Add the drained tuna to the mixing bowl with the vegetables.
- Break Up the Tuna: Using a fork, gently flake the tuna and break it into smaller pieces. Be careful not to mash it into a paste; you want to maintain some of its texture.
- Combine the Salad: Give the dressing another quick shake, then pour about three-quarters of it over the tuna and vegetable mixture. Gently toss everything together with the fork until just combined. Have a taste and add more dressing, salt, or pepper if you think it needs it. I find that letting it sit for 5 minutes allows the flavours to meld beautifully.
- Warm the Wraps (Optional): For extra soft and pliable wraps, you can warm them for 10-15 seconds per side in a dry frying pan over a medium heat, or for 10 seconds in the microwave.
- Assemble the Wraps: Lay a warmed wrap on a clean surface. Arrange a layer of crisp lettuce leaves down the centre, leaving a border around the edges. Spoon half of the tuna salad mixture on top of the lettuce.
- Fold and Serve: Fold in the bottom edge of the wrap, then fold in the two sides tightly to enclose the filling. You can slice it in half on the diagonal or serve it whole. Repeat with the second wrap and serve immediately.
Notes
I really hope you give this fresh and flavourful Tuna Salad Wrap Olive Oil Dressing a try. It’s completely transformed my idea of what a tuna sandwich can be, and it’s become a non-negotiable part of our weekly meal plan. If you make it, please do let me know what you think in the comments below. I love hearing how my recipes turn out in your kitchens!
– Elena